Using thermal printer with Arduino UNO
Tutorial plan
1- What is thermal printer ?
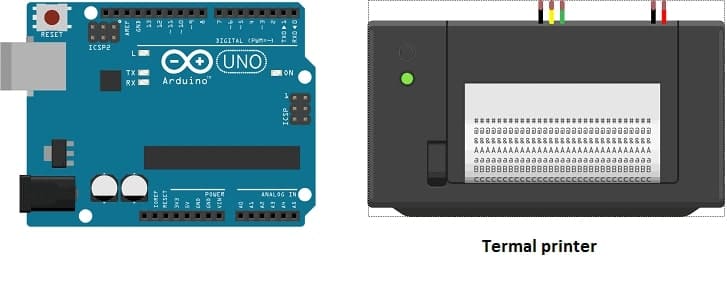
2- Components Needed to use thermal printer by Arduino UNO
3- Circuit Setup
4- Programming Arduino UNO
What is thermal printer ?
A thermal printer is a type of printer that produces printed images or text by selectively heating specially coated paper, known as thermal paper, as it passes over the printer’s thermal print head. The heat-sensitive coating on the paper reacts to heat, creating the desired output.
How Thermal Printers Work
1- Thermal Print Head:
Consists of tiny heating elements aligned in a row.
Heats specific points to create an image or text.
2- Paper Feed Mechanism:
Moves the thermal paper through the printer.
The thermal head applies heat to the paper's surface as it moves.
3- Thermal Paper or Ribbon:
Direct thermal printers require special thermal paper.
Thermal transfer printers use a ribbon to transfer the image to the material.
Components Needed to use thermal printer by Arduino UNO
To use a thermal printer with an Arduino UNO, a push button, and a 5V-2A charger, here is a list of components and how to set up the system:
Arduino UNO

The microcontroller board that will control the thermal printer and the push button.
QR701 thermal printer
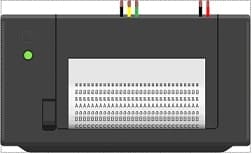
The QR701 Thermal Printer is a compact and efficient thermal printer used for various applications like receipt printing, label printing, and ticketing. Here's a detailed overview of the QR701 thermal printer, its features, and how to integrate it with an Arduino UNO for use in projects.
Push Button
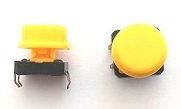
A simple button to trigger the printing action.
5V-2A Power Supply

Provides sufficient power to the Arduino and thermal printer. Since thermal printers typically require more current, a 5V-2A supply is appropriate.
Jumper Wires

Used to connect the thermal printer, push button, and Arduino.
Breadboard (Optional)
For prototyping and making temporary connections.
Thermal Paper Roll
Special paper that works with thermal printers.
Circuit Setup
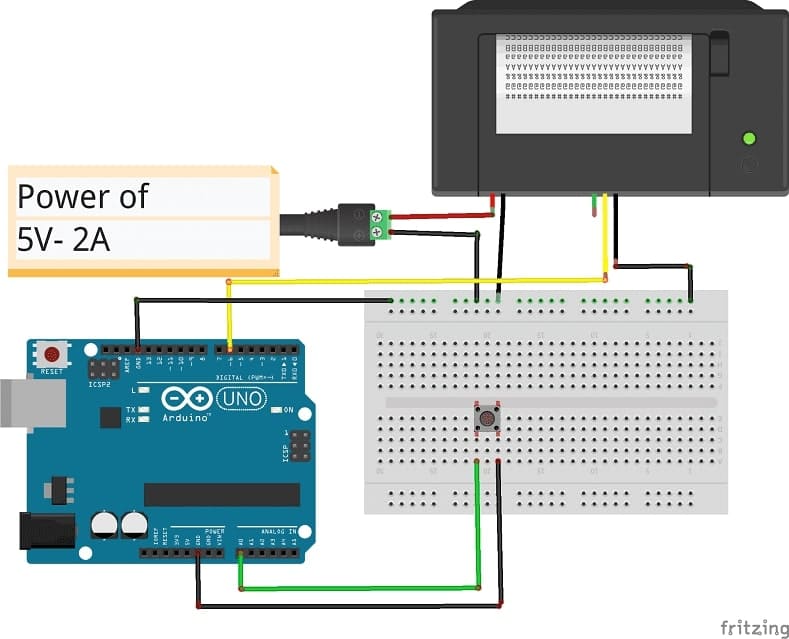
Thermal Printer to Arduino UNO:
TR pin → (+) terminal of the charger
RX (Thermal Printer) → TX (Arduino UNO) (Pin 6).
First GND (Thermal Printer) → GND (Arduino UNO).
Second GND (Thermal Printer) → GND (Arduino UNO).
Push Button to Arduino UNO:
One side of the button connects to GND.
The other side connects to a analogic input pin (e.g., A0).
5V-2A Power Supply:
Use the 5V-2A charger to power the thermal printer.
Programming Arduino UNO
Here’s a basic example code to use the push button to print a message when it is pressed:
We must use the librariy: Adafruit_Thermal to control QR701 thermal printer :
|
1 2 3 4 5 6 7 8 9 10 11 12 13 14 15 16 17 18 19 20 21 22 23 24 25 26 27 28 29 30 31 32 33 34 35 36 37 38 39 40 41 42 43 44 45 46 47 48 49 50 51 52 53 54 55 56 57 58 |
/*------------------------------------------------------------------------ Example sketch for Adafruit Thermal Printer library for Arduino. Demonstrates a few text styles & layouts, bitmap printing, etc. IMPORTANT: DECLARATIONS DIFFER FROM PRIOR VERSIONS OF THIS LIBRARY. This is to support newer & more board types, especially ones that don't support SoftwareSerial (e.g. Arduino Due). You can pass any Stream (e.g. Serial1) to the printer constructor. See notes below. ------------------------------------------------------------------------*/ #include "Adafruit_Thermal.h" #include "adalogo.h" #include "adaqrcode.h" // Here's the new syntax when using SoftwareSerial (e.g. Arduino Uno) ---- // If using hardware serial instead, comment out or remove these lines: #include "SoftwareSerial.h" #define TX_PIN 6 // Arduino transmit YELLOW WIRE labeled RX on printer #define RX_PIN 5 // Arduino receive GREEN WIRE labeled TX on printer SoftwareSerial mySerial(RX_PIN, TX_PIN); // Declare SoftwareSerial obj first Adafruit_Thermal printer(&mySerial); // Pass addr to printer constructor // Then see setup() function regarding serial & printer begin() calls. // Here's the syntax for hardware serial (e.g. Arduino Due) -------------- // Un-comment the following line if using hardware serial: //Adafruit_Thermal printer(&Serial1); // Or Serial2, Serial3, etc. // ----------------------------------------------------------------------- const int btnPin = A0; // le bouton est connecté à la broche A0 de la carte Adruino int btnVal = 0; void setup() { pinMode(btnPin,INPUT_PULLUP); // This line is for compatibility with the Adafruit IotP project pack, // which uses pin 7 as a spare grounding point. You only need this if // wired up the same way (w/3-pin header into pins 5/6/7): pinMode(7, OUTPUT); digitalWrite(7, LOW); // NOTE: SOME PRINTERS NEED 9600 BAUD instead of 19200, check test page. mySerial.begin(9600); // Initialize SoftwareSerial //Serial1.begin(19200); // Use this instead if using hardware serial printer.begin(); // Init printer (same regardless of serial type) // The following calls are in setup(), but don't *need* to be. Use them // anywhere! They're just here so they run one time and are not printed // over and over (which would happen if they were in loop() instead). // Some functions will feed a line when called, this is normal. } void loop() { btnVal=analogRead(btnPin); if(btnVal<200){ // We press the push button printer.println(F("Arduino")); } } |


