Using Micro:bit buttons with MakeCode

Micro:bit 21-04-23
202 0

What is a Micro:bit card ?

carte microbit

A micro:bit card is a small, programmable device designed for education and experimentation in the field of electronics and computer programming. It is developed by the BBC, and is used in many schools around the world to teach coding and robotics to children.
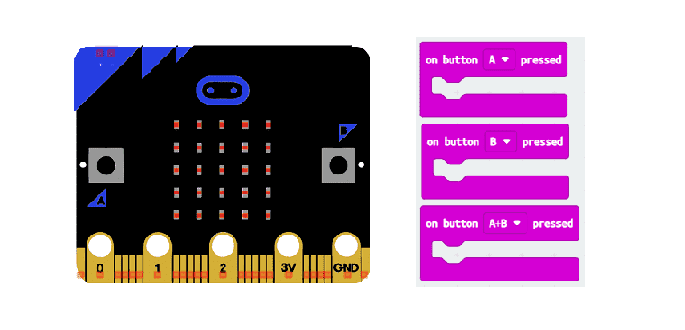
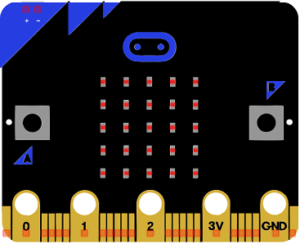
The micro:bit card has a 5×5 grid of LEDs, two buttons, and various sensors, such as an accelerometer and a compass. It also has a microprocessor and wireless communication capabilities, allowing it to communicate with other micro:bits and devices such as smartphones and computers.

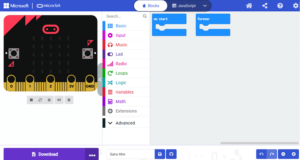
Using a variety of programming languages and software, such as the MakeCode and MicroPython, students can create a wide range of projects with the micro:bit, such as games, robots, weather stations, and musical instruments. The micro:bit is a great tool for learning coding, electronics, and creativity, and is suitable for children and beginners of all ages.

The MakeCode Editor

MakeCode interface

The MakeCode Editor is an online platform used to program the Micro:bit. The MakeCode Editor is a block-based programming environment that uses drag-and-drop blocks to create programs and projects. It is designed to be user-friendly and accessible for beginners, while still offering advanced features for more experienced users.

In the MakeCode Editor, users can access a variety of pre-made blocks and functions, including inputs (such as buttons and sensors), outputs (such as LEDs and sounds), and control blocks (such as loops and conditional statements). Users can drag and drop these blocks to create programs, and can also write custom code using JavaScript and TypeScript.

The MakeCode Editor also offers a simulator, which allows users to test their programs before they are downloaded to the Micro:bit. This is useful for debugging and testing purposes, as it allows users to see how their programs will behave without having to physically run them on the device.

Overall, the Micro:bit and MakeCode Editor are powerful tools for teaching coding and electronics, and are accessible to users of all ages and experience levels.

Using buttons A and B to display text on the Micro:bit card

We can use buttons A and B on the Micro:bit card to display text on the LED display.

For example, to display the text “Button A pressed” when button A is pressed, you can drag the “when button A is pressed” block into the workspace and add the “display text” block to it with the text “Button A pressed”. Once you have uploaded the code to the Micro:bit card, press the A button to display the text on the Micro:bit card display.

Note: To display the message press button A on the Micro:bit card.

Create a calculator with MakeCode

We are going to make a simple calculator to add two numbers. To do this, we are going to use variables, namely elements that will vary according to events or an instruction (calculation, for example). Go to the Variables menu, click on Create a variable, and choose its name (here, NUMBER1). You then get the following instructions:

create_variable

The operation is repeated for the second number. Then, we will create a program that takes place in three parts:

  1. Pressing button A displays the first number of the addition.

  2. Pressing button B displays the second number of the addition.

  3. A pressure on the two buttons A and B makes it possible to obtain the result of the addition.

Calculator with MakeCode

Create a counter program with MakeCode

Here is an example of a simple counter program for the Micro:bit board using MakeCode. For this, we will use a variable named ‘counter’. Go to the Variables menu, click on Create a variable…, and choose its name. You then get the following instructions:

counter_variable

We repeat the operation to create the second variable named ‘test’ which allows to stop the incrementation of the counter if we press button B.

Then, we will create a program that takes place in two parts:

  1. pressing button A increments the counter variable and displays it on the Micro:bit card.

  2. pressing button B stops the incrementing of the counter.

0 comment

Leave a comment

Veuillez noter s'il vous plaît*

Votre adresse e-mail ne sera pas publiée. Les champs obligatoires sont indiqués avec *

Purpose of this website

Educational robotics refers to the use of robots and robotics technology to promote learning in educational settings. It involves the integration of technology, engineering, and computer science into the classroom, allowing students to engage in hands-on, project-based learning experiences.
In this context, our website represents an excellent resource for parents, teachers and children who wish to discover robotics.

Contact details

Zaouiet Kontech-Jemmel-Monastir-Tunisia

+216 92 886 231

medaliprof@gmail.com

Pictures of the articles

Robotic site created by MedAli-Teacher info