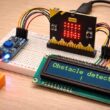
Using 28BYJ-48 stepper motor by Arduino and ULN2003 driver
Tutorial plan
1- Definition of 28BYJ-48 stepper motor
2- Components Needed to command 28BYJ-48 stepper motor by Arduino
3- Circuit Setup
4- Arduino program
Definition of 28BYJ-48 stepper motor
The 28BYJ-48 is a unipolar stepper motor, commonly used in automation, robotics, and DIY electronics projects due to its affordability and ease of use. It features a built-in 1/64 gear reduction, which provides precise control but reduces speed.
How it Works:
1- The motor operates by energizing its coils in a specific sequence, causing the rotor to move step-by-step.
2- Each step corresponds to a specific angular movement of the rotor (5.625° before gearbox reduction).
3- The internal gearbox divides the movement further, resulting in finer control over the output shaft.
Applications:
Small robotics: For movement control.
Home automation: Such as controlling air conditioner vents or automated curtains.
Hobbyist projects: For creating small-scale CNC machines or camera gimbals.
Consumer electronics: Found in CD/DVD drives and printers.
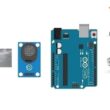
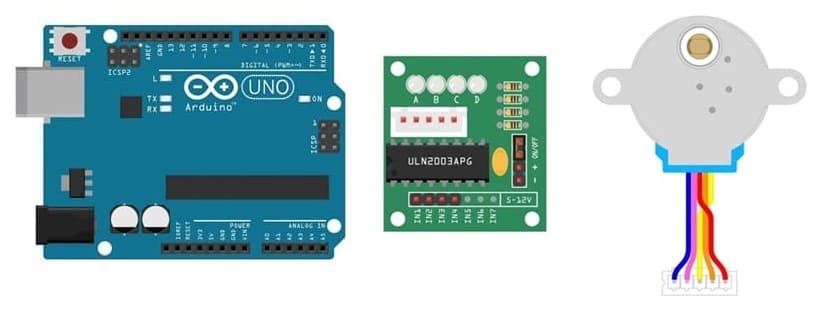
Components Needed to command 28BYJ-48 stepper motor by Arduino
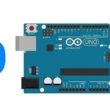
Arduino UNO

Arduino UNO board generates the step control signals for the stepper motor.
It sends digital HIGH/LOW signals to the ULN2003 driver to control the stepper motor.
28BYJ-48 Stepper Motor
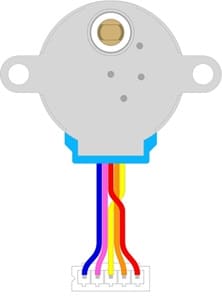
It Converts electrical pulses into mechanical rotation.
It Moves in small, precise steps based on the coil activation sequence.
ULN2003 Stepper Motor Driver Board
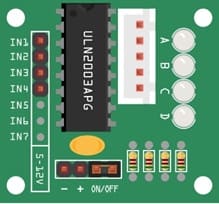
It acts as an intermediary between the Arduino and the stepper motor, amplifying the control signals.
It uses Darlington transistor arrays to provide enough current to the stepper motor.
Jumper Wires (Male-Female & Male-Male)

Used to make connections between the Arduino, ULN2003 driver module, and stepper motor.
Power Supply
The power supply provides energy to the UNL2003 module.
Circuit Setup
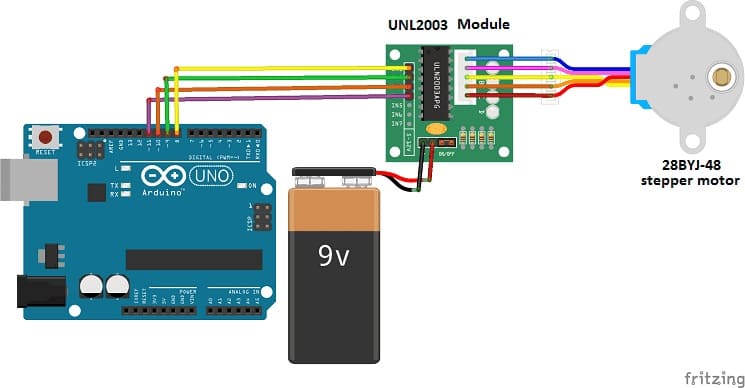
We connect :
1- the UNL2003 module to the stepper motor
2- the IN1 pin of the UNL2003 module to pin N°8 of the Arduino
3- the IN2 pin of the UNL2003 module to pin N°9 of the Arduino
4- the IN3 pin of the UNL2003 module to pin N°10 of the Arduino
5- the IN4 pin of the UNL2003 module to pin N°11 of the Arduino
Arduino program
Here is the program which allows to control the stepper motor by the Arduino card.
You have to import this library: Stepper.
|
1 2 3 4 5 6 7 8 9 10 11 12 13 14 15 16 17 18 19 20 21 22 23 24 25 26 |
#include <Stepper.h> const int stepsPerRevolution = 300; // change this to fit the number of steps per revolution // for your motor // initialize the stepper library on pins 8 through 11: Stepper myStepper(stepsPerRevolution, 8, 9, 10, 11); void setup() { // set the speed at 60 rpm: myStepper.setSpeed(60); // initialize the serial port: Serial.begin(9600); } void loop() { // step one revolution in one direction: Serial.println("clockwise"); myStepper.step(stepsPerRevolution); delay(500); // step one revolution in the other direction: Serial.println("counterclockwise"); myStepper.step(-stepsPerRevolution); delay(500); } |
0 comment
Leave a comment
Passion for robotics

Recent tutorials

Robotics workshop

Polpular tutorials


Making robots

Most commented tutorials


Robotic arm

Categories
Smart Home