Using 28BYJ-48 stepper motor by Arduino
Tutorial plan
1- Definition of 28BYJ-48 stepper motor
2- How command 28BYJ-48 stepper motor by Arduino ?
2- Components Needed
3- Circuit Setup
4- Arduino program
Definition of 28BYJ-48 stepper motor
The 28BYJ-48 is a small, low-cost, and widely used unipolar stepper motor designed for applications requiring precise control of rotational movement. It is commonly operated at 5V DC and is characterized by its compact design, making it ideal for hobbyist projects, robotics, and small automation systems.
How it Works:
1- The motor operates by energizing its coils in a specific sequence, causing the rotor to move step-by-step.
2- Each step corresponds to a specific angular movement of the rotor (5.625° before gearbox reduction).
3- The internal gearbox divides the movement further, resulting in finer control over the output shaft.
Applications:
Small robotics: For movement control.
Home automation: Such as controlling air conditioner vents or automated curtains.
Hobbyist projects: For creating small-scale CNC machines or camera gimbals.
Consumer electronics: Found in CD/DVD drives and printers.
How command 28BYJ-48 stepper motor by Arduino ?
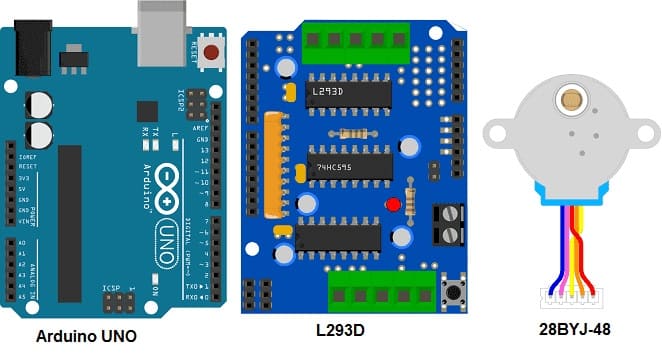
The 28BYJ-48 stepper motor can be controlled effectively using an Arduino board and an L293D motor driver module. The L293D serves as an intermediary to manage the voltage and current required to drive the motor, while the Arduino generates control signals.
The Arduino controls the motor by sequentially energizing the motor coils in the correct order. This can be done using the Stepper library or by manually defining the sequence.
How It Works
1. Signal Generation:
The Arduino generates a sequence of HIGH/LOW signals to control the inputs of the L293D.
This sequence energizes the motor coils in a stepwise pattern to create rotation.
2. Direction Control:
The sequence order determines the motor’s rotation direction (clockwise or counterclockwise).
3. Speed Control:
The delay between steps controls the speed. A shorter delay increases speed.
4. Current Amplification:
The L293D amplifies the low-current signals from the Arduino to drive the motor.
Components Needed
Arduino UNO:

The Arduino UNO is the central controller for the system.
Role:
- Generates step and direction signals to control the motor.
- Defines the sequence of energizing motor coils.
- Adjusts speed and direction of the motor.
- Serves as the interface for user input or external control logic.
L293D Motor Driver
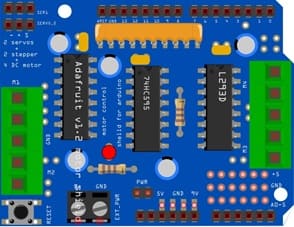
The L293D is a dual H-bridge motor driver IC capable of driving DC motors and stepper motors.
Role:
- Acts as an intermediary between the Arduino and the stepper motor.
- Amplifies the low-current signals from the Arduino to a level sufficient to drive the motor coils.
- Provides bidirectional control for the motor by enabling forward and reverse currents.
28BYJ-48 Stepper Motor
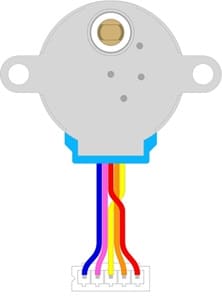
The 28BYJ-48 is a unipolar stepper motor with four coils.
Role:
- Performs rotational movement in discrete steps.
- Translates electrical signals into precise mechanical motion.
- The internal reduction gearbox provides higher torque and finer control.
Power Supply
The power supply provides energy to the L293D Motor Driver.
Jumper Wires

Jumper wires connect the various components in the circuit.
Circuit Setup
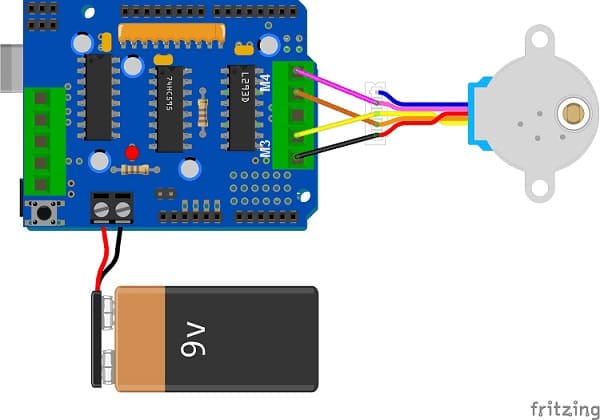
1- Connect the L293D module to the Arduino UNO board
2- Connect the control pins of the 8BYJ-48 stepper motor (pin 1, 2, 3 and 4) to the two ports M3 and M4 of the L293D module
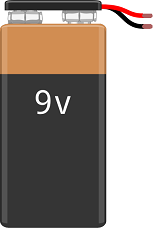
3- Use A 9V battery for power source.
Arduino program
Here is the Arduino program that can control the 28BYJ-48 stepper motor by the Arduino UNO board and the L293D Shield module.
You have to import this library: AFMotor.
|
1 2 3 4 5 6 7 8 9 10 11 12 13 14 15 16 17 18 19 20 21 22 23 24 25 26 27 28 29 30 31 32 |
#include <AFMotor.h> // Number of steps per output rotation // Change this as per your motor's specification const int stepsPerRevolution = 48; // connect motor to port #2 (M3 and M4) AF_Stepper motor(stepsPerRevolution, 2); void setup() { Serial.begin(9600); Serial.println("Stepper test!"); motor.setSpeed(255); // 10 rpm } void loop() { Serial.println("Single coil steps"); motor.step(100, FORWARD, SINGLE); /*motor.step(100, BACKWARD, SINGLE); Serial.println("Double coil steps"); motor.step(100, FORWARD, DOUBLE); motor.step(100, BACKWARD, DOUBLE); Serial.println("Interleave coil steps"); motor.step(100, FORWARD, INTERLEAVE); motor.step(100, BACKWARD, INTERLEAVE); Serial.println("Micrsostep steps"); motor.step(100, FORWARD, MICROSTEP); motor.step(100, BACKWARD, MICROSTEP); */ } |
