Use of the TM1637 display by the Micro:bit card
Tutorial plan
1- What is the TM1637 display ?
2- The components necessary to display numberss on the TM1637 display using the Micro:bit card
3- Micro:bit board wiring diagram with TM1637 display
4- Programming Micro:bit board with Makecode to display number on the TM1637 display
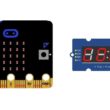
What is the TM1637 display ?
The TM1637 is a popular LED display driver IC (Integrated Circuit) that is commonly used to control 7-segment LED displays. It's especially popular in hobbyist electronics and is often used with microcontrollers like Arduino and the BBC micro:bit.
Key features of the TM1637 include:
Control of 7-Segment Displays: The TM1637 is designed to drive 7-segment LED displays. It can control up to four digits, and each digit can display numbers 0-9.
Built-In Key Scan Function: Some versions of TM1637 modules come with built-in buttons, and the IC has a key scan function that allows you to read the state of these buttons easily.
I2C Communication: The TM1637 communicates with the microcontroller over the I2C (Inter-Integrated Circuit) protocol, making it relatively easy to interface with microcontrollers.
Integrated Display RAM: It has integrated display RAM, which simplifies the process of updating the display.
Brightness Control: The TM1637 allows for brightness control, providing the ability to adjust the intensity of the LED display.
The components necessary to display texts on the TM1637 display using the Micro:bit card
To use the TM1637 display with Micro:bit card, you'll need the following components:
Micro:bit board:

The Micro:bit board is a small, programmable microcontroller board designed for education and beginner-friendly coding projects. It was developed by the BBC, in collaboration with various partners, as a tool to introduce young people to programming and electronics.
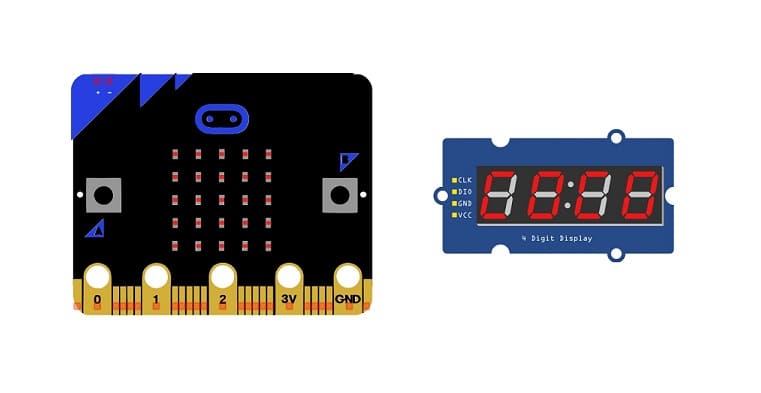
TM1637 Display
This display is used for displaying numbers, symbols and letters.
Jumper Wires:

To make the physical connections between the components.
Breadboard:

A breadboard is a useful tool for creating temporary electronic circuits. It allows you to connect components without soldering.
Micro:bit board wiring diagram with TM1637 display
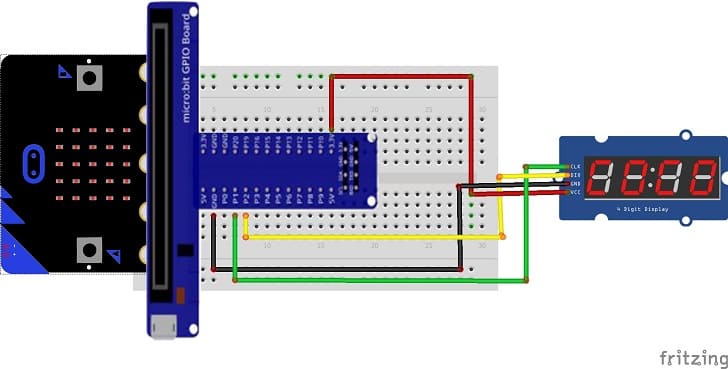
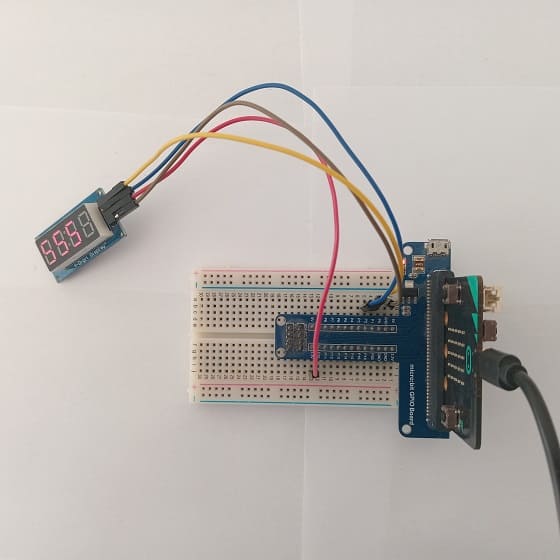
Connect the TM1637 Display to Micro:bit card as follows:
1- Connect the VCC pin of the TM1637 display to 3.3V pin of Micro:bit card.
2- Connect the GND pin of the TM1637 display to GND pin of Micro:bit card.
3- Connect the CLK pin of the TM1637 display to P1 pin of Micro:bit card.
4- Connect the DIO pin of the TM1637 display to P2 pin of Micro:bit card.
Programming Micro:bit board with Makecode to display number on the TM1637 display
To program a BBC micro:bit with MakeCode to display numbers on a TM1637 display, you can follow these steps:
1- Open the MakeCode editor for the micro:bit: MakeCode for micro:bit.
2- Create a new project by clicking on "New Project."
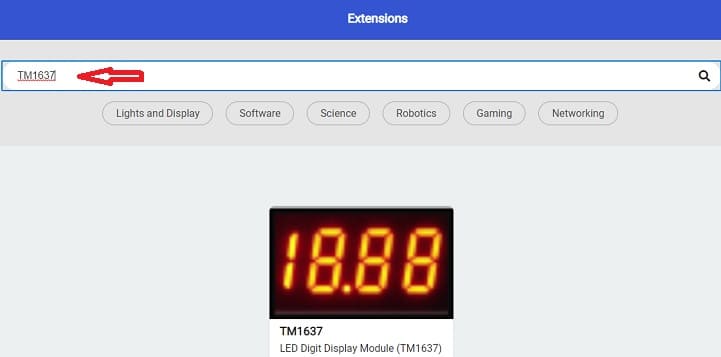
3- You'll need to add an extension for the TM1637 to make the blocks available.
Click on the "Advanced" category.
Click on "Extensions."
Search for "TM1637" and add the extension.

4- Once you've added the extension, you'll find new blocks under the "Advanced" category for controlling the TM1637 display.
5- Use the "TM1637 Show Number" block to display a number on the TM1637 display. You can find this block in the "TM1637" section.
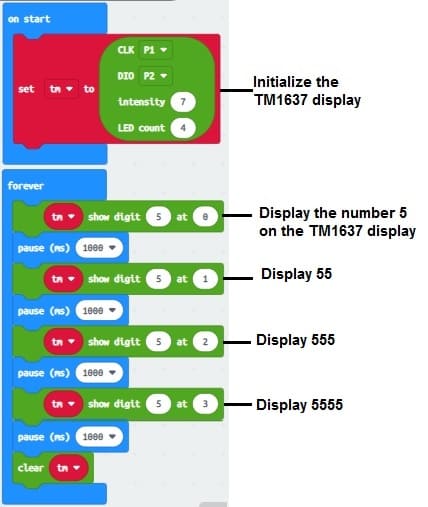
6- Add blocks to set up your micro:bit to display numbers. For example, you can use the "on start" block to initialize the TM1637 display and then use the "forever" block to continuously update the display.
Here's a simple example to display the numbers "5", "55", "555" and "5555" on the TM1637:
7- Connect your micro:bit to your computer using a USB cable and click on the "Download" button in MakeCode to download the compiled program.
8- Copy the downloaded file (usually a .hex file) to your micro:bit.
9- Power on your micro:bit, and you should see the numbers "5", "55", "555" and "5555" displayed on the connected TM1637 display.
0 comment
Leave a comment
Passion for robotics

Recent tutorials


Robotics workshop

Polpular tutorials


Making robots

Most commented tutorials


Robotic arm

Categories
Smart Home