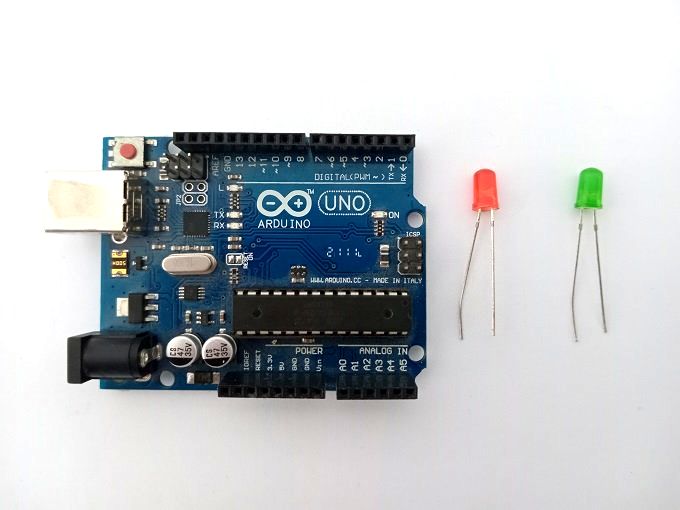
Turn on two LEDs by the Arduino UNO
Tutorial plan
1- Role of LEDs in robotics
2- The components needed to control two LEDs by Arduino UNO
3- Mounting the Arduino UNO with two LEDs
4- Lighting two LEDs by the Arduino UNO
5- Blink two LEDs by the Arduino UNO
Role of LEDs in robotics
LEDs (Light-Emitting Diodes) play various roles in robotics. Here are some common applications of LEDs in robotics:
Status Indicators: LEDs are often used as status indicators in robotic systems. They can be programmed to provide visual feedback about the state of different components or subsystems within the robot. For example, LEDs can indicate whether the robot is powered on, charging, in standby mode, or performing a specific task.
Sensor Readouts: LEDs can be used in conjunction with sensors to provide visual feedback on the readings or measurements obtained by the sensors. For instance, in line-following robots, an array of sensors detects the line, and LEDs are used to indicate which sensors are activated or which path the robot is following.
Communication: LEDs can be used as part of a communication system in robots. For example, LEDs can be integrated into a robot's body to display signals or messages to interact with humans or other robots. These visual cues can help convey information or intentions in a clear and intuitive manner.
Illumination: LEDs are widely used for illuminating the working area of robots. They provide bright and energy-efficient lighting solutions for vision systems, enabling robots to perceive and navigate their environment effectively. LEDs are particularly useful in low-light conditions or for specific applications such as machine vision, inspection, or object recognition.
Aesthetics: LEDs are sometimes incorporated into robotic designs for aesthetic purposes. They can enhance the visual appeal of robots by adding customizable lighting effects or creating an engaging display. This is often seen in entertainment robots, humanoid robots, or robot companions.
The components needed to control two LEDs by Arduino UNO
To control two LEDs using an Arduino UNO, you will need the following components:
Arduino UNO board: This is the microcontroller board that will be responsible for programming and controlling the LEDs.
Two LEDs: Choose the LEDs of your choice, considering their color and brightness. Ensure that they are compatible with the Arduino in terms of voltage and current.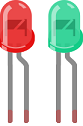
Two resistors: Resistors are needed to limit the current flowing through the LEDs to protect them. The value of the resistors will depend on the specifications of the LEDs and the operating voltage of the Arduino.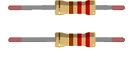
Breadboard : will be used to connect the LEDs, resistors, and Arduino together. 
Jumper wires: These wires are used to make connections between the Arduino UNO and the LEDs. 
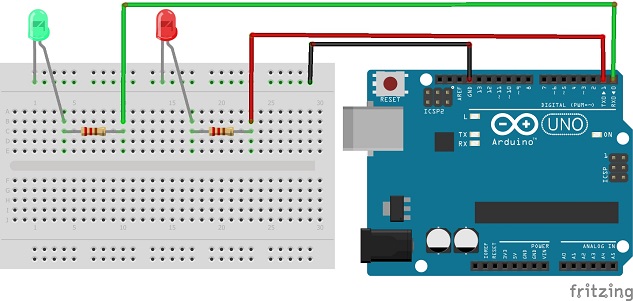
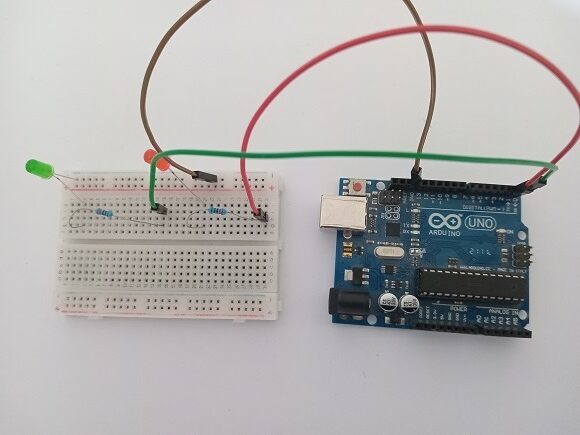
Mounting the Arduino UNO with two LEDs
Here's how you can connect the components to control the LEDs using the Arduino UNO:
1- Connect the longer leg (anode) of the green LED to digital pin 0 on the Arduino. Place a resistor (e.g., 220 ohms) in series with the LED's anode. Connect the shorter leg (cathode) of the LED to the Arduino's ground (GND) pin.
2- Repeat the previous step for the red LED. Connect its anode to digital pin 1 on the Arduino and connect the cathode to the ground through a resistor.
3- Make sure your Arduino board is properly powered by connecting it to a power source, such as a USB cable connected to your computer or an external power supply.
Once you have connected the components and powered the Arduino, you can program the microcontroller to control the LEDs using the Arduino programming language. You can define the corresponding digital pins as outputs in your code and use instructions to turn the LEDs on and off as per your requirements.
Lighting two LEDs by the Arduino UNO
To light two LEDs using an Arduino UNO, follow these steps:
1- Write the following code to control the LEDs:
|
1 2 3 4 5 6 7 8 9 10 |
void setup() { pinMode(0, OUTPUT); // Set pin 0 as output pinMode(1, OUTPUT); // Set pin 1 as output digitalWrite(0, HIGH); // Turn on the green LED digitalWrite(1, HIGH); // Turn on the red LED } void loop() { } |
2- Upload the code to the Arduino board using the Arduino IDE.
The code above sets the designated pins (0 and 1) as output pins in the setup() function. The digitalWrite() function is used to turn on and off the LEDs connected to those pins.
Once you upload the code to the Arduino, the two LEDs should lighting.
Blink two LEDs by the Arduino UNO
To blink two LEDs alternately using an Arduino UNO, you can follow these steps:
1- Write the following code to blink the LEDs alternately:
|
1 2 3 4 5 6 7 8 9 10 11 12 13 14 |
void setup() { pinMode(0, OUTPUT); // Set pin 2 as output pinMode(1, OUTPUT); // Set pin 3 as output } void loop() { digitalWrite(0, HIGH); // Turn on the green LED digitalWrite(1, LOW); // Turn off the led LED delay(2000); // Wait for 2 seconds digitalWrite(0, LOW); // Turn off the green LED digitalWrite(1, HIGH); // Turn on the red LED delay(2000); // Wait for 2 seconds } |
2- Upload the code to the Arduino board using the Arduino IDE.
The code above sets the designated pins (0 and 1) as output pins in the setup() function. In the loop() function, the digitalWrite() function is used to turn on and off the LEDs connected to those pins. The delay() function is used to create a delay of 2 second between each state change.
Once you upload the code to the Arduino, the two LEDs should start blinking alternately, with one LED turning on while the other turns off, and vice versa. Each LED will stay on for 2 second before switching to the other LED. You can adjust the delay duration to change the blinking speed according to your preference.
0 comment
Leave a comment
Passion for robotics

Recent tutorials


Robotics workshop

Polpular tutorials


Making robots

Most commented tutorials


Robotic arm

Categories
Smart Home