Turn on two lamps using radio communication between two Micro:bit boards

Tutorial plan
1- Introduction to the Micro:bit Board Radio Module
2- The components needed to control two lamps by Micro:bit
3- Mounting the Micro:bit board with an two lamps
4- Controlling two lamps by radio communication between two Micro:bit boards
Introduction to the Micro:bit Board Radio Module
The BBC micro:bit is a pocket-sized computer board designed for educational purposes. It has a built-in radio module that allows micro:bit boards to communicate with each other wirelessly. The radio module on the micro:bit uses Bluetooth Low Energy (BLE) technology, which enables short-range communication between devices.
The radio module on the micro:bit board allows for wireless communication and data transfer. It operates on the 2.4 GHz frequency band and supports a range of up to 30 meters (or about 100 feet) in an open space environment. The micro:bit radio module can be used for various applications, such as creating interactive games, sending messages between devices, or building remote-controlled projects.
To use the radio module on the micro:bit, you can program it using the micro:bit's programming environments, such as the Microsoft MakeCode editor or the MicroPython programming language. These environments provide blocks or functions specifically designed to control the radio module and enable communication between micro:bit boards.
By utilizing the radio module, you can establish a communication link between multiple micro:bit boards, allowing them to exchange data, coordinate actions, or create collaborative projects. It's a powerful feature that adds interactivity and connectivity to your micro:bit projects.
The components needed to control two lamps by Micro:bit board
To control a lamp using a Micro:bit board, you'll need a few components to set up a safe and functional circuit. Here's a list of the necessary components:
Micro:bit Board:
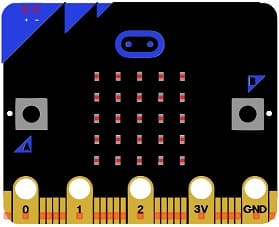
The Micro:bit board, often referred to simply as the Micro:bit, is a small, programmable microcontroller designed for educational purposes and hands-on learning.
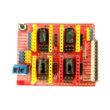
The GPIO expansion card for the Micro:bit card
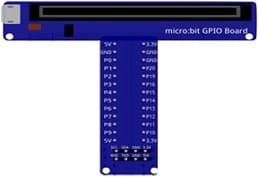
The GPIO expansion board for the Micro:bit board expands the capabilities of the Micro:bit board by adding more input/output (GPIO) pins and additional functionality.
Two Relays Module:
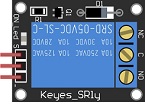
You'll need a relay module that is compatible with the Micro:bit and can switch the high-voltage lamp. Ensure it's rated for the voltage and current required for your lamp.
Two lamps (220V):

The lamp you want to control, which is rated for 220V. Ensure it's in working condition and safe to use.
Power Supply for the Lamp:

You'll need a power source for the lamp, typically a 220V AC power supply.
Wiring:
Various wires and cables for connecting the components in your circuit.
Breadboard or Prototyping Board (optional):
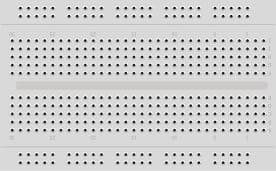
A breadboard can be useful for creating temporary connections and organizing your circuit.
Mounting the Micro:bit board with two lamps
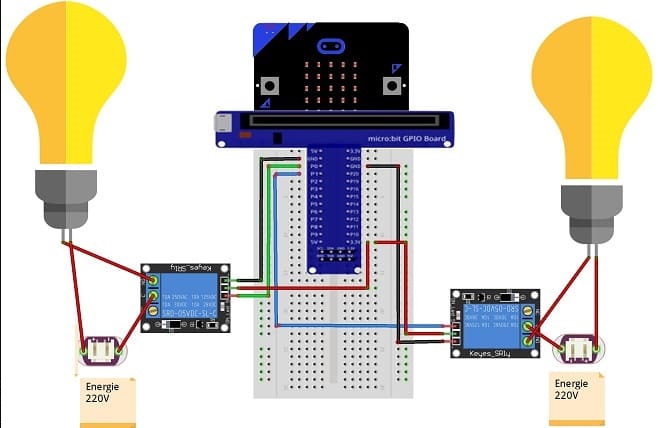
To control two lamps using a Micro:bit board, you will need to use a relay module to safely interface the low-voltage Micro:bit with the high-voltage lamp. Here are the step-by-step instructions to set up the Micro:bit with two lamps:
1- Safety First: Ensure the lamp is disconnected from any power source before proceeding.
2- Connect the first Relay to the Micro:bit:
- Connect the relay's control pin (S) to pin P0 of Micro:bit board
- Connect the pin (+) of relay to pin 3.3V of Micro:bit board.
- Connect the relay's ground pin (GND) to the Micro:bit's GND.
3- Connect the first Lamp and the power supply to the Relay:
- Connect one of the lamp's wires to the normally open (NO) terminal of the relay.
- Connect the phase wire of the power supply to the relay's common (COM) terminal.
- Connect the neutral wire of the power supply directly to the neutral wire of the lamp.
4- Connect the second Relay to the Micro:bit:
- Connect the relay's control pin (S) to pin P1 of Micro:bit board
- Connect the pin (+) of relay to pin 3.3V of Micro:bit board.
- Connect the relay's ground pin (GND) to the Micro:bit's GND.
5- Connect the second Lamp and the power supply to the Relay:
- Connect one of the lamp's wires to the normally open (NO) terminal of the relay.
- Connect the phase wire of the power supply to the relay's common (COM) terminal.
- Connect the neutral wire of the power supply directly to the neutral wire of the lamp.
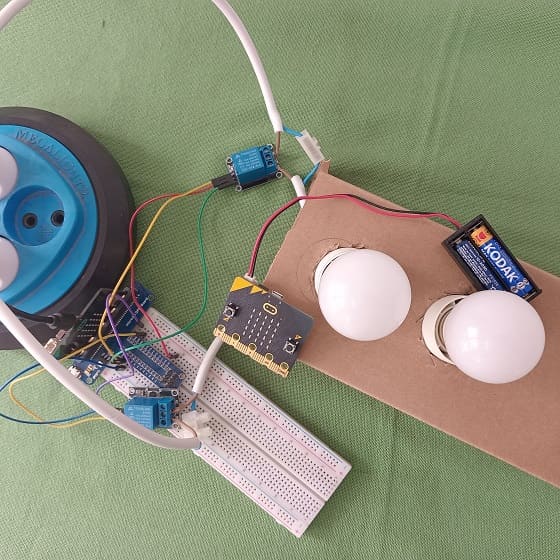
Controlling two lamps by radio communication between two Micro:bit boards
To control an two lamps using radio communication from one micro:bit board to another, you'll need two micro:bit boards—one acting as a transmitter and the other as a receiver. Here's a step-by-step guide on how to accomplish this:
Transmitter (Micro:bit A):
1- Connect two relays to micro:bit's GPIO pins (for example, P0 for first relay and P1 for second realy).
2- Open the Microsoft MakeCode editor.
3- Write the following code to send radio messages:
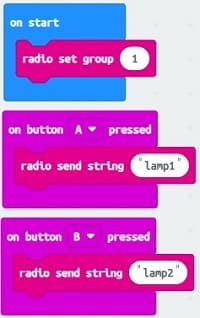
4- Download the code to the micro:bit (A).
Receiver (Micro:bit B):
1- Connect another micro:bit board to your computer and open the programming environment.
2- Write the following code to receive radio messages and control the two lamps:
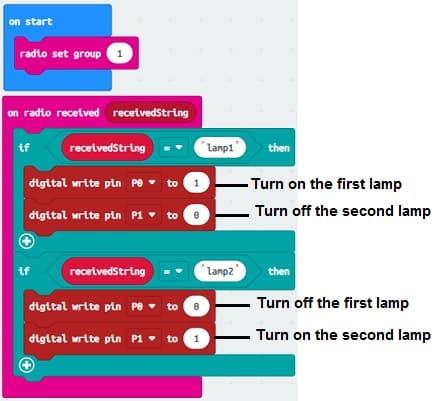
3- Download the code to the micro:bit (B) and disconnect it from the computer.
Now, whenever you press button A on the transmitter micro:bit (A), it will turn on the first lamp.
whenever you press button B on the transmitter micro:bit (A), it will turn off the second lamp .


