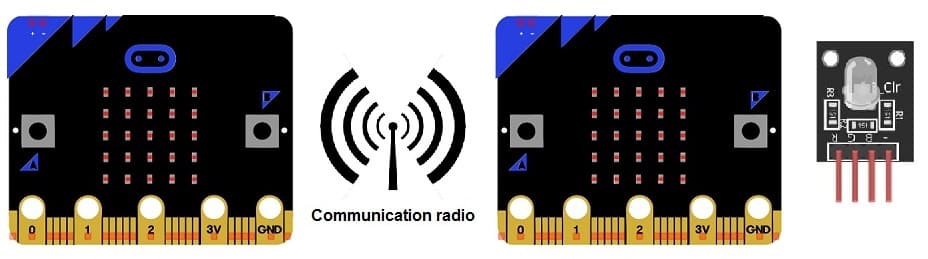
Turn on the RGB LED module using radio communication between two Micro:bit cards
Tutorial plan
1- Introduction to the Micro:bit Board Radio Module
2- The components needed to control the RGB LED module by Micro:bit
3- Mounting the Micro:bit board with the RGB LED module
4- Controlling the RGB LED module by radio communication from the Micro:bit board
Introduction to the Micro:bit Board Radio Module
The Micro:bit board is a small, programmable microcontroller board designed for educational purposes, particularly for teaching computer programming to young learners. It was developed by the BBC in the UK and is widely used in schools and maker communities around the world. The Micro:bit includes a variety of sensors, LEDs, buttons, and a radio module.
The radio module on the Micro:bit allows it to communicate wirelessly with other Micro:bits and compatible devices. This feature is often used for creating interactive projects, such as games or collaborative activities. The radio module on the Micro:bit operates on the 2.4GHz ISM (Industrial, Scientific, and Medical) band and uses a simple and easy-to-use communication protocol.
Here are some key points about the Micro:bit radio module:
Wireless Communication: The Micro:bit's radio module allows it to communicate with other Micro:bits, which is a powerful feature for creating projects that involve multiple devices.
Radio Blocks in MakeCode: The MakeCode programming environment, which is commonly used with the Micro:bit, offers blocks for easily working with the radio module. Students and beginners can drag and drop these blocks to send and receive data wirelessly.
Broadcasting and Peer-to-Peer Communication: You can use the radio module to broadcast data to all nearby Micro:bits or establish peer-to-peer communication between two or more devices.
Wireless Sensor Networks: The Micro:bit's radio module is often used to create wireless sensor networks, allowing data to be collected from multiple devices and transmitted to a central receiver.
Range: The range of the Micro:bit's radio module can vary depending on factors like environmental conditions, but it typically covers a short distance, making it suitable for projects within a classroom or small room.
Custom Communication Protocols: For more advanced users, it's possible to create custom communication protocols using the radio module. This can be useful for more complex projects.
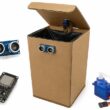
The components needed to control the RGB LED module by Micro:bit
To control an RGB LED module using a Micro:bit, you'll need a few components and accessories. The RGB LED module typically consists of an RGB LED and may come with additional resistors or components for voltage regulation. Here's a list of components you might need:
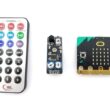
1- Two Micro:bit boards:

The Micro:bit is the main microcontroller that will control the RGB LED. It has built-in pins that can be used to connect to external components.
2- RGB LED Module:
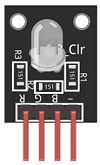
This module contains a red, green, and blue LED, allowing you to produce various colors by controlling the intensity of each color component.
3- The GPIO expansion card for the Micro:bit card

The GPIO expansion board for the Micro:bit board expands the capabilities of the Micro:bit board by adding more input/output (GPIO) pins and additional functionality.
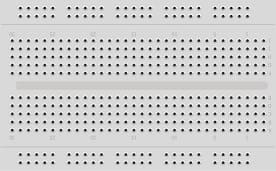
4- Breadboard (optional):

A breadboard can be useful for prototyping and connecting components, especially if you want to use external resistors or additional components.
5- Jumper Wires:
You'll need jumper wires to connect the Micro:bit and the RGB LED module. Make sure you have wires with alligator clips or female-to-male connectors for easy connection.
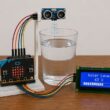
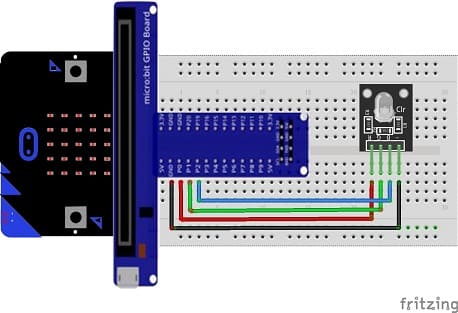
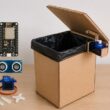
Mounting the Micro:bit board with the RGB LED module
Mounting a Micro:bit board with an RGB LED module is a straightforward process. You can use a breadboard or a custom enclosure to secure and connect the Micro:bit and the RGB LED module. Here's a step-by-step guide on how to do this using a breadboard:
1- Connect the control pins of the Micro:bit board to the control pins of the RGB LED module. For example, you can use pins P0, P1 and P2 to control the 3 pins R, G and B of the RGB LED module respectively.
2- Connect the GND pin of the Micro:bit card to the GND pin of the RGB LED module.
3- Program the Micro:bit card to control the RGB LED module using the appropriate programming language, such as MakeCode Editor. You can write code to adjust the color and light intensity of the LEDs according to your needs.

Controlling the RGB LED module by radio communication from the Micro:bit board
1- Go to the MakeCode website (https://makecode.microbit.org/).
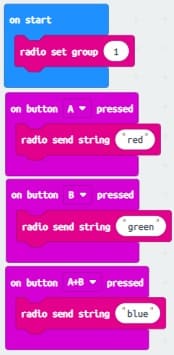
2- Create the code for Micro:bit transmitting:
Write code which sends a string of characters "red" when button A is pressed, "green" when button B is pressed and "blue" when both buttons A and B are pressed.
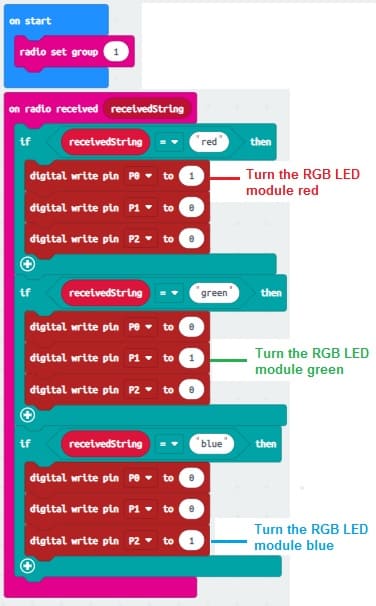
3- Create the code for receiver Micro:bit:
Write code to receive and interpret radio messages from the transmitter Micro:bit. The code should adjust the RGB LED based on the received commands. This code which will react to radio communication by lighting the RGB LED module in red when the word 'red' is received, in green when the word 'green' is received and in blue when the word 'green' is received.
4- Test the Setup:
Power on both Micro:bits. Use the transmitter Micro:bit to send radio commands. The receiver Micro:bit should respond to the commands and control the RGB LED module accordingly.
0 comment
Leave a comment
Passion for robotics

Recent tutorials

Robotics workshop

Polpular tutorials


Making robots

Most commented tutorials


Robotic arm

Categories
Smart Home