Turn on the RGB LED module by Arduino UNO
Tutorial plan
1- Role of RGB LED module in robotics
2- The components needed to control RGB LED module by Arduino UNO
3- Mounting the Arduino UNO with RGB LED module
4- Programming the Arduino UNO board to turn on the RGB LED module with Arduino IDE
5- Programming the Arduino UNO board to turn on the RGB LED module with mBlock
Role of RGB LED module in robotics
RGB LED (Red, Green, Blue Light Emitting Diode) modules play a significant role in robotics by offering versatile illumination and visual communication capabilities. Here are some of the key roles and uses of RGB LED modules in robotics:
Color Sensing: RGB LED modules can be used for color sensing and recognition in robotic applications. By emitting light of specific colors and analyzing the reflected light, robots can distinguish and identify objects based on their colors.
Visual Feedback: Robots can use RGB LEDs to provide visual feedback to users or other robots. For example, an RGB LED module can change colors to signal various states or conditions, such as indicating when the robot is busy, idle, or has encountered an error.
Navigation and Wayfinding: RGB LEDs can be used for navigation and wayfinding in robotic applications. By placing colored markers or beacons with RGB LEDs, robots can follow a predefined path or locate specific destinations within an environment.
Expressive Communication: In humanoid or social robots, RGB LEDs can be used to convey emotions or expressions. Changing the color and brightness of the LEDs can help the robot communicate emotions, intentions, or states to humans, making interactions more natural and intuitive.
Ambient Lighting: RGB LED modules can create ambient lighting in a robot's environment. This feature can be used in various contexts, such as in-home service robots that adjust the lighting to create a soothing or energizing atmosphere.
Robot Identification: Robots operating in a shared environment can use unique combinations of colors to identify themselves. This simplifies the distinction between multiple robots when they are interacting or collaborating.
Visual Programming: RGB LEDs can be incorporated into visual programming environments for robotics to provide visual feedback. For instance, a flashing RGB LED can indicate an error in the programmed code, making it easier for users to understand and debug their robot's behavior.
In summary, RGB LED modules are versatile tools in robotics, offering visual communication, color detection, personalization, and various other applications. They enhance a robot's ability to interact effectively with its environment and with humans, providing valuable feedback and improving the overall user experience.
The components needed to control RGB LED module by Arduino UNO
To control the module LED RGB using an Arduino UNO, you will need the following components:
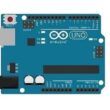
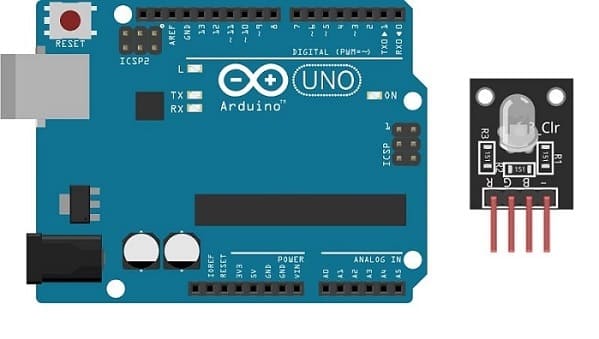
Arduino UNO:

The Arduino UNO is a microcontroller board that serves as the brain of your project. It provides the necessary I/O pins and processing power to control the RGB LED module.
RGB LED Module:
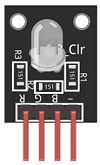
This module contains a red, green, and blue LED, allowing you to produce various colors by controlling the intensity of each color component.
Breadboard:

A breadboard is a prototyping board that allows you to build circuits without soldering. It provides a convenient way to connect the components together.
Jumper Wires:

You'll need jumper wires to make connections between the Arduino UNO, RGB LED module and breadboard.
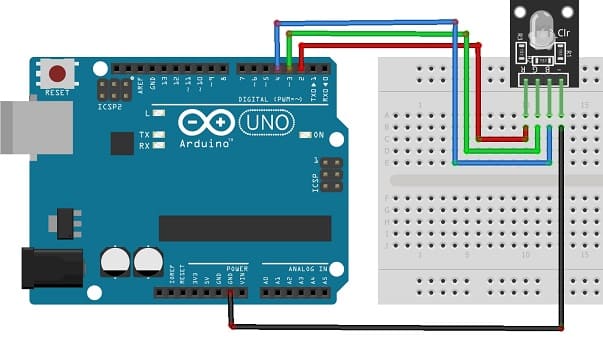
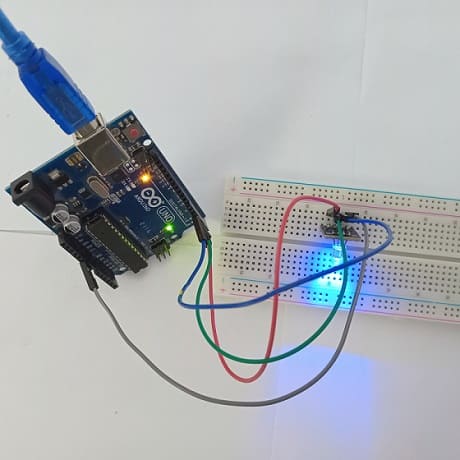
Mounting the Arduino UNO with the RGB LED module
Once you have the necessary components, you can proceed with the following steps to control the RGB LED module:
1- Connect pin R (red) of RGB LED module to pin N°2 of the Arduino UNO
2- Connect pin G (green) of RGB LED module to pin N°3 of the Arduino UNO
3- Connect pin B (blue) of RGB LED module to pin N°4 of the Arduino UNO
4- Connect pin GND of RGB LED module to pin GND of the Arduino UNO
Programming the Arduino UNO board to turn on the RGB LED module with Arduino IDE
To light up an RGB LED module using an Arduino UNO and the Arduino IDE, you'll need to write a simple Arduino program.
|
1 2 3 4 5 6 7 8 9 10 11 12 13 14 15 16 17 18 19 20 21 22 23 24 25 26 27 28 29 |
int redPin = 2; // Pin for the red channel int greenPin = 3; // Pin for the green channel int bluePin = 4; // Pin for the blue channel void setup() { pinMode(redPin, OUTPUT); pinMode(greenPin, OUTPUT); pinMode(bluePin, OUTPUT); } void loop() { // Turn on the RGB LED in red digitalWrite(redPin, HIGH); digitalWrite(bluePin, LOW); delay(1000); // Wait for 1 second // Turn on the RGB LED in green digitalWrite(redPin, LOW); digitalWrite(greenPin, HIGH); delay(1000); // Wait for 1 second // Turn on the RGB LED in blue digitalWrite(greenPin, LOW); digitalWrite(bluePin, HIGH); delay(1000); // Wait for 1 second } |
In this code, we set the pins 2, 3, and 4 as outputs to control the RGB LED. We then turn on the red channel and turn off the blue channel, creating a red color. After a second, We then turn on the green channel and turn off the red channel. After a second, We then turn on the blue channel and turn off the green channel. The loop repeats, creating a blinking effect.
Uploading the Code:
1- Open the Arduino IDE on your computer.
2- Select the correct Arduino board (Arduino UNO) and COM port from the "Tools" menu.
3- Copy and paste the code into the IDE.
4- Click the "Upload" button (right arrow icon) to compile and upload the code to your Arduino UNO.
Programming the Arduino UNO board to turn on the RGB LED module with mBlock
To program an Arduino UNO board to control an RGB LED module using mBlock (a graphical programming environment based on Scratch for Arduino), you can follow these steps:
Software and Setup:
1- Download and install mBlock from the official website (https://www.mblock.cc/).
2- Open mBlock and connect your Arduino UNO board to your computer using a USB cable.
3- In mBlock, make sure you've selected the correct Arduino board and COM port in the "Connect" menu.
Programming Steps:
Follow these steps to program the Arduino UNO using mBlock:
1- Launch mBlock and create a new project.
2- You can use the following blocks to control the RGB LED:
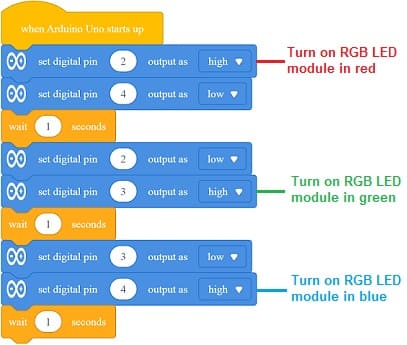
set digital pin 2 output: This block sets pin 9 as an output, which you can use to control the RGB LED's red color.
set digital pin 3 output: This block sets pin 10 as an output for the green color.
set digital pin 4 output: This block sets pin 11 as an output for the blue color.
digital write pin [ ] to [ ]: This block allows you to turn a digital pin on the Arduino ON (HIGH) or OFF (LOW).
wait [ ] seconds: This block adds a delay.
3- Drag and snap the blocks together to create your program. For example, you can use the following mBlock script to change color of RGB LED module every second:
0 comment
Leave a comment
Passion for robotics

Recent tutorials


Robotics workshop

Polpular tutorials


Making robots

Most commented tutorials


Robotic arm

Categories
Smart Home