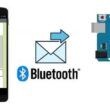
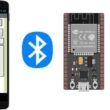
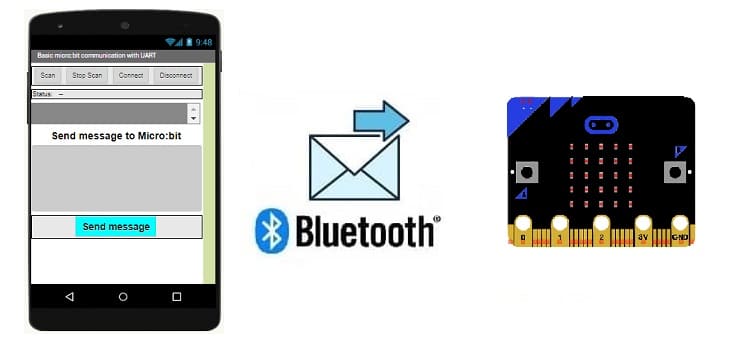
Transmit a message to Micro:bit board via Bluetooth
Tutorial plan
1- How to transmit a message from the Smartphone to Micro:bit board via Bluetooth ?
2- Program the Micro:bit to receive a message from the Smartphone
3- Develop a mobile application to send a message to Micro:bit board
How to transmit a message from the Smartphone to Micro:bit board via Bluetooth ?
To transmit a message from a smartphone to a Micro:bit board via Bluetooth, you need to follow these general steps:
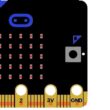
1- Set up the Micro:bit board:
Make sure your Micro:bit is ready to receive data via Bluetooth. You can use online development tools like MakeCode to program your Micro:bit.
2- Develop a Smartphone Application:
Create a mobile application on your smartphone that has the capability to communicate via Bluetooth Low Energy (BLE). You can use mobile app development tools like App Inventor.
Utilize mobile app development libraries that support Bluetooth communication, such as Bluetooth Low Energy API for Android.
3- Establish a Bluetooth Connection:
Establish a Bluetooth connection between your smartphone and your Micro:bit. Ensure your Micro:bit is discoverable, and your mobile application can find it.
4- Transfer Data:
Once the connection is established, you can transfer data from your mobile application to your Micro:bit using appropriate Bluetooth services and characteristics. You will likely need to define custom communication profiles for your application.
5- Handle Data on Micro:bit:
Program your Micro:bit to process the data it receives via Bluetooth and take appropriate actions based on that data.
6- Test and Debug:
Test your application and code on different devices to ensure they work as expected. Perform debugging if necessary.
Once everything is working correctly, deploy your application to your smartphone and use it to communicate with your Micro:bit.
These steps should help you set up Bluetooth communication between your smartphone and your Micro:bit board. Make sure to refer to the specific documentation for your development platform and the libraries you're using for detailed instructions on implementation.
Program the Micro:bit to receive a message from the Smartphone
To program the Micro:bit to receive a message from a smartphone via Bluetooth using MakeCode, follow these steps:
1-Go to the MakeCode website (makecode.microbit.org).
2- Click on "New Project" to start.
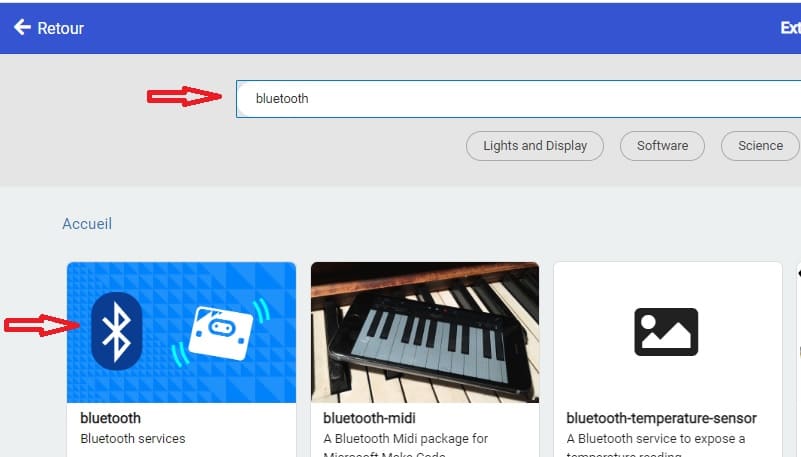
3- Add Bluetooth Extension:
Click on the "Extensions" option in the bottom left corner.

Search and add the "Bluetooth" extension by clicking on it.
4- Program Message Reception:
In the "Bluetooth" category, you will find the "Bluetooth on data received" block. Drag this block onto the workspace.
Inside this block, you can add code to process the received message. For example, you can display the message on the Micro:bit's LED screen using the "show string" block.
5- Export the Code:
Connect your Micro:bit to your computer using a USB cable.
Once you have programmed the message reception, click on "Download" to transfert .hex file to Micro:bit.
Here's a simple example of MakeCode blocks for receiving and displaying a message on the Micro:bit:
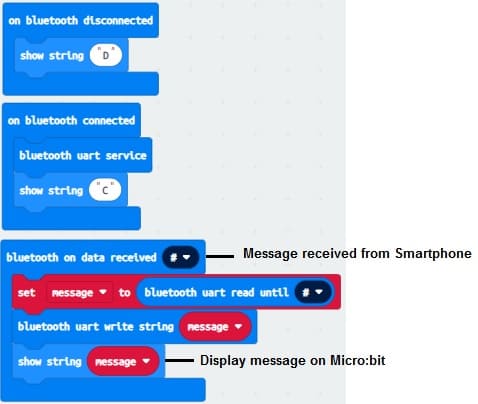
This code displays 'C' on the Micro:bit's LED screen when Bluetooth connection is established, shows 'D' when the connection is lost, and displays any received string messages on the LED screen.
Develop a mobile application to send a message to the Micro:bit
To develop a mobile application that sends a message to the Micro:bit using MIT App Inventor, follow these steps:
1- Go to the MIT App Inventor website (ai2.appinventor.mit.edu).
2- Click on "Start new project" to create a new project.
Design the User Interface (UI):
1- Use the components from the Palette to design the user interface of your application. For example, you can add a TextBox for entering the message and a Button for sending the message.
2- Add Bluetooth Functionality:
From the Palette, click on "Connectivity" and then drag the "BluetoothClient" component onto the design screen.
Design the user interface of your app. You might have two buttons to turn on and turn off the two lamps
3- Add the components to your app. ![]()
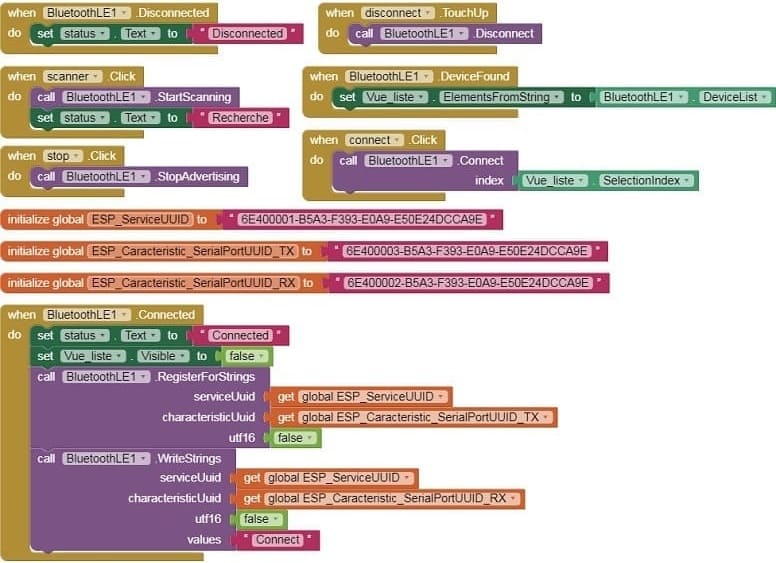
- The "BluetoothLE1" extension indeed refers to a specific extension for MIT App Inventor which allows you to manage Bluetooth Low Energy (BLE) communication in your mobile applications. This extension facilitates the interaction between your App Inventor application and BLE devices, such as sensors, trackers, wearables, etc.
- The "BluetoothClient1" extension in MIT App Inventor allows you to create mobile applications that can connect to Bluetooth devices, such as serial Bluetooth modules (eg HC-06) connected to microcontrollers, Bluetooth audio devices, etc. . This extension facilitates communication with these devices using serial Bluetooth connections.
- The "Microbit_UART1" extension allows you to use UART (Universal Asynchronous Receiver-Transmitter) communication with the Micro:bit card in the MakeCode programming environment.
- The "Notifier1" extension in MIT App Inventor is a component for displaying notifications or messages to the user of an application. It can be used to send pop-up messages, alerts or important information to the user while the application is running. It is a useful component to improve user experience by providing contextual information.
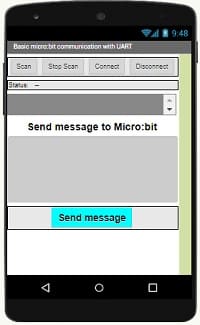
Here is an example of our mobile application interface:
Program the Message Sending Functionality:
1- Click on the "Blocks" tab to switch to the Blocks Editor.
- Starting with Android 12, Bluetooth permissions have been enhanced to improve security and user data protection. This is why we must declare the authorizations that your application needs in the AndroidManifest.xml file. For Bluetooth, you'll need to include ACCESS_FINE_LOCATION, BLUETOOTH_SCAN, and possibly BLUETOOTH_CONNECT permissions, depending on the features you're using.
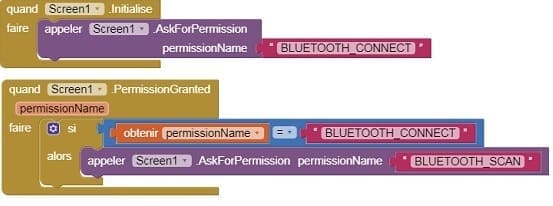
- Use these programming blocks to connect the smartphone to the Micro:bit board via Bluetooth:
2- Use the blocks to program the functionality for sending a message via Bluetooth when the button is clicked.
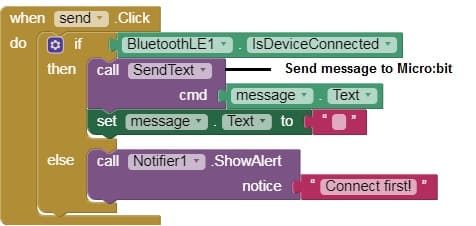
3- Use the "When send.Click" block to trigger the sending of the message.
4- Inside this block, use the "Call.SendText.cmd" block to send the text entered in the TextBox to the Micro:bit.
Here's a simple example to send a message to the Micro:bit board:
Download project Download application
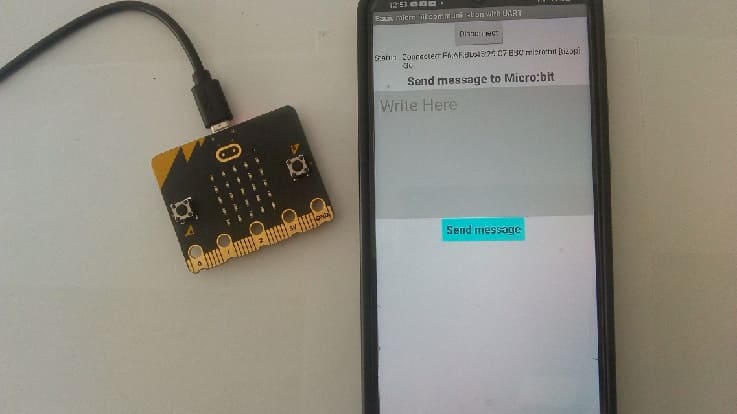
Test the Application:
1- Install the mobile app on your smartphone.
2- Connect your smartphone to the Micro:bit via Bluetooth.
3- Enter a message in the TextBox and click the Button to send the message to the Micro:bit.
4- Verify if the Micro:bit receives the message as expected.

Passion for robotics

Recent tutorials

Robotics workshop

Polpular tutorials


Making robots

Most commented tutorials


Robotic arm

Categories
Smart Home