The Micro:bit card
Micro:bit
16-04-23
1511
0
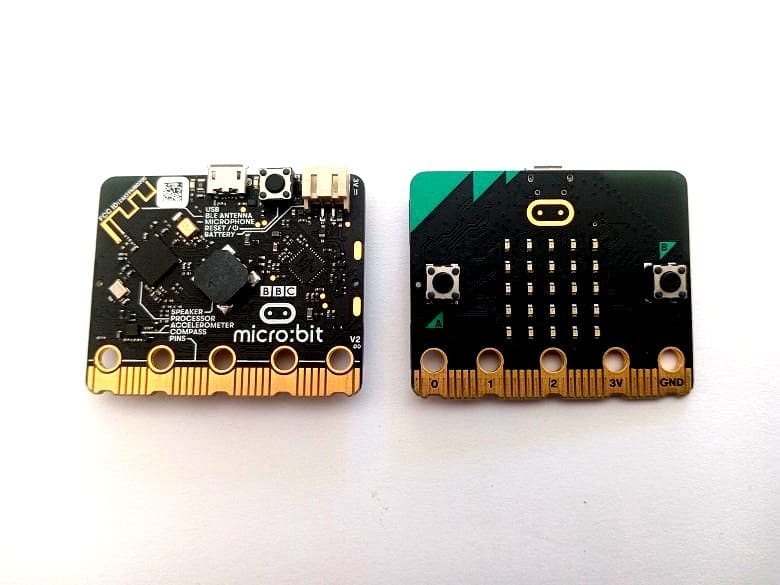
What is a Micro:bit card ?
The Micro:bit is a small, programmable device designed to teach children and beginners how to code and experiment with electronics. It was created by the BBC in the UK in 2015 as part of an initiative to promote computer science education in schools.
The Micro:bit is a small, pocket-sized card that contains a microcontroller, sensors, and LEDs. It can be programmed using a block-based programming language such as Scratch or a text-based programming language such as Python.
The device has a range of features, including an accelerometer, magnetometer, and Bluetooth connectivity, which allow it to interact with other devices and sensors. It also has 25 programmable LEDs that can be used to display text, images, and animations.
The Micro:bit has become popular in schools and educational settings due to its ease of use and versatility. It can be used to teach a wide range of topics, including programming, electronics, and design. It is also relatively inexpensive and widely available, making it accessible to a wide range of students and educators.
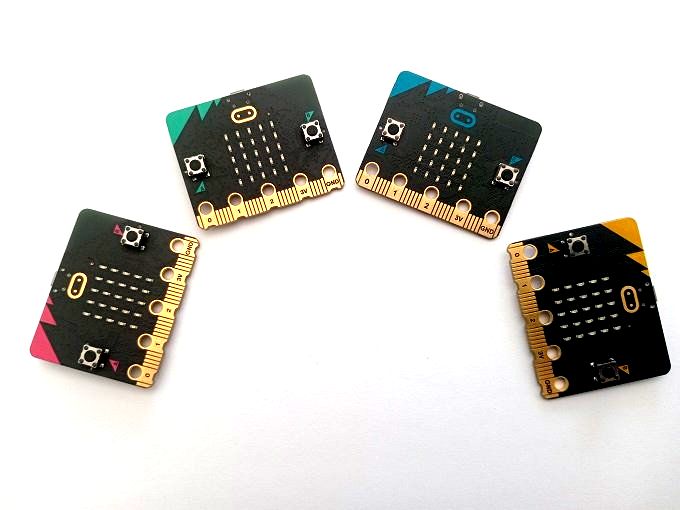
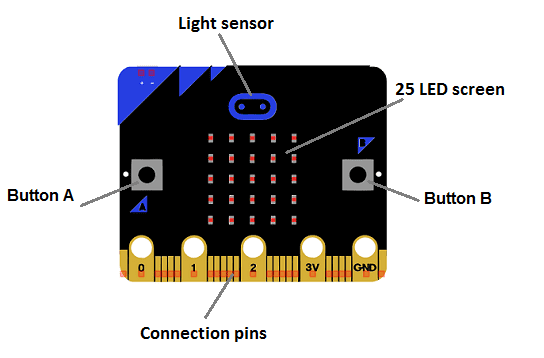
Micro:bit board components
The Micro:bit is equipped with a range of components that make it easy to connect to other devices, sensors, and motors.
Here are some of the key components of the Micro:bit board:
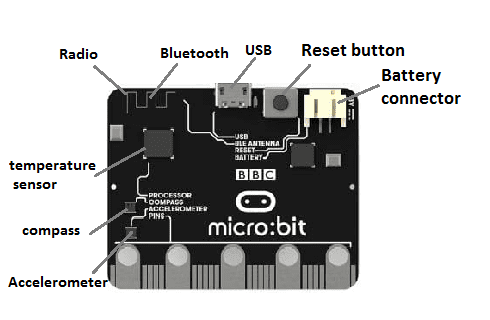
Processor: The Micro:bit is powered by a 32-bit ARM Cortex-M0 processor.
LED display: The board features a 5x5 LED matrix display, which can be used to show simple graphics, text, and animations.
Buttons: The Micro:bit has two programmable buttons, labeled A and B, which can be used for input.
Accelerometer and compass: The board has an accelerometer and compass built in, which can be used to detect motion and orientation.
Bluetooth: The Micro:bit has Bluetooth Low Energy (BLE) connectivity, which allows it to communicate wirelessly with other devices such as smartphones and tablets.
GPIO pins: The board has 20 pins that can be used for input and output, including 17 digital I/O pins and 3 analog input pins.
Micro-USB port: The Micro:bit can be powered and programmed through its micro-USB port, which also supports serial communication.
Radio: The board features a 2.4 GHz radio, which can be used for wireless communication between multiple Micro:bit boards.
Micro:bit and robotics
The Micro:bit can be a great tool for learning robotics, as it can be used to control and interact with a variety of different robot platforms.
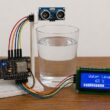
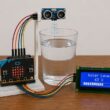
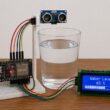
For example, the Micro:bit can be connected to a motor driver board, which can be used to control the movement of motors and wheels on a robot. The Micro:bit's sensors can be used to detect obstacles, measure distances, and track movement, allowing the robot to navigate and respond to its environment.
In addition to controlling the physical movements of a robot, the Micro:bit can also be used to program the robot's behavior and decision-making processes. This can be done through coding and programming, using either block-based or text-based programming languages.
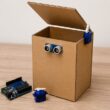
The Micro:bit can also be used to create more advanced robot projects, such as robot arms, drones, and rovers. By combining the Micro:bit's capabilities with other components such as sensors, actuators, and communication modules, students and hobbyists can build more complex and sophisticated robots.
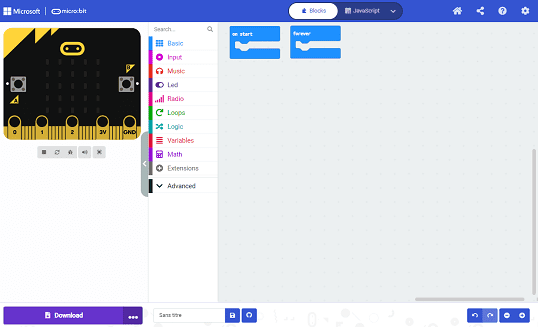
Micro:bit and Makecode
MakeCode is a block-based programming environment that is used to program the Micro:bit, as well as other microcontrollers and robotics platforms. It was developed by Microsoft and is designed to be easy to use and accessible for beginners.
MakeCode provides a visual programming interface that allows users to drag and drop code blocks to create programs for the Micro:bit. It also includes a range of tutorials, examples, and projects that can be used to help users get started with programming and robotics.
With MakeCode, users can program the Micro:bit to control LEDs, interact with sensors, and communicate with other devices, such as smartphones and computers. They can also create more complex programs that use loops, conditional statements, and functions.
MakeCode is a great tool for learning programming and robotics, as it provides an intuitive and visual interface that allows users to experiment and explore without needing to learn complex programming syntax. It also provides a range of resources and support, including a community forum and online documentation, which can be used to get help and share projects with others.
Uploading the MakeCode program to the Micro:bit
Uploading a MakeCode program to the Micro:bit is a straightforward process. Here are the steps:
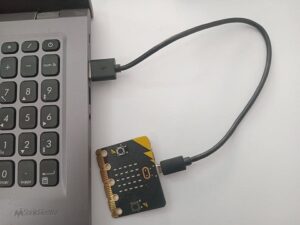
1- Connect your Micro:bit to your computer using a USB cable.
2- Open the MakeCode website and select the Micro:bit as your device.
3- Create or open the program you want to upload to the Micro:bit.
4- Click on the Download button in the top right corner of the MakeCode editor.
5- The file will download as a .hex file. Drag and drop this file onto the Micro:bit drive on your computer.
6- Wait for the file to transfer to the Micro:bit. When the transfer is complete, the Micro:bit will reset and start running your program.
Powering the Micro:bit
The Micro:bit can be powered using a variety of methods, depending on your needs and the resources available to you. Here are some options for powering the Micro:bit:
1. USB Cable: The easiest way to power the Micro:bit is to connect it to a computer or USB power supply using a USB cable. This will provide a stable and reliable source of power for the device.
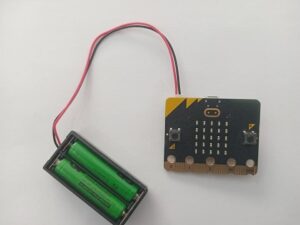
2. Battery Pack: You can also power the Micro:bit using a battery pack. The Micro:bit has a built-in battery connector that can be used to connect a battery pack. You can use a 2xAAA battery pack or a 3V coin cell battery to power the device.
When powering the Micro:bit, it's important to ensure that the voltage and current rating of your power source are appropriate for the device. Using a power source with too high or too low voltage or current can damage the Micro:bit or cause it to malfunction.
0 comment
Leave a comment
Passion for robotics

Recent tutorials

Robotics workshop

Polpular tutorials


Making robots

Most commented tutorials


Robotic arm

Categories
Smart Home