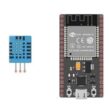
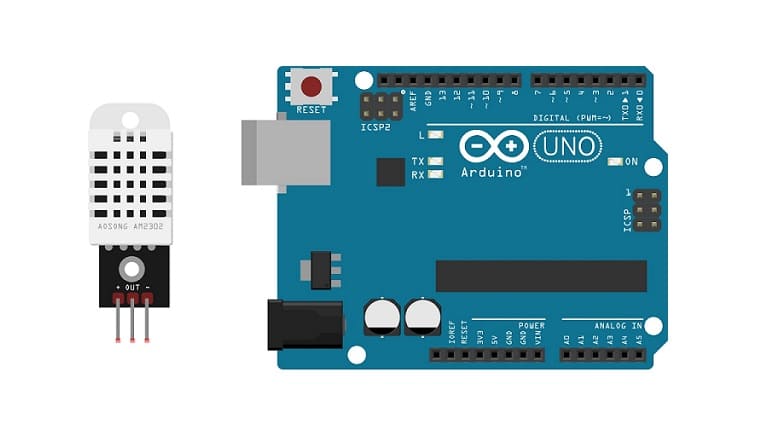
The Arduino UNO board and the DHT22 sensor
Tutorial plan
1- What is the DHT22 sensor ?
2- How does the Arduino board receive the temperature and humidity measured by the DHT22 sensor?
3- The necessary components to use the DHT22 sensor by the Arduino card
4- Arduino board wiring diagram with DHT22 sensor
5- Programming the Arduino to receive the temperature and humidity measured by the DHT22 sensor
What is the DHT22 sensor ?
The DHT22 sensor is a digital temperature and humidity sensor. It's also known as the AM2302 sensor. This sensor is commonly used to measure both temperature and humidity in various applications, including weather stations, environmental monitoring systems, and home automation.
The DHT22 sensor uses a digital signal to output both temperature and humidity readings, which makes it relatively simple to interface with microcontrollers like Arduino or Raspberry Pi. It has a built-in capacitive humidity sensor and a thermistor for temperature measurement.
One of the advantages of the DHT22 sensor is its accuracy and relatively low cost compared to some other sensors with similar capabilities. It communicates over a single-wire digital interface, making it easy to use in projects where temperature and humidity monitoring are required.
The DHT11 and DHT22 are both digital temperature and humidity sensors, but they differ in terms of their specifications, accuracy, and capabilities.
Accuracy: The DHT22 (also known as AM2302) is generally more accurate than the DHT11 in terms of both temperature and humidity readings. The DHT22 has a higher resolution and a wider measurement range compared to the DHT11.
Range: The DHT22 has a wider temperature range (-40°C to 80°C) compared to the DHT11 (0°C to 50°C). Similarly, the humidity range of the DHT22 is 0-100% while the DHT11 ranges from 20% to 80%.
Accuracy: The DHT22 has higher accuracy levels for both temperature (±0.5°C) and humidity (±2-5%) compared to the DHT11 (±2°C for temperature and ±5% for humidity).
Price: Generally, the DHT11 is cheaper compared to the DHT22, but the DHT22 offers better accuracy and a wider range of readings.
Pin Compatibility: Both sensors have similar pin layouts and can be interfaced with microcontrollers in a similar way, which makes them easy to use in DIY projects or applications requiring environmental sensing.
How does the Arduino board receive the temperature and humidity measured by the DHT22 sensor?
The Arduino board communicates with the DHT22 sensor using a single-wire digital interface known as the "One-Wire" protocol. This protocol allows the Arduino to receive data from the DHT22 sensor.
To interface the DHT22 sensor with an Arduino board, you typically use a library like the "DHT sensor library." This library simplifies the process of reading data from the sensor.
Here's a basic overview of the steps involved in receiving temperature and humidity data from the DHT22 sensor using an Arduino:
1- Connections: Connect the DHT22 sensor to your Arduino board. The sensor has three pins: VCC (power), data, and ground (GND). Connect VCC to 5V on the Arduino, ground to GND, and the data pin to a digital input/output pin on the Arduino (e.g., pin 2).
2- Include Library and Code: In your Arduino sketch, include the dhtlib library at the beginning of your code. Then, write the necessary code to initialize the sensor and read the temperature and humidity values.
The necessary components to use the DHT22 sensor by the Arduino card
To use a SSD1306 display with an Arduino, you'll need the following components:
Arduino UNO Board:

The Arduino Uno is a popular and versatile microcontroller board that's widely used in various electronics projects.
DHT22 sensor:
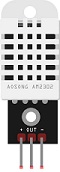
The DHT22 sensor is a digital temperature and humidity sensor.
Jumper Wires:

To make the physical connections between the components.
Breadboard:

A breadboard is a useful tool for creating temporary electronic circuits. It allows you to connect components without soldering.
Arduino board wiring diagram with DHT22 sensor
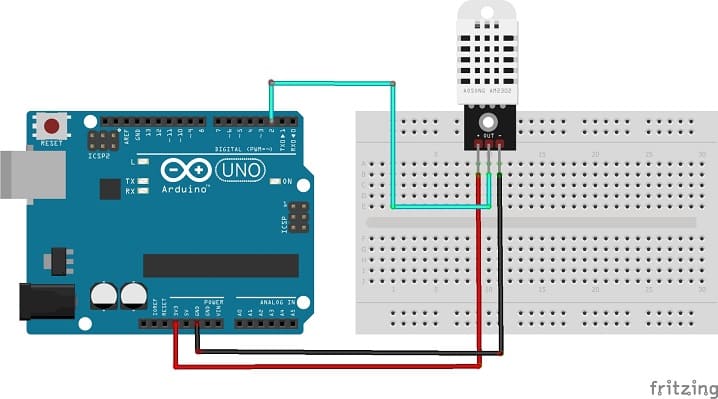
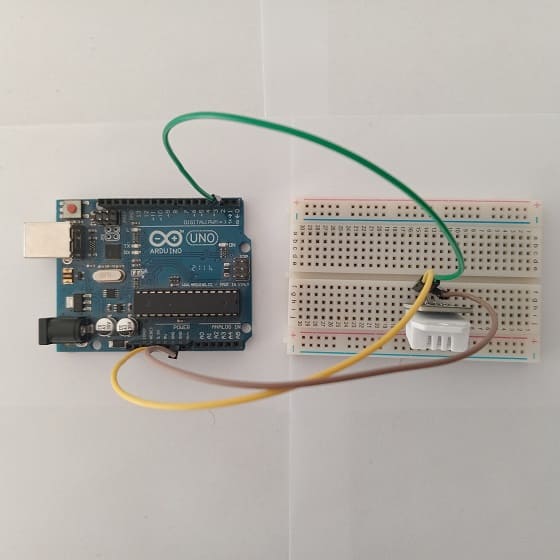
This represents the basic connections between the DHT22 sensor and an Arduino board:
- Connect the (+) pin of the DHT22 sensor to the 3.3V pin on the Arduino.
- Connect the OUT pin of the DHT22 sensor to a digital pin 2 on the Arduino.
- Connect the (-) pin of the DHT22 sensor to any ground (GND) pin on the Arduino.
Programming the Arduino to receive the temperature and humidity measured by the DHT22 sensor
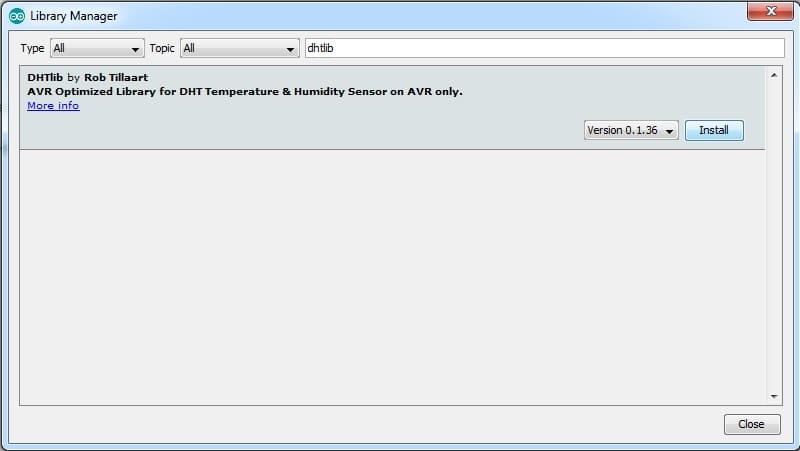
Before uploading the program, use the Arduino IDE to install the DHT sensor library if you haven't already. You can do this by navigating to "Sketch" -> "Include Library" -> "Library Manager" then search for and install the "dhtlib" by Rob Tillart or other compatible libraries.
|
1 2 3 4 5 6 7 8 9 10 11 12 13 14 15 16 17 18 19 20 21 22 23 24 25 26 27 28 29 30 |
#include <dht.h> #define dataPin 2 // Defines pin number to which the sensor is connected dht DHT; // Creats a DHT object void setup() { Serial.begin(9600); } void loop() { //Uncomment whatever type you're using! int readData = DHT.read22(dataPin); // DHT22/AM2302 //int readData = DHT.read11(dataPin); // DHT11 float t = DHT.temperature; // Gets the values of the temperature float h = DHT.humidity; // Gets the values of the humidity // Printing the results on the serial monitor Serial.print("Temperature = "); Serial.print(t); Serial.print(" "); Serial.print((char)176);//shows degrees character Serial.print("C | "); Serial.print("Humidity = "); Serial.print(h); Serial.println(" % "); Serial.println(""); delay(2000); // Delays 2 secods } |
This code initializes the sensor, reads temperature and humidity values, and prints them to the serial monitor every two seconds. Adjustments to the pin number and sensor type may be necessary based on your specific setup.
Remember to open the Serial Monitor in the Arduino IDE (at baud rate 9600) to see the output data.
0 comment
Leave a comment
Passion for robotics

Recent tutorials


Robotics workshop

Polpular tutorials


Making robots

Most commented tutorials


Robotic arm

Categories
Smart Home