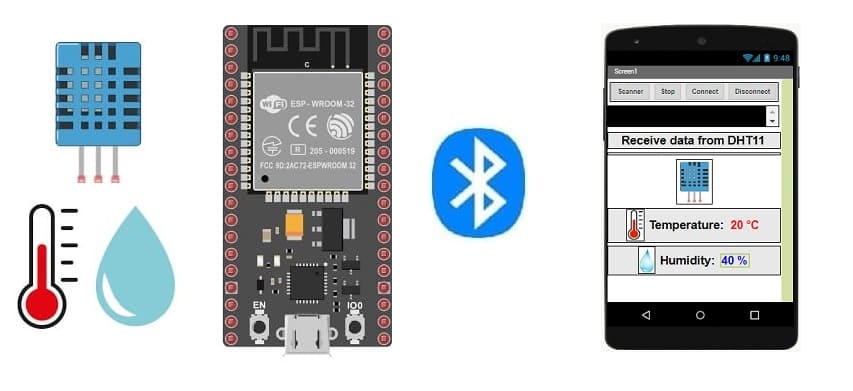
Send temperature and humidity to Smartphone measured by DHT11 connected to ESP32
Tutorial plan
1- How to send temperature and humidity measured by DHT11 sensor to smartphone via Bluetooth ?
2- The components required to use DHT11 sensor by ESP32 board
3- Mounting the ESP32 board with the DHT11 sensor
4- Program with Micropython (for ESP32) and Iventor App (for Smartphone) to display the data measured by the DHT11 sensor on the smartphone
How to send temperature and humidity measured by DHT11 sensor to smartphone via Bluetooth ?
To send temperature and humidity data measured by a DHT11 sensor to a smartphone via Bluetooth using an ESP32 and MicroPython, you can follow these steps:
Programming the ESP32 with MicroPython:
1. Flash your ESP32 with MicroPython using tools like esptool.
2. Writing MicroPython code for the DHT11 sensor
Configuration of the Smartphone App (using App Inventor or similar):
1. Creating the app with App Inventor:
Create a mobile app with App Inventor.
Use the available Bluetooth components to establish a connection with the ESP32.
Add labels or text fields to display the received sensor data.
2. Programming the app:
Use the available blocks in App Inventor to establish a Bluetooth connection with the ESP32.
Receive the data sent by the ESP32 via Bluetooth and display it in your app.
Testing and Debugging:
Upload the MicroPython code to your ESP32.
Install and launch the app created with App Inventor on your smartphone.
Connect to the ESP32 from the app.
Verify that the temperature and humidity data from the DHT11 sensor are received and displayed correctly in the app.
Make sure to adapt the code according to your hardware configuration, especially the GPIO pin used for the DHT11 sensor. Also, ensure that the UUID addresses for Bluetooth communication are correct and compatible between both devices.
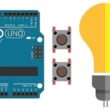
The components required to use DHT11 sensor by ESP32 board
ESP32 board:
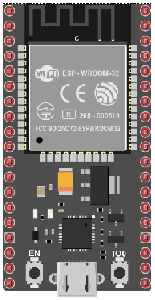
The ESP32 is a powerful microcontroller developed by Espressif Systems. It's renowned for its integrated Wi-Fi and Bluetooth capabilities, making it a popular choice for various IoT (Internet of Things) applications.
DHT11 Temperature and Humidity Sensor
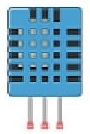
The DHT11 is a basic, low-cost digital temperature and humidity sensor.
Jumper Wires:

For making temporary connections and wiring between components.
Breadboard:

A breadboard is a useful tool for creating temporary electronic circuits. It allows you to connect components without soldering.
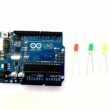
Mounting the ESP32 board with the DHT11 sensor

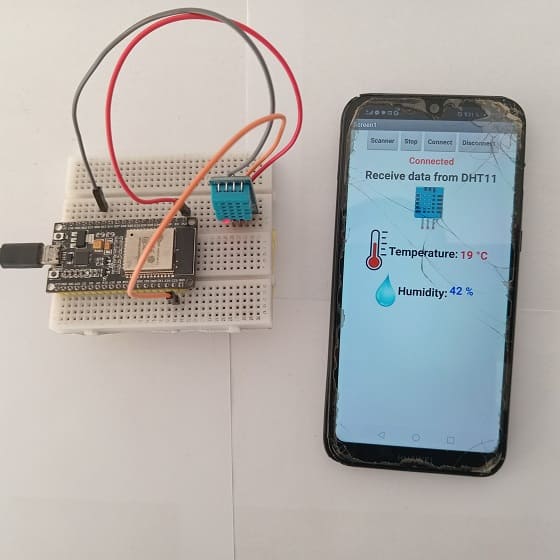
This represents the basic connections between the DHT11 sensor and the ESP32 board:
- Connect the VCC(+) pin of the DHT11 sensor to the 3.3V pin on the ESP32 board.
- Connect the DATA pin of the DHT11 sensor to a digital pin GPIO 23 on the ESP32 board.
- Connect the GND(-) pin of the DHT11 sensor to any ground (GND) pin on the ESP32 board.
Program with Micropython (for ESP32) and Iventor App (for Smartphone) to display the data measured by the DHT11 sensor on the smartphone
To display data measured by a DHT11 sensor, connected to an ESP32, on a smartphone using MicroPython and App Inventor, you can follow these steps:
Programming the ESP32 with MicroPython:
1- Flash your ESP32 with MicroPython using this file esp32-20210902-v1.17.bin.
2- import this two libraries : ble_uart_peripheral.py and ble_advertising.py
3- Writing MicroPython code for the DHT11 sensor:
Here's an example of MicroPython code to read data from the DHT11 sensor and send it via Bluetooth:
|
1 2 3 4 5 6 7 8 9 10 11 12 13 14 15 16 17 18 19 20 21 22 23 24 25 26 27 28 29 30 31 32 33 34 35 36 37 38 39 40 41 42 43 44 45 |
########## DIGITAL MANUFACTURING ########## # PIKACHU Project # Authors: Miguel Angel Guzman # Kadriye Nur Bakirci ########################################### ########## IMPORT REQUIRED LIBRARIES ########## import bluetooth from ble_uart_peripheral import BLEUART from machine import Pin import dht import time # DHT11 sensor configuration p23=Pin(23, Pin.IN) d=dht.DHT11(p23) # Create BLE object ble = bluetooth.BLE() # Open UART session for BLE uart = BLEUART(ble) # Define ISR for an UART input on BLE connection def on_rx(): # Read UART string, AppInventor sends raw bytes uart_in = uart.read() # read the message received from the Smartphone via Bluetooth print("UART IN: ", uart_in.decode()) # display the message received from the Smartphone on the Thonny console # Map ISR to UART read interrupt def env_tx(val_tx): uart.write(str(val_tx) + '\n') print("tx", val_tx) # Map ISR to UART read interrupt uart.irq(handler=on_rx) while True: message=""; d.measure() # Read data from the DHT11 sensor t=d.temperature() # read temperature h=d.humidity() # read l'humidity print('Temperature=', t, 'C') print('Humidity=', h) message=str(t)+" °C" env_tx(message) # send temperature to Smartphone message=str(h)+" %" env_tx(message) # send humdity to Smartphone time.sleep_ms(2000) uart.close() |
Configuration of the Smartphone App (using App Inventor or similar):
1. Creating the application with App Inventor:
Create a mobile app with App Inventor.
Use the available Bluetooth components to establish a connection with the ESP32.
Add labels or text fields to display the received sensor data.
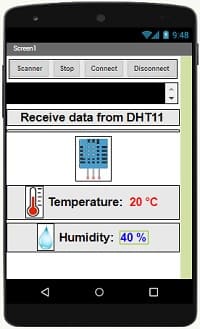
Here is the Designer part of the application with App Inventor :
2. Programming the application with App Inventor:
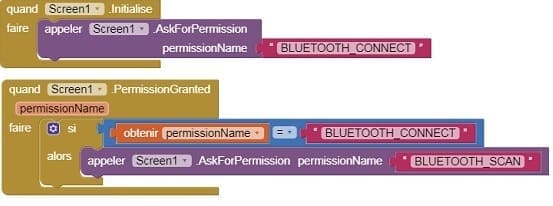
a- Use the available blocks in App Inventor to establish a Bluetooth connection with the ESP32.
- Starting with Android 12, Bluetooth permissions have been enhanced to improve security and user data protection. This is why we must declare the authorizations that your application needs in the AndroidManifest.xml file. For Bluetooth, you'll need to include ACCESS_FINE_LOCATION, BLUETOOTH_SCAN, and possibly BLUETOOTH_CONNECT permissions, depending on the features you're using.
- Use these programming blocks to connect the smartphone to the ESP32 board via Bluetooth:
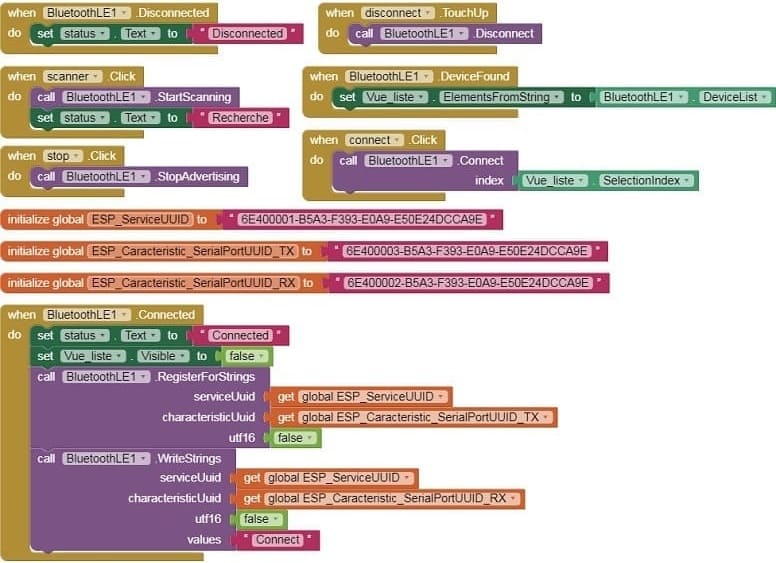
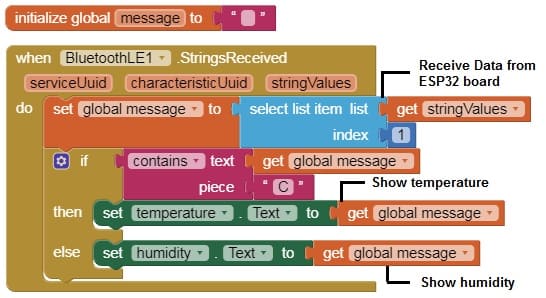
b- Receive the data sent by the ESP32 via Bluetooth and display it in your app.
Testing and Debugging:
1- Upload the MicroPython code to your ESP32.
2- Install and launch the app created with App Inventor on your smartphone.
3- Connect to the ESP32 from the app.
4- Verify that the temperature and humidity data from the DHT11 sensor are received and displayed correctly in the app.
1 comment

Mamour 24-07-2525
Je vous félicite pour vos efforts et pour votre générosité.
Leave a comment
Passion for robotics

Recent tutorials


Robotics workshop

Polpular tutorials


Making robots

Most commented tutorials


Robotic arm

Categories
Smart Home