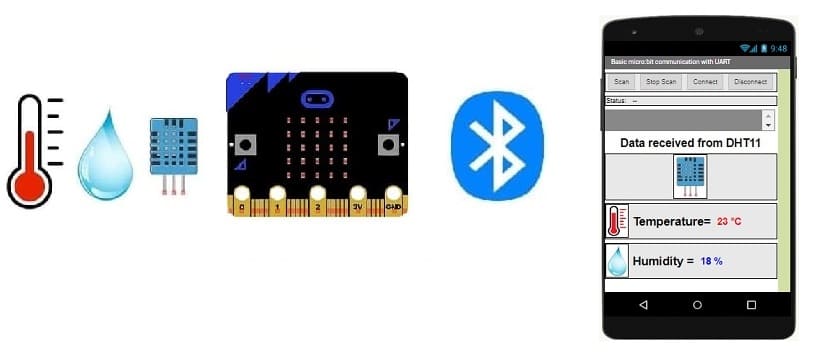
Send data measured by the DHT11 sensor connected to the Micro:bit via Bluetooth
Tutorial plan
1- How does the Micro:bit card receive the data measured by the DHT11 sensor ?
2- How does the Micro:bit card send data to the smartphone via Bluetooth?
3- The components required to use the DHT11 sensor by Micro:bit board
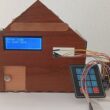
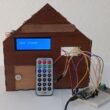
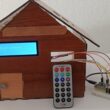
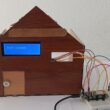
4- Mounting the Micro:bit board with the DHT11 sensor
5- Program the Micro:bit card with Makecode to send temperature and humidity to the smartphone
6- Develop a mobile smartphone application with App Inventor to receive data from the Micro:bit card via Bluetooth
How does the Micro:bit card receive the data measured by the DHT11 sensor ?
The Micro:bit is a small, programmable computer that includes a variety of sensors and features, including a built-in accelerometer and magnetometer. However, it does not have a native input for the DHT11 sensor, which is a sensor commonly used for measuring temperature and humidity.
If you want to connect a DHT11 sensor to a Micro:bit, you would typically use one of the Micro:bit's general-purpose input/output (GPIO) pins. The DHT11 sensor has three pins: VCC (power), GND (ground), and a data pin. You would connect the VCC and GND pins of the DHT11 to the appropriate power and ground pins on the Micro:bit, and the data pin to one of the Micro:bit's GPIO pins.
Once connected, you can use the Micro:bit's programming environment, such as the Microsoft MakeCode editor or MicroPython, to read data from the DHT11 sensor. The DHT11 sensor communicates using a simple one-wire protocol, and you would need to implement the necessary code to read data from the sensor through the connected GPIO pin.
How does the Micro:bit card send data to the smartphone via Bluetooth?
The micro:bit uses Bluetooth Low Energy (BLE) for wireless communication with other devices, such as smartphones. Bluetooth Low Energy is a power-efficient version of the classic Bluetooth technology, and it is well-suited for applications where low power consumption is essential, making it ideal for small devices like the micro:bit.
Here's a brief overview of how the micro:bit sends data to a smartphone via Bluetooth:
1- Bluetooth UART (Universal Asynchronous Receiver-Transmitter):
The micro:bit supports a UART service over Bluetooth. UART is a standard communication protocol used for serial communication between devices.
In the provided MakeCode example, the bluetooth.uartWriteString function is used to send a string over the Bluetooth UART connection.
2- MakeCode Programming:
The MakeCode programming environment for the micro:bit provides a simple and user-friendly way to work with Bluetooth communication.
3- Smartphone App:
On the smartphone side, you can use a Bluetooth terminal app to connect to the micro:bit and receive the data.
A Bluetooth terminal app typically allows you to establish a Bluetooth connection with a device and view the data sent over the UART service.
4- Data Format:
In the provided MakeCode example, the micro:bit sends a string containing the temperature and humidity data when button A is pressed.
The data is formatted as a string using concatenation (+ operator) and includes labels such as "Temperature:" and "Humidity:" to make the information more readable.
To interact with the micro:bit using Bluetooth, you need to ensure that your smartphone has Bluetooth enabled, and you may need to pair/connect to the micro:bit from the Bluetooth settings on your phone. The specific steps may vary depending on the Bluetooth terminal app you are using on your smartphone.
The components required to use the DHT11 sensor by Micro:bit board
To display the temperature and humidity readings from the DHT11 sensor using the Micro:bit, you'll need the following components:
Micro:bit board:

The Micro:bit board is a small, programmable microcontroller board designed for education and beginner-friendly coding projects. It was developed by the BBC, in collaboration with various partners, as a tool to introduce young people to programming and electronics.
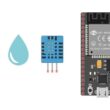
DHT11 Temperature and Humidity Sensor
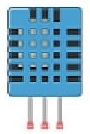
The DHT11 is a basic, low-cost digital temperature and humidity sensor.
Cables with crocodile clip:
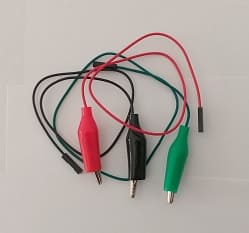
For making temporary connections and wiring between components.
Breadboard:

A breadboard is a useful tool for creating temporary electronic circuits. It allows you to connect components without soldering.
Mounting the Micro:bit board with the DHT11 sensor
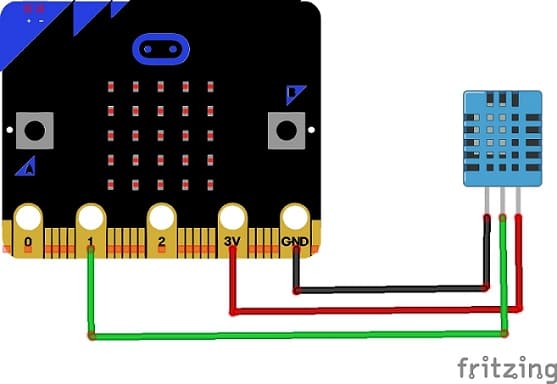
Mounting the DHT11 Sensor:
- connect the VCC pin of the DHT11 Sensor to 3.3V pin of the Micro:bit board
- connect the GND pin of the DHT11 to GND pin of the Micro:bit board
- connect the DATA pin of the DHT11 to P1 pin of the Micro:bit board
Program the Micro:bit card with Makecode to send temperature and humidity to the smartphone
To program the micro:bit using MakeCode to send temperature and humidity data to a smartphone, you can use Bluetooth communication. Here's a simple example using Microsoft MakeCode:
1- Go to the MakeCode website: https://makecode.microbit.org/
2- Create a new project.
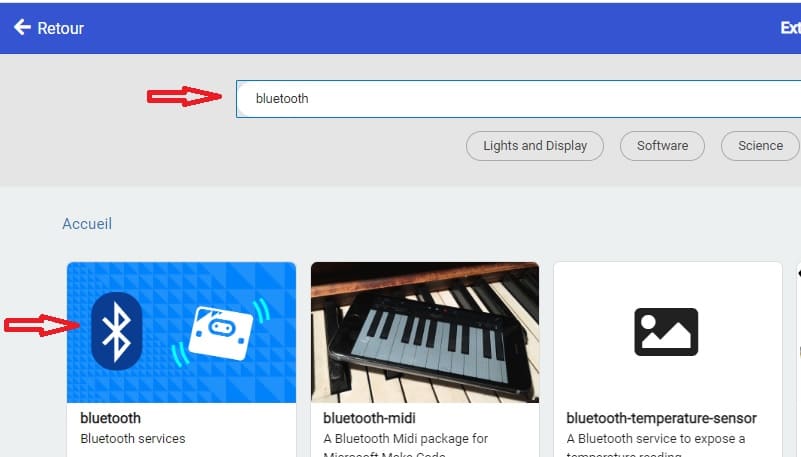
3- Add the Bluetooth extension:
Look for "Extensions" and click on it.

In the search box, type "bluetooth" to find the bluetooth extension.
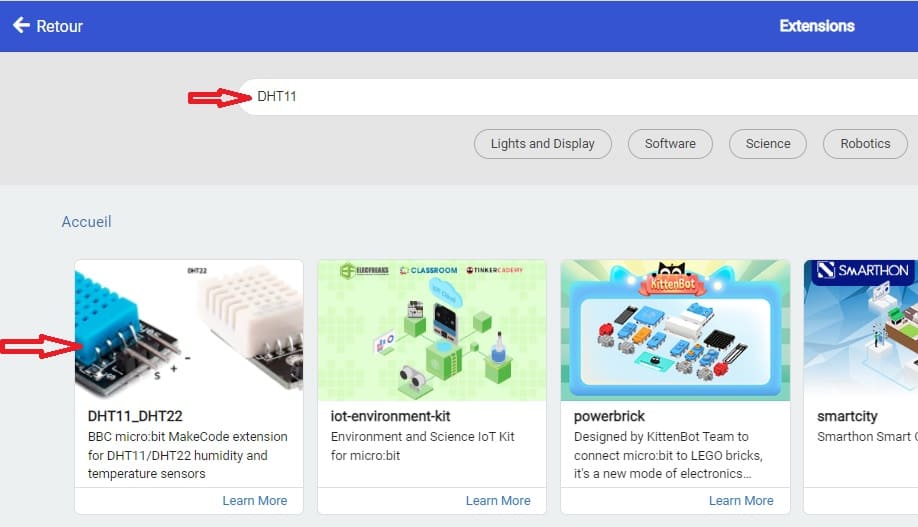
4- Click on the "Extensions" category in the toolbox.
Search for and add the "DHT11" extension to your project.
5- Read Data from DHT11 :
Use a loop to continuously read data from the DHT11 sensor.
Use the "DHT11 read data" block to obtain temperature and humidity values.
Now, let's write the code:
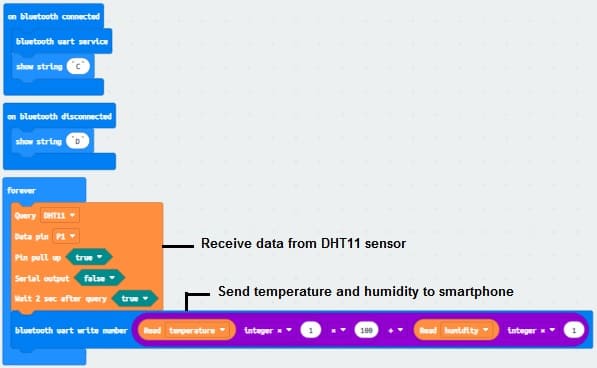
This code continuously reads the temperature and humidity from the built-in sensors and send a number containing the temperature and humidity over Bluetooth.
Develop a mobile smartphone application with App Inventor to receive data from the Micro:bit card via Bluetooth
You can create a simple mobile application using MIT App Inventor to receive data from the micro:bit via Bluetooth. Here's a step-by-step guide:
1. Set Up Your Micro:bit
Ensure that your micro:bit has the Bluetooth UART service enabled. You can use the previously mentioned MakeCode program to send data over Bluetooth. Make sure your micro:bit is powered on and ready.
2. Create a New App in MIT App Inventor
1- Open your web browser and go to MIT App Inventor (http://ai2.appinventor.mit.edu/).
2- Sign in with a Google account.
3- Click on "Start new project" and give your project a name.
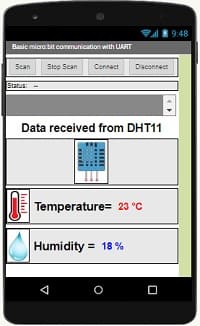
3. Design the App UI
Drag and drop the following components from the Palette onto the Viewer:
- 4 buttons for connecting and disconnecting with Micro:bit card
- 3 images Sprite
- 2 labels for displaying the temperature and humidty sended from Micro:bit card
Arrange them on the screen as needed.
4- Connect to Bluetooth
Design the user interface of your app. You might have two buttons to turn on and turn off the two lamps
Add the components to your app. ![]()
- The "BluetoothLE1" extension indeed refers to a specific extension for MIT App Inventor which allows you to manage Bluetooth Low Energy (BLE) communication in your mobile applications. This extension facilitates the interaction between your App Inventor application and BLE devices, such as sensors, trackers, wearables, etc.
- The "BluetoothClient1" extension in MIT App Inventor allows you to create mobile applications that can connect to Bluetooth devices, such as serial Bluetooth modules (eg HC-06) connected to microcontrollers, Bluetooth audio devices, etc. . This extension facilitates communication with these devices using serial Bluetooth connections.
- The "Microbit_UART1" extension allows you to use UART (Universal Asynchronous Receiver-Transmitter) communication with the Micro:bit card in the MakeCode programming environment.
- The "Notifier1" extension in MIT App Inventor is a component for displaying notifications or messages to the user of an application. It can be used to send pop-up messages, alerts or important information to the user while the application is running. It is a useful component to improve user experience by providing contextual information.
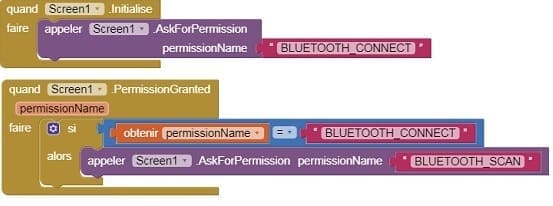
5- Create Blocks for Bluetooth Communication
- Starting with Android 12, Bluetooth permissions have been enhanced to improve security and user data protection. This is why we must declare the authorizations that your application needs in the AndroidManifest.xml file. For Bluetooth, you'll need to include ACCESS_FINE_LOCATION, BLUETOOTH_SCAN, and possibly BLUETOOTH_CONNECT permissions, depending on the features you're using.
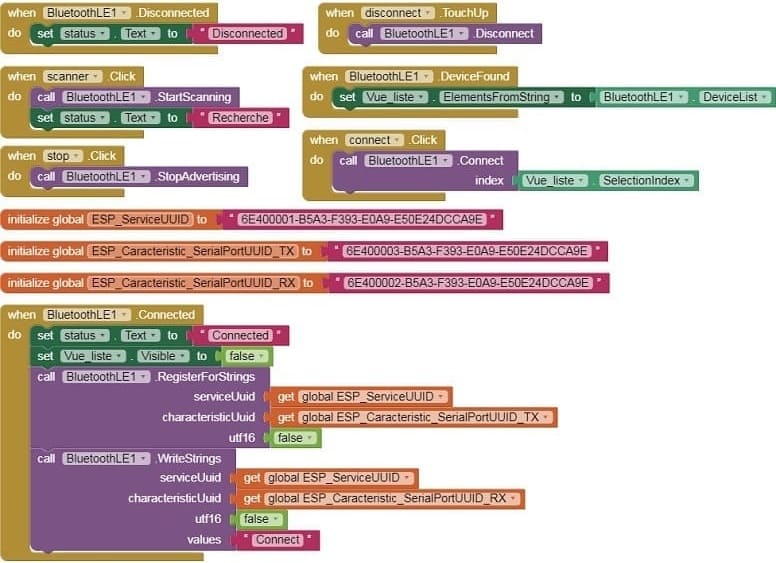
- Use these programming blocks to connect the smartphone to the Micro:bit board via Bluetooth:
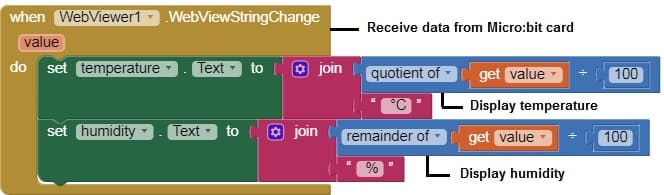
6- Use programming blocks to receive data from Micro:bit card via Bluetooth
Download projectDownload apk file
7. Connect the App to Your Smartphone
Connect your smartphone to the computer, install the MIT AI2 Companion app (available on Google Play for Android or App Store for iOS), and scan the QR code from the MIT App Inventor website to load your app onto the smartphone.
8. Test the App
1- Open the application on your smartphone.
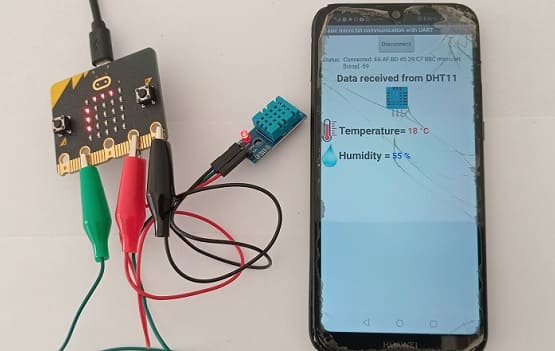
2- Press the "Connect" button to establish a Bluetooth connection with the micro:bit.
3- The labels should display the temperature and humidity received from the micro:bit.
0 comment
Leave a comment
Passion for robotics

Recent tutorials

Robotics workshop

Polpular tutorials


Making robots

Most commented tutorials


Robotic arm

Categories
Smart Home