SD1306 display
Definition of SD1306 display
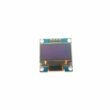
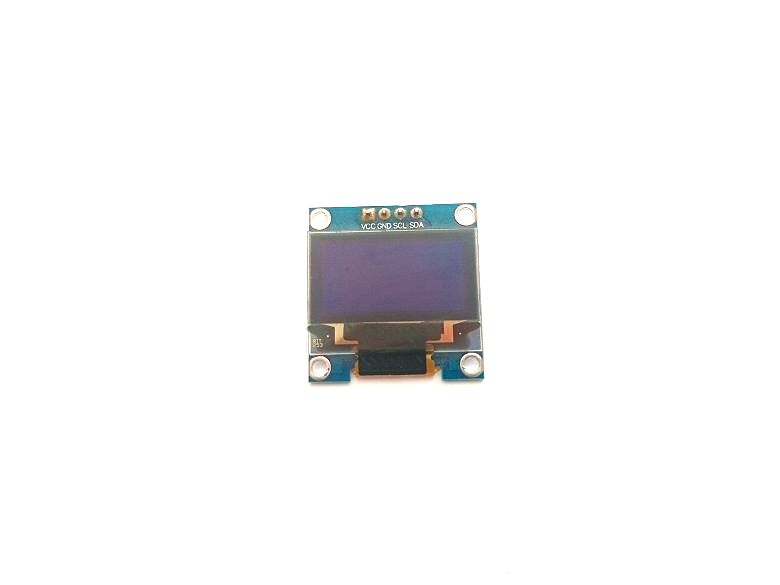
The SSD1306 is a popular OLED display driver chip that can be used to control small monochrome OLED displays. These displays are typically very low power and can be used in a wide variety of applications, including wearable devices, embedded systems, and small handheld devices.
The SSD1306 chip communicates with a microcontroller or other host device using the I2C protocol, making it easy to interface with a wide variety of different hardware platforms. The chip can be configured to display graphics, text, or both, and can be used to create custom user interfaces or display system status information.
To use an SSD1306 display, you will need to connect it to your microcontroller or other host device using the I2C interface. You will also need to write software to communicate with the display and send commands to control its behavior. There are many libraries available for popular microcontroller platforms like Arduino, Raspberry Pi, and STM32, which can simplify the process of interfacing with an SSD1306 display.
Pins of the SD1306 display
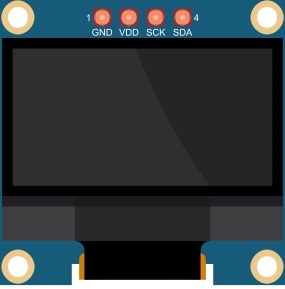
The SSD1306 OLED display module typically has four pins: VCC, GND, SCL, and SDA.
VCC: This pin is the power supply pin, and it is used to supply power to the display module. It typically requires 3.3V or 5V DC power.
GND: This pin is the ground pin, and it is used to provide a ground connection for the display module.
SCL: This pin is the clock signal input for the I2C interface. It is used to synchronize the communication between the display module and the microcontroller or other host device.
SDA: This pin is the data signal input/output for the I2C interface. It is used to transmit data between the display module and the microcontroller or other host device.
Microcontrollers compatible with the SD1306 display
The SSD1306 display driver chip is compatible with a wide variety of microcontrollers, including:
Arduino: Many Arduino boards, including the Arduino Uno, Nano, and Mega, are compatible with the SSD1306 display. There are also many libraries available for the Arduino platform that make it easy to interface with the display.
Raspberry Pi: The Raspberry Pi is also compatible with the SSD1306 display. There are several libraries available for the Raspberry Pi that allow you to control the display using Python.
STM32: STM32 microcontrollers are also compatible with the SSD1306 display. There are several libraries available for the STM32 platform that make it easy to interface with the display.
ESP32: The ESP32 microcontroller is another popular choice for interfacing with the SSD1306 display. There are several libraries available for the ESP32 platform that make it easy to control the display.
PIC: Many PIC microcontrollers are also compatible with the SSD1306 display. There are several libraries available for the PIC platform that make it easy to interface with the display.
These are just a few examples of microcontrollers that are compatible with the SSD1306 display. In general, any microcontroller that supports the I2C protocol and has enough memory and processing power to handle the display driver code can be used with the SSD1306 display.
Programming the SD1306 display with Arduino IDE
To program the SSD1306 display with the Arduino IDE, you will need to follow these basic steps:
1- Connect the SSD1306 display to your Arduino board using the I2C interface. Typically, the SCL pin of the display will be connected to the Arduino's SCL pin, the SDA pin of the display will be connected to the Arduino's SDA pin, the VCC pin of the display will be connected to the Arduino's 5V or 3.3V pin, and the GND pin of the display will be connected to the Arduino's GND pin.
2- Download and install the Adafruit SSD1306 library for the Arduino IDE. This library provides functions for communicating with the SSD1306 display and drawing graphics and text on the display.
3- In your Arduino sketch, include the SSD1306 library and create an instance of the SSD1306 display object. For example:
|
1 2 3 |
#include <Adafruit_SSD1306.h> Adafruit_SSD1306 display(128, 64, &Wire); |
This creates an instance of the SSD1306 display object with a display size of 128x64 pixels, using the Wire library for I2C communication.
4- Initialize the SSD1306 display object in the setup() function of your Arduino sketch. For example:
|
1 2 3 4 |
void setup() { display.begin(SSD1306_SWITCHCAPVCC, 0x3C); display.clearDisplay(); } |
This initializes the display object and clears the display.
5- Use the SSD1306 display object to draw graphics and text on the display in the loop() function of your Arduino sketch. For example:
|
1 2 3 4 5 6 7 8 9 |
void loop() { display.clearDisplay(); display.setTextSize(2); display.setTextColor(SSD1306_WHITE); display.setCursor(0, 0); display.println("Hello, world!"); display.display(); delay(1000); } |
This clears the display, sets the text size to 2, sets the text color to white, sets the cursor position to (0,0), prints "Hello, world!" on the display, displays the contents of the display buffer, and delays for one second before repeating.
These are just the basic steps for programming the SSD1306 display with the Arduino IDE. The Adafruit SSD1306 library provides many other functions for drawing graphics and text, scrolling text, and more, so be sure to consult the library documentation for more information.
Programming the SD1306 display with Micropython
To program the SSD1306 display with Micropython, you will need to follow these basic steps:
1- Connect the SSD1306 display to your Micropython board using the I2C interface. Typically, the SCL pin of the display will be connected to the board's SCL pin, the SDA pin of the display will be connected to the board's SDA pin, the VCC pin of the display will be connected to the board's 3.3V or 5V pin, and the GND pin of the display will be connected to the board's GND pin.
2- Create a new Micropython file in your code editor or IDE and import the necessary modules for I2C communication and the SSD1306 display. For example:
|
1 2 |
from machine import I2C, Pin from ssd1306 import SSD1306_I2C |
This imports the I2C module, the Pin module, and the SSD1306_I2C class from the ssd1306 module.
3- Create an instance of the I2C object and an instance of the SSD1306_I2C object. For example:
|
1 2 |
i2c = I2C(0, scl=Pin(22), sda=Pin(21), freq=400000) display = SSD1306_I2C(128, 64, i2c) |
This creates an instance of the I2C object using the board's SCL and SDA pins, sets the I2C frequency to 400kHz, and creates an instance of the SSD1306_I2C object with a display size of 128x64 pixels.
4- Use the SSD1306 display object to draw graphics and text on the display. For example:
|
1 2 3 |
display.fill(0) display.text("Hello, world!", 0, 0) display.show() |
This clears the display, sets the text cursor position to (0,0), prints "Hello, world!" on the display, and displays the contents of the display buffer.
These are just the basic steps for programming the SSD1306 display with Micropython. The SSD1306_I2C class provides many other functions for drawing graphics and text, scrolling text, and more, so be sure to consult the class documentation for more information.
Role of the SD1306 display in robotic projects
The SSD1306 display can play a significant role in robotic projects as it provides a visual interface that can display important information or feedback to the user or operator. Here are a few examples of how the SSD1306 display can be used in robotic projects:
Displaying sensor data: In many robotic projects, sensors are used to gather information about the environment or the robot itself. The SSD1306 display can be used to display this sensor data in real-time, allowing the user to monitor the robot's behavior and make informed decisions.
Displaying status information: The SSD1306 display can be used to display status information about the robot, such as battery level, motor speed, or communication status. This information can be critical in ensuring the robot is operating safely and effectively.
Displaying instructions or menus: The SSD1306 display can be used to display instructions or menus to the user, allowing them to interact with the robot and control its behavior. For example, the user could use the display to select a mode of operation or adjust the robot's parameters.
Providing feedback: The SSD1306 display can be used to provide feedback to the user, such as confirming that a command was received or indicating that an action has been completed.
0 comment
Leave a comment
Passion for robotics

Recent tutorials


Robotics workshop

Polpular tutorials


Making robots

Most commented tutorials


Robotic arm

Categories
Smart Home