Remotely light up a lamp by remote using Micro:bit
Tutorial plan
1- The components needed to use the KY-032 infrared sensor and a lamp with the Micro:bit board
2- Mounting the Micro:bit board with the KY-032 infrared sensor and a lamp
3- Makecode programming of the Micro:bit board to receive data from the KY-032 infrared sensor and light up a lamp
The components needed to use the KY-032 infrared sensor and the lamp with the Micro:bit board
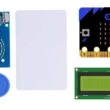
To use the KY-032 infrared sensor and a lamp with the Micro:bit board, you will need a few components and connections. Here's a list of the required items:
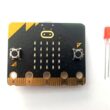
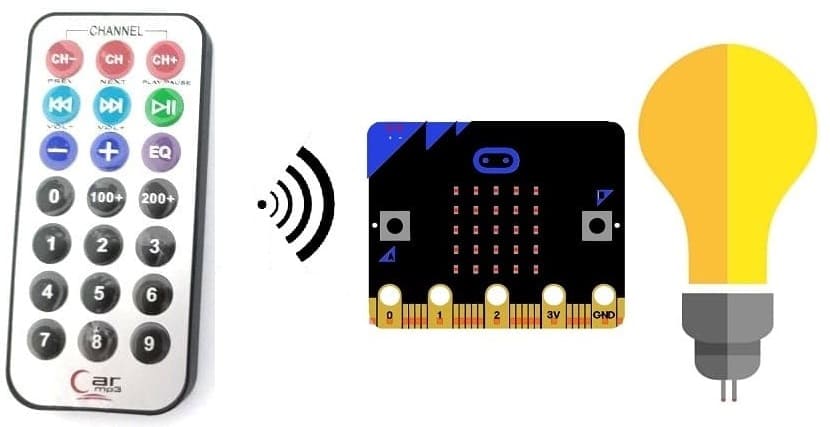
Micro:bit board:

The Micro:bit board is a small, programmable microcontroller board designed for education and beginner-friendly coding projects. It was developed by the BBC, in collaboration with various partners, as a tool to introduce young people to programming and electronics.
The GPIO expansion card for the Micro:bit card

The GPIO expansion board for the Micro:bit board expands the capabilities of the Micro:bit board by adding more input/output (GPIO) pins and additional functionality.
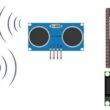
KY-032 Infrared Sensor:
This sensor detects infrared signals and can be used to detect objects or receive signals from a remote control.
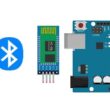
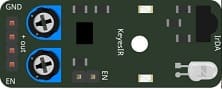
Relay Module:
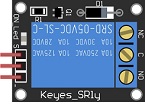
Turning on a 220V lamp using a Micro:bit card requires an intermediate component like a relay to safely interface the low-voltage Micro:bit with the high-voltage lamp.
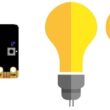
Lamp (220V):

The lamp you want to control, which is rated for 220V. Ensure it's in working condition and safe to use.
Power Supply for the Lamp:

You'll need a power source for the lamp, typically a 220V AC power supply.
Wiring:
Various wires and cables for connecting the components in your circuit.
Breadboard:

A breadboard is a useful tool for creating temporary electronic circuits. It allows you to connect components without soldering.
Jumper wires:

These wires are used to make connections between the Micro:bit, KY-032 sensor, relay, lamp, and breadboard.
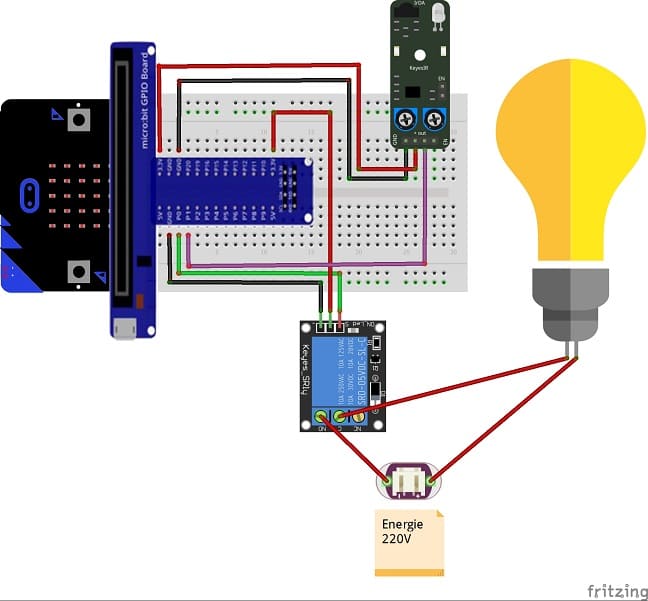
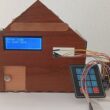
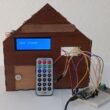
Mounting the Micro:bit board with the KY-032 infrared sensor and a lamp
Once you have these components ready, you can follow these steps to connect and use them with the Micro:bit board:
1- Connect the Relay to the Micro:bit:
- Connect the relay's control pin (S) to pin P0 of Micro:bit board
- Connect the pin (+) of relay to pin 3.3V of Micro:bit board.
- Connect the relay's ground pin (GND) to the Micro:bit's GND.
2- Connect the Lamp and the power supply to the Relay:
- Connect one of the lamp's wires to the relay's common (COM) terminal.
- Connect the phase (live) wire of the power supply to the normally open (NO) terminal of the relay.
- Connect the neutral wire of the power supply directly to the neutral wire of the lamp.
3- Connect the to KY-032 sensor the Micro:bit:
- Connect the VCC (power) pin of the KY-032 sensor to the 3.3V pin on the Micro:bit board.
- Connect the GND (ground) pin of the KY-032 sensor to GND pin on the Micro:bit board.
- Connect the OUT pin of the KY-032 sensor to digital input pin (P1) on the Micro:bit board.
Now, you can write code on the Micro:bit board to control the KY-032 sensor and lamp. You can use the Micro:bit's programming environment, such as Microsoft MakeCode or MicroPython, to program the board and interact with the sensor and lamp.

Makecode programming of the Micro:bit board to receive data from the KY-032 infrared sensor and light up a lamp
To program the Micro:bit board using Microsoft MakeCode to receive data from the KY-032 infrared sensor and light up a lamp based on the received data, you can follow these steps:
1- Open the MakeCode editor for Micro:bit at https://makecode.microbit.org/.
2- Start a new project or open an existing one.
3- Add the necessary packages for the infrared sensor. Click on the "Advanced" category in the toolbox on the left, and then click on "Extensions". 
4- In the search bar, type "https://github.com/osoyoo/OSOYOO_IR_V3/" and click on the "OSYOO-IR-Silvery-Receiver" extension to import it into your project. 
5- Initialize the KY-032 infrared sensor:
- Insert a "on start" block from the "Basic" category to initialize the program when the Micro:bit board starts. 
- Insert the "connect IR receiver at pin P0 and decode OSOYOO" block from the "OSYOO_SilveryIR_V3" category to initialize the KY-032 sensor. Specify the pin to which the sensor is connected (for example, P1). 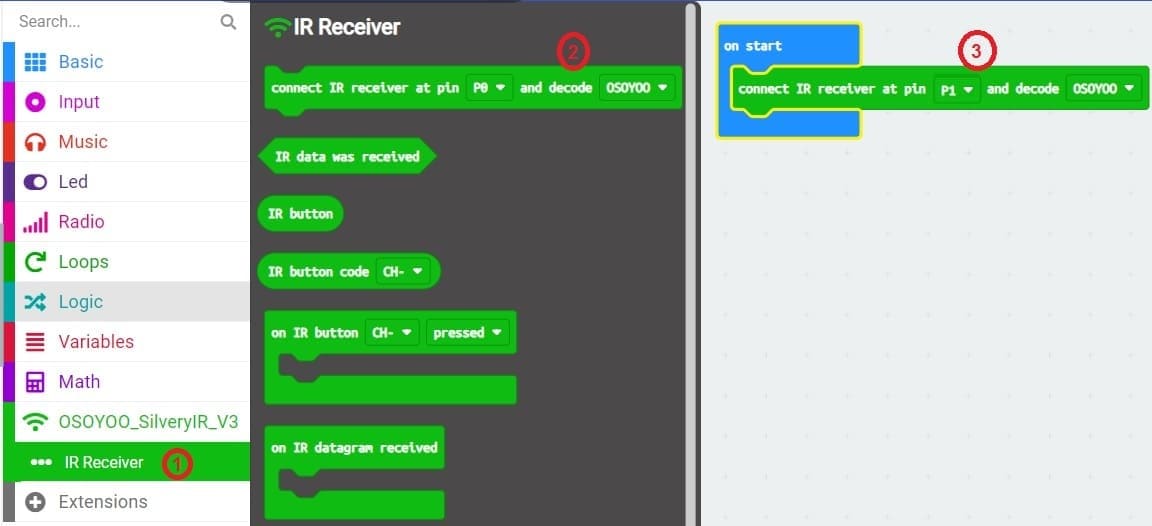
6- Add an event handler for receiving infrared signals :
- Insert an "on IR Button" block from the "OSYOO_SilveryIR_V3" category to trigger an action when the infrared signal is received and specify button on the remote control.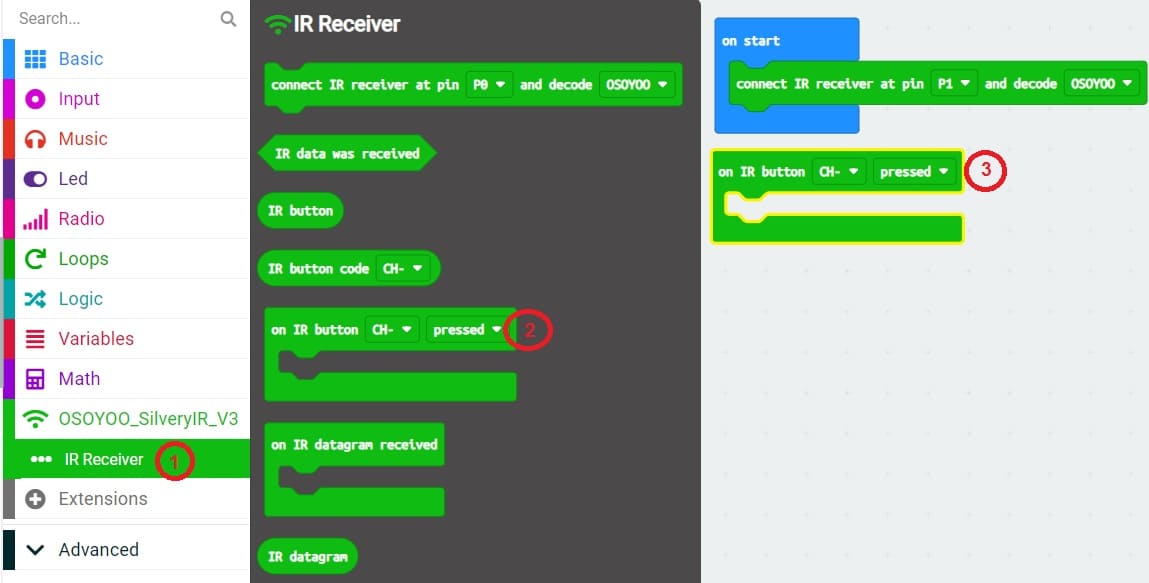
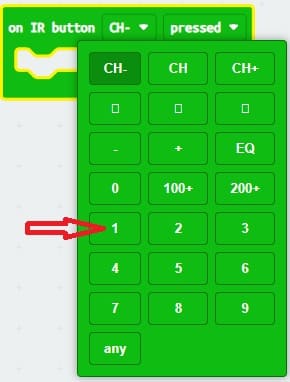
7- Insert a block "digital write pin P0 to 0" inside the block "on IR button 1 pressed".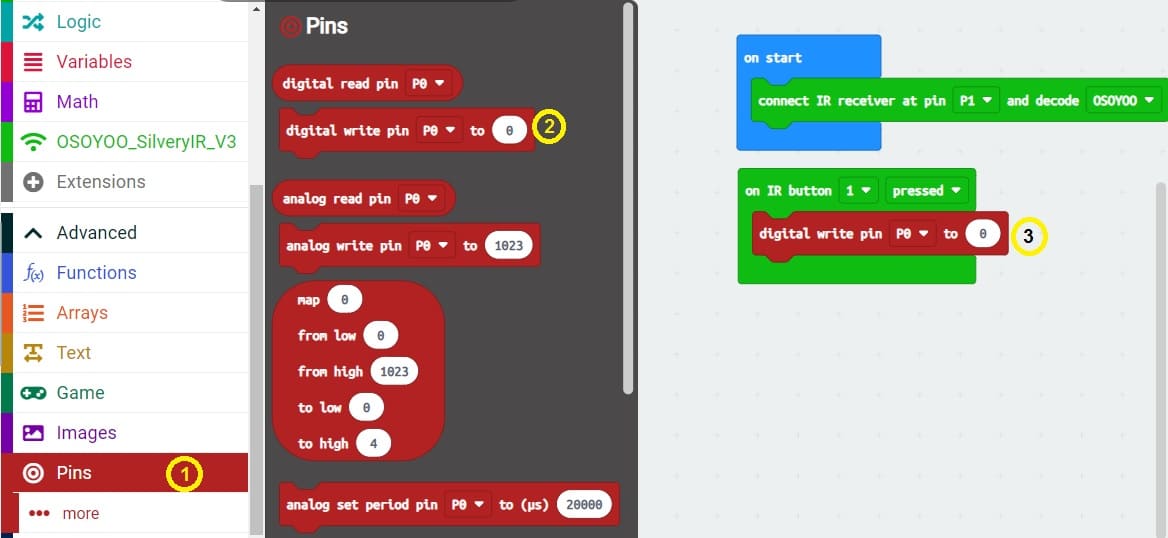
8- Set the state of the block "digital write pin P0 to 0" to "1" to turn on the lamp by pressing the 1 key on the remote control.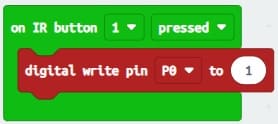
9- repeat steps 6, 7, 8 and 9 to turn off the lamp by pressing button 2 on the remote control.
10- Upload the program to your Micro:bit board by connecting it to your computer via a USB cable and clicking the "Upload" button in the MakeCode editor.
Here is the complete program which allows to turn on and off a lamp by a remote control
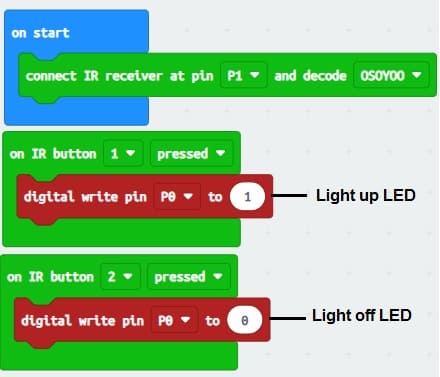
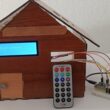
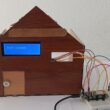
Now, when you press the selected button on your infrared remote control in front of the KY-032 sensor, the lamp connected to the chosen pin will light up. Make sure you understand the pinout and specifications of your KY-032 sensor for proper use with the Micro:bit board.
0 comment
Leave a comment
Passion for robotics

Recent tutorials

Robotics workshop

Polpular tutorials


Making robots

Most commented tutorials


Robotic arm

Categories
Smart Home