Read temperature and humidity measured by DHT11 connected to ESP32
Tutorial plan
1- What is the DHT11 sensor ?
2- How does the ESP32 board receive the temperature and humidity measured by the DHT11 sensor ?
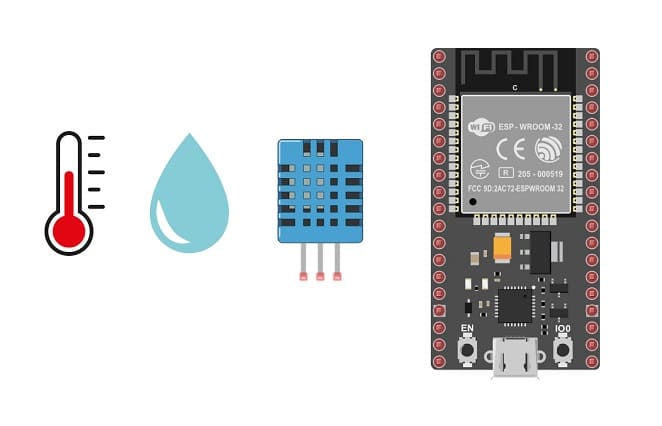
3- The necessary components to use the DHT11 sensor by the ESP32 card
4- ESP32 board wiring diagram with DHT11 sensor
5- Programming the ESP32 board with Micropython to receive the temperature and humidity measured by the DHT11 sensor
What is the DHT11 sensor ?
The DHT11 sensor is a basic, low-cost digital temperature and humidity sensor. It consists of a capacitive humidity sensor and a thermistor to measure the surrounding air's relative humidity and temperature, respectively.
Key features of the DHT11 sensor include:
Humidity Measurement: It measures humidity within a range of 20%-80% with an accuracy of around +/- 5%.
Temperature Measurement: It can measure temperature in a range of 0-50 degrees Celsius with an accuracy of around +/- 2 degrees Celsius.
Digital Output: The sensor provides digital output, making it relatively easy to integrate with various microcontrollers and platforms.
Cost-effective: It's an inexpensive sensor suitable for hobbyist projects, prototyping, and applications where moderate accuracy is sufficient.
However, the DHT11 has some limitations compared to more advanced sensors like the DHT22 or DHT21. Its lower accuracy and limited measurement range might make it less suitable for applications requiring precise environmental monitoring, but it remains a popular choice for basic temperature and humidity sensing due to its affordability and simplicity.
How does the ESP32 board receive the temperature and humidity measured by the DHT11 sensor ?
The ESP32 board can receive temperature and humidity data measured by the DHT11 sensor by following these general steps:
Physical Connection: Connect the DHT11 sensor to the ESP32 board. The DHT11 typically has three pins (power, data signal, and ground). The data signal pin needs to be connected to a digital pin on the ESP32.
Library Usage: Utilize a library compatible with the DHT11 sensor for the ESP32. Libraries like the "DHT" can be used to read data from the sensor.
Code Implementation: Create a MicroPython programm using the DHT sensor library for ESP32 to readthe temperature and humidity measured by the DHT11 sensor.
Uploading the Code: Upload this code to your ESP32 using the Thonnyor or another compatible development environment.
Once uploaded, open the console of Thonny or another compatible development environment to view the temperature and humidity readings from the DHT11 sensor in real-time.
The necessary components to use the DHT11 sensor by the ESP32 card
ESP32 board:
The ESP32 is a powerful microcontroller developed by Espressif Systems. It's renowned for its integrated Wi-Fi and Bluetooth capabilities, making it a popular choice for various IoT (Internet of Things) applications.
DHT11 Temperature and Humidity Sensor
The DHT11 is a basic, low-cost digital temperature and humidity sensor.
Jumper Wires:

For making temporary connections and wiring between components.
Breadboard:

A breadboard is a useful tool for creating temporary electronic circuits. It allows you to connect components without soldering.
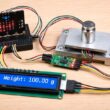
ESP32 board wiring diagram with DHT11 sensor

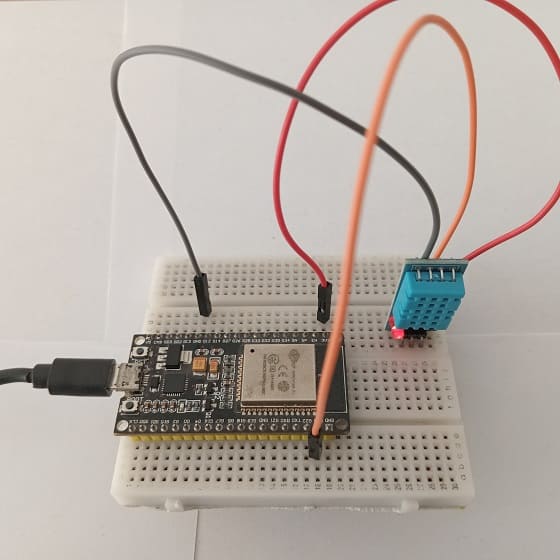
This represents the basic connections between the DHT11 sensor and the ESP32 board:
- Connect the VCC(+) pin of the DHT11 sensor to the 3.3V pin on the ESP32 board.
- Connect the DATA pin of the DHT11 sensor to a digital pin 2 on the ESP32 board.
- Connect the GND(-) pin of the DHT11 sensor to any ground (GND) pin on the ESP32 board.
Programming the ESP32 board with Micropython to receive the temperature and humidity measured by the DHT11 sensor
To receive temperature and humidity readings from a DHT11 sensor using Micropython on an ESP32, you can follow these steps:
1- Flash Micropython onto ESP32: Make sure you have Micropython installed and running on your ESP32. There are various methods to flash Micropython onto ESP32 boards; you can use esptool or other flashing tools.
2- Hardware Connection: Connect the DHT11 sensor to your ESP32. Usually, this involves connecting the data pin of the sensor to a digital pin on the ESP32.
3- Micropython Code: Below is an example code in Micropython to read temperature and humidity from a DHT11 sensor:
|
1 2 3 4 5 6 7 8 9 10 11 12 13 14 15 16 |
from machine import Pin import dht import time # Define the pin to which the DHT11 sensor is connected p23=Pin(23, Pin.IN) # Initialize the DHT11 sensor d=dht.DHT11(p23) while True: d.measure() <span class="hljs-comment"># Read data from the sensor</span> t=d.temperature() # read temperature h=d.humidity # read humidity print('Temperature=', t, ' °C') print('Humdity=', t, ' %') print('******************') time.sleep(1) |
4- Uploading the Code: Use tools like Thonny IDE or ampy to upload this code onto your ESP32.
This code continuously reads temperature and humidity data from the DHT11 sensor and prints it to the REPL (Read-Eval-Print Loop) console in Micropython. You can view these readings by connecting to the REPL via a serial terminal.
0 comment
Leave a comment
Passion for robotics

Recent tutorials


Robotics workshop

Polpular tutorials


Making robots

Most commented tutorials


Robotic arm

Categories
Smart Home