Opening a door with Arduino and push button
Tutorial plan
1- How Open a door with Arduino and push button ?
2- Required Components
3- Circuit Connections of system
4- Arduino program to control the door
How Open a door with Arduino and push button ?
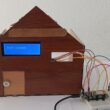
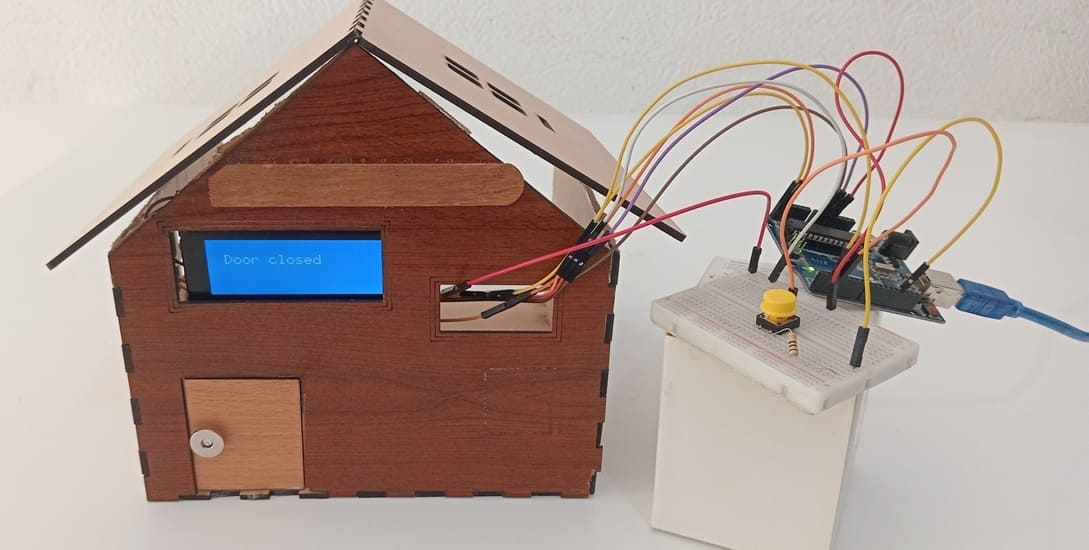
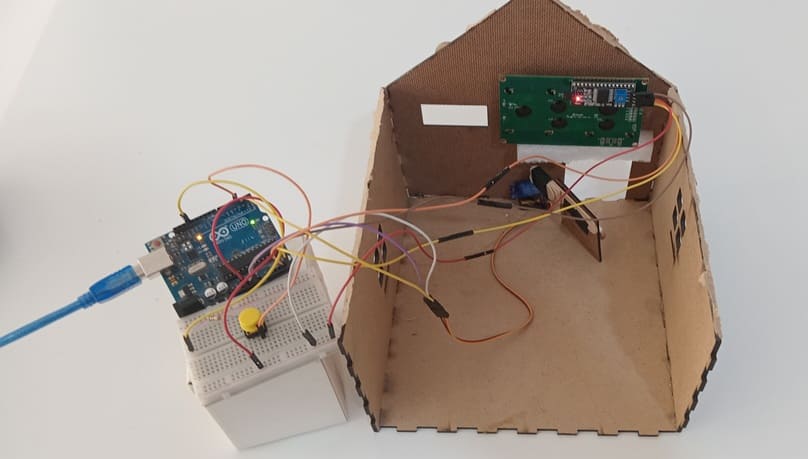
This project involves creating an automatic door opening system using an Arduino, a push button, a servo motor, and an LCD I2C display. The push button acts as a trigger to open or close the door, while the servo motor controls the door’s movement. The LCD display provides user feedback by showing messages like "Door Open" and "Door Closed".
1- System Initialization
- When powered on, the Arduino initializes the LCD display and servo motor.
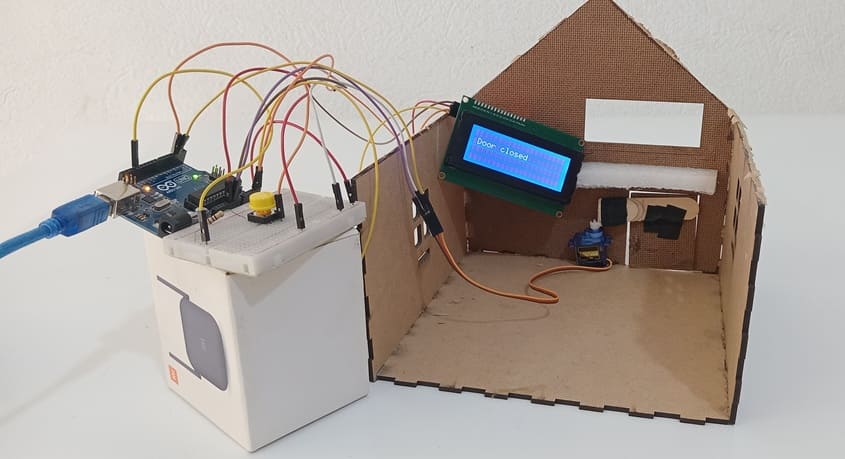
- The LCD displays the message: "Door closed".
- The servo motor is set to 85° (door closed position).
2- Button Press Detection
- The Arduino monitors the push button for a press event.
- When the button is pressed, the Arduino triggers the servo motor to rotate 20° to open the door.
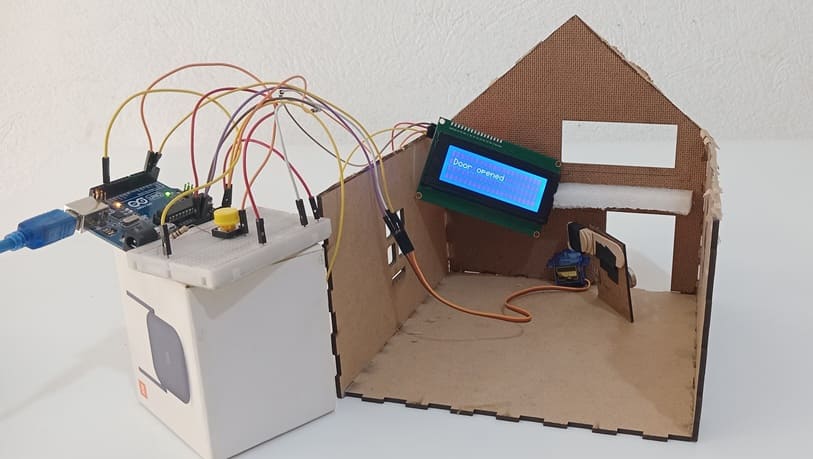
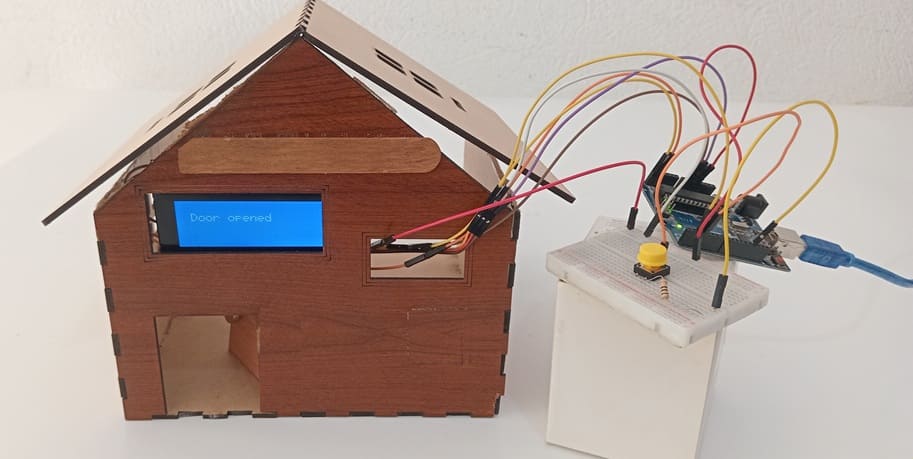
- The LCD updates the message to "Door Opened".
- The system waits for the next button press.
3- Auto Closing the Door
- When the button is pressed again, the servo motor returns to 85° (closing the door).
- The LCD updates to "Door Closed".
- The system waits for the next button press.
Required Components
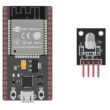
Arduino UNO

The Arduino UNO acts as the main controller of the system. It processes the push button input, controls the servo motor, and updates the LCD display.
Push Button
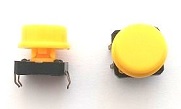
A simple momentary push button is used to trigger the servo motor to open or close the door. When pressed, it sends a signal to the Arduino.
Servo Motor (SG90 or MG995)
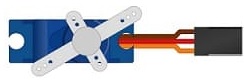
The servo motor is used to rotate the door open or closed. It moves to a specific angle controlled by the Arduino.
Function in the System:
Rotates 20° to open the door.
Rotates back to 85° to close the door.
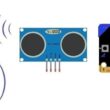
LCD I2C Display (16x2 or 20x4)
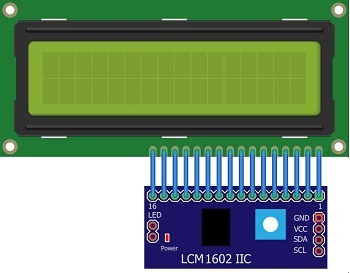
The LCD display provides real-time status updates about the door (e.g., "Door Open", "Door Closed").
10kΩ Resistor (Pull-Down Resistor)
![]()
A 10kΩ resistor is used to stabilize the push button input.
Breadboard

- Provides a convenient wiring interface.
- Connects components like the servo motor, LCD screen, and Arduino UNO.
- Allows power distribution (5V, GND) to different components.
Wires and Jumpers

Ensure proper routing of power, ground, and data signals.
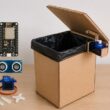
Wooden house prototype
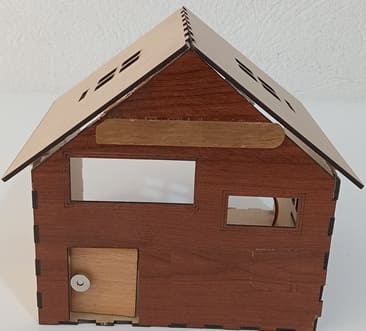
- Represents a real-life house model with a door that opens and closes.
- The servo motor is mounted inside the house, controlling the door movement.
- The LCD screen is attached to the exterior for status display.
Circuit Connections of system
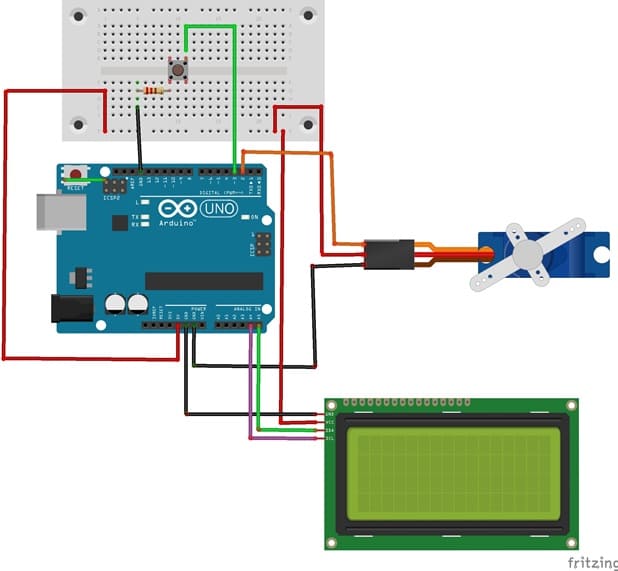
Connection of LCD I2C display to Arduino
LCD I2C Display Pin | Arduino Pin |
GND | GND |
VCC | 5V |
SDA | A4 |
SCL | A5 |
Connection of servo motor to Arduino
Servo motor | Arduino UNO |
Brown wire (-) | GND |
Red wire (+) | 5V |
Yellow wire (Signal) | D2 |
Connection of push button to Arduino
Push button | Arduino UNO |
a leg | D3 |
another leg | GND (via 10kΩ resistor) |
Arduino program to control the door
This code uses the LiquidCrystal_I2C library for the LCD display.
1- Open Arduino IDE.
2- Go to Sketch → Include Library → Manage Libraries.
3- Search for LiquidCrystal_I2C and install it
|
1 2 3 4 5 6 7 8 9 10 11 12 13 14 15 16 17 18 19 20 21 22 23 24 25 26 27 28 29 30 31 32 33 34 35 36 37 38 39 40 41 42 43 44 45 46 47 48 49 50 51 52 53 54 55 56 57 58 59 60 61 62 63 64 |
#include <LiquidCrystal_I2C.h> #include<Servo.h> //include the servo library int button = 3; //pin of the push button LiquidCrystal_I2C lcd(0x27, 40, 4); Servo servo; //create a servo object int position_servo = 85; //initial position of the servo void setup() { // put your setup code here, to run once: servo.attach(2); //pin used by the servo pinMode(button, INPUT_PULLUP); //define push button as input pullup servo.write(85); lcd.init(); lcd.backlight(); lcd.clear(); lcd.setCursor(1, 1); lcd.print("Door closed"); // display "Door closed" on LCD screen } void loop() { // put your main code here, to run repeatedly: if (digitalRead(button) == LOW) { // When the button is pressed if (position_servo==85) { // If the door is closed lcd.clear(); lcd.setCursor(1, 1); lcd.print("The door opens"); // The servo motor opens the door for (int i=85; i>20 ; i--) { servo.write(i); delay(100); } lcd.clear(); lcd.setCursor(1, 1); lcd.print("Door opened"); position_servo=20; // If the door is opened } else { if (position_servo==20) { lcd.clear(); lcd.setCursor(1, 1); lcd.print("The door closes"); // The servo motor closes the door for (int i=20; i<85 ; i++) { servo.write(i); delay(100); } lcd.clear(); lcd.setCursor(1, 1); lcd.print("Door closed"); position_servo=85; } } } } |
How the Arduino code works ?
1- Setup Phase:
- The LCD is initialized with a welcome message.
- The servo is positioned at 85° (closed door position).
- The button is set as an input with a pull-up resistor.
2- Loop Execution:
- The Arduino checks if the button is pressed.
- If pressed, the door opens (20° rotation), and the LCD updates.
- If pressed a second time, the door closes automatically (returns to 85°).
0 comment
Leave a comment
Passion for robotics

Recent tutorials


Robotics workshop

Polpular tutorials


Making robots

Most commented tutorials


Robotic arm

Categories
Smart Home