Measure water level with Arduino and LCD I2C screen
Tutorial Plan
1- Definition of Water measurement
2- How does the Arduino UNO measure water level ?
3- Materials Needed
4- System wiring diagram
5- Arduino program
Definition of Water measurement
Water measurement refers to the process of quantifying various physical and chemical properties of water to monitor its level, flow, quality, or consumption in different applications such as agriculture, industry, environmental science, and household use.
Types of Water Measurement :
1- Water Level Measurement
Determines the height or depth of water in tanks, wells, rivers, or reservoirs.
Common methods: Ultrasonic sensors, Float sensors, Pressure sensors
2- Water Flow Measurement
Measures the rate at which water moves through a pipe or open channel.
Common methods: Flow meters (Hall effect, electromagnetic, turbine sensors)
3- Water Quality Measurement
Analyzes the chemical and physical properties of water to ensure its safety and usability.
Common parameters: pH, turbidity, Total Dissolved Solids (TDS), temperature, dissolved oxygen (DO)
4- Water Volume Measurement
Determines the amount of water consumed or stored over time.
Used in water billing systems, irrigation planning, and industrial applications.
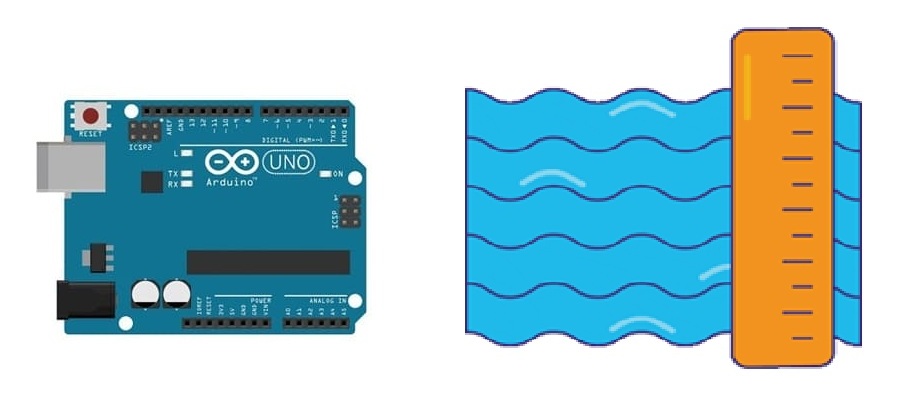
How does the Arduino UNO measure water level ?
An Arduino UNO can measure water levels using conductive sensing (resistive method) with metal probes (or wires) placed at different heights inside a bottle. The water acts as a conductor, and the resistance changes based on the water level. The Arduino detects these changes and displays the water level on an LCD I2C screen.
Working Principle (Conductivity Method)
- Water is a weak conductor of electricity.
- Metal probes (or wires) are placed at different heights inside the bottle.
- When water touches a probe, a small current flows, which Arduino detects as a HIGH signal (1).
- If there is no water, the pin reads a LOW signal (0).
- Using multiple probes at different levels, Arduino determines the water level percentage and displays it on the LCD screen.
Materials Needed
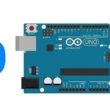
Arduino UNO

The Arduino UNO is the brain of the system. It reads inputs from water level probes, processes the data, and displays the result on the LCD screen.
LCD 16x2 I2C Screen
The LCD I2C screen is used to display the current water level in the bottle. It communicates with the Arduino via the I2C protocol, which allows for easy wiring using only two data pins (SDA and SCL).
Plastic Bottle
The plastic bottle acts as the container for the water being measured. The water level inside the bottle is monitored by the Arduino through probes placed at different heights inside the bottle.
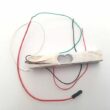
Stripped Wires

Stripped wires act as conductivity sensors. When water comes into contact with the probes, it conducts electricity (albeit weakly). The Arduino detects this change in resistance and determines the water level.
Resistors (10kΩ - 220kΩ)

The resistors are used to stabilize the water level readings. These resistors ensure that the probes do not pick up stray signals or remain in an undefined state when not submerged in water. They pull the input pin to LOW when the probes are not in contact with water.
Breadboard

The Breadboard is used to test electronic circuits without the need for soldering.
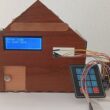
System wiring diagram
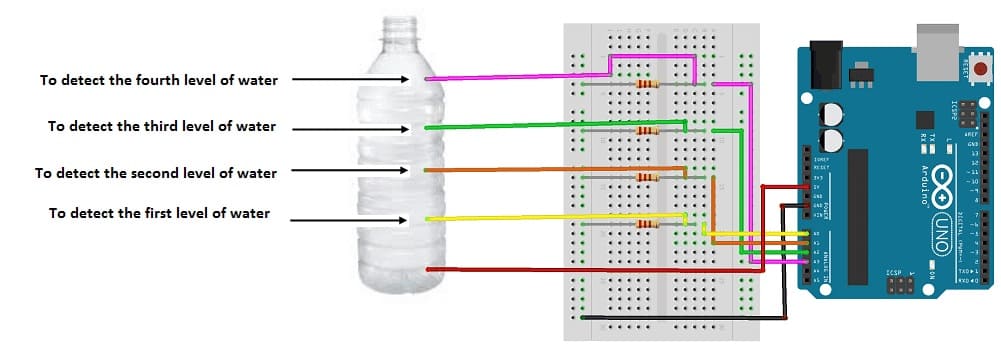
First We drill 5 holes in the bottle. Then we fix a connection wire in each hole.
Then we connect:
- the lowest jumper wire to the 5V pin of the Arduino
- the 2nd wire connecting to pin A0 of the Arduino
- connecting the 3rd wire to pin A1 of the Arduino
- connecting the 4th wire to pin A2 of the Arduino
- the 5th jumper wire to pin A3 of the Arduino
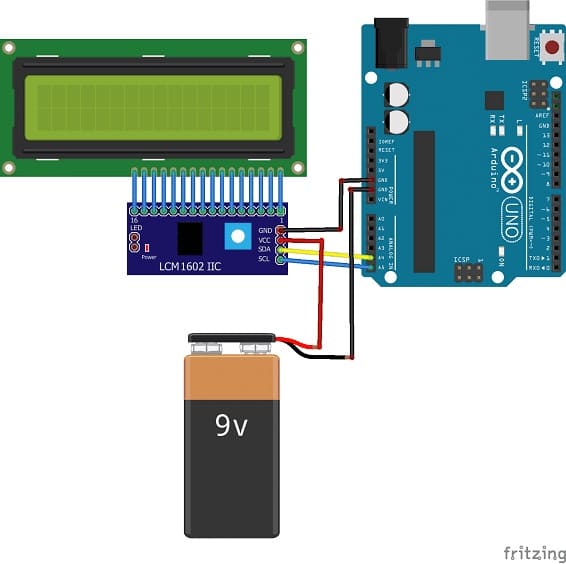
For the I2C LCD 1602 display we connect:
- the SDA pin to the A4 pin of the Arduino
- the SCL pin to the A5 pin of the Arduino
- the GND pin to the GND pin of the Arduino
- the VCC pin to the 5V pin of the Arduino
Arduino program
Here is the Arduino program that detects the level of water filled in the bottle and displays the water level on the LCD display.
You have to download these two libraries: LiquidCrystal_I2C et LcdBarGraphRobojax
|
1 2 3 4 5 6 7 8 9 10 11 12 13 14 15 16 17 18 19 20 21 22 23 24 25 26 27 28 29 30 31 32 33 34 35 36 37 38 39 40 41 42 43 44 45 46 47 48 49 50 51 52 53 54 55 56 57 58 59 60 61 62 63 64 65 66 67 68 69 70 71 72 73 74 75 76 77 78 79 80 81 82 83 84 |
#include <LiquidCrystal_I2C.h> #include <LcdBarGraphRobojax.h> LiquidCrystal_I2C lcd(0x27,20,4); // set the LCD address to 0x27 for a 16 chars and 2 line display LcdBarGraphRobojax lbg(&lcd, 16, 0, 0); int analogA0 = A0; int analogA1 = A1; int analogA2 = A2; int analogA3 = A3; int level_1,level_2,level_3,level_4; //analog readings int niveau=30; int send_0; int send_1; int send_2; int send_3; int send_4; void setup() { lcd.init(); // initialize the lcd // Print a message to the LCD. lcd.backlight(); send_0=0; send_1=0; send_2=0; send_3=0; send_4=0; Serial.begin(9600); pinMode(analogA0,INPUT); pinMode(analogA1,INPUT); pinMode(analogA2,INPUT); pinMode(analogA3,INPUT); } void loop() { // Read the analog interface level_1 = analogRead(analogA0); level_2 = analogRead(analogA1); level_3 = analogRead(analogA2); level_4 = analogRead(analogA3); Serial.print("niveau 1 "); Serial.println(level_1); Serial.print("niveau 2 "); Serial.println(level_2); Serial.print("niveau 3 "); Serial.println(level_3); Serial.print("niveau 4 "); Serial.println(level_4); if ((level_1<niveau)&&(level_2<niveau)&&(level_3<niveau)&&(level_4<niveau)&&(send_0==0)){// Niveau 0 de l'eau lbg.clearLine(1);// clear line 1 to display fresh voltage value lbg.drawValue( 0, 1024); // Display level 0 on the LCD display send_0=1;send_1=0;send_2=0;send_3=0;send_4=0; } if ((level_1>niveau)&&(level_2<niveau)&&(level_3<niveau)&&(level_4<niveau)&&(send_1==0)){ // Niveau 1 de l'eau lbg.clearLine(1);// clear line 1 lbg.drawValue( 256, 1024);//Display level 1 on the LCD display send_0=0;send_1=1;send_2=0;send_3=0;send_4=0; } if ((level_1>niveau)&&(level_2>niveau)&&(level_3<niveau)&&(level_4<niveau)&&(send_2==0)){ // Niveau 2 de l'eau lbg.clearLine(1);// clear line 1 lbg.drawValue( 512, 1024);// Display level 2 on the LCD display send_0=0;send_1=0;send_2=1;send_3=0;send_4=0; } if ((level_1>niveau)&&(level_2>niveau)&&(level_3>niveau)&&(level_4<niveau)&&(send_3==0)){ // Niveau 3 de l'eau lbg.clearLine(1);// clear line 1 lbg.drawValue( 768, 1024);// Display level 3 on the LCD display send_0=0;send_1=0;send_2=0;send_3=1;send_4=0; } if ((level_1>niveau)&&(level_2>niveau)&&(level_3>niveau)&&(level_4>niveau)&&(send_4==0)){ // Niveau 4 de l'eau lbg.clearLine(1);// clear line 1 lbg.drawValue( 1024, 1024);// Display level 4 on the LCD display send_0=0;send_1=0;send_2=0;send_3=0;send_4=1; } lcd.setCursor(2,1); lcd.print("Water level"); delay(100); } |
0 comment
Leave a comment
Passion for robotics

Recent tutorials


Robotics workshop

Polpular tutorials


Making robots

Most commented tutorials


Robotic arm

Categories
Smart Home