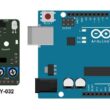
Line follower robot controlled by ESP32 board
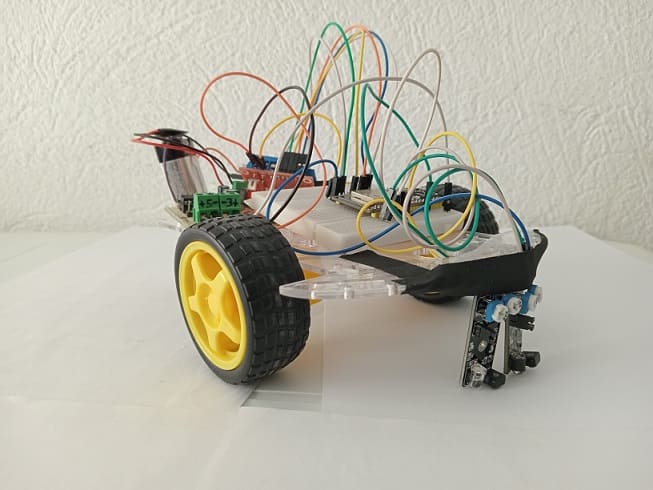
Tutorial plan
1- What is line follower robot ?
2- Operation of line follower robot controlled by the ESP32 card
3- Robot components
4- Mounting of robot
5- Programming the ESP32 board with Micropython
What is Line follower robot ?
A Line Follower Robot is an autonomous robot designed to follow a pre-defined path, typically a line drawn on a surface. The line is usually black on a white surface or white on a black surface. The robot uses sensors to detect the line and adjusts its movement to stay on the path.
How It Works:
Sensors:
Infrared (IR) sensors or light-dependent resistors (LDRs) are commonly used to detect the contrast between the line and the surface.
Sensors are positioned at the base of the robot to continuously scan the surface.
When a sensor detects the line (high contrast), it signals the controller.
Controller:
A microcontroller (like Arduino, Raspberry Pi, or another embedded system) processes the sensor data and makes decisions.
It calculates how the robot needs to move to stay aligned with the line.
Motors and Actuators:
The robot uses DC motors or servo motors to drive its wheels.
Based on the controller's instructions, the motors adjust the robot's direction.
Algorithm:
A basic algorithm uses conditions like "if left sensor detects the line, turn left; if right sensor detects the line, turn right."
Advanced robots may use PID (Proportional-Integral-Derivative) control to achieve smoother and more accurate line-following.
Operation of line follower robot controlled by the ESP32 card
A line follower robot with two wheels controlled by an ESP32 microcontroller, using two KY-032 sensors for line detection and an L298N motor driver module for motor control, follows a line on a surface by continuously sensing and adjusting its movement. Below is a detailed description of the operation:
1. Sensor Working:
Each KY-032 sensor emits infrared light and measures the reflected light:
A dark line absorbs IR light (low reflection, signal = LOW).
A light surface reflects IR light (high reflection, signal = HIGH).
2. Decision Making by ESP32:
The ESP32 reads the sensor data and decides the movement:
Both Sensors Detect the Line (L=LOW, R=LOW): The robot moves forward.
Left Sensor Detects the Line (L=LOW, R=HIGH): The robot turns left to align itself back to the line.
Right Sensor Detects the Line (L=HIGH, R=LOW): The robot turns right to align itself back to the line.
Both Sensors Off the Line (L=HIGH, R=HIGH): The robot stops or searches for the line by rotating slightly.
3. Motor Control via L298N:
The L298N receives signals from the ESP32 to adjust motor directions and speed:
Forward: Both motors move forward.
Left Turn: Reduce/stop the right motor, keep the left motor moving.
Right Turn: Reduce/stop the left motor, keep the right motor moving.
Stop: Stop both motors.
Robot components
ESP32 Microcontroller:
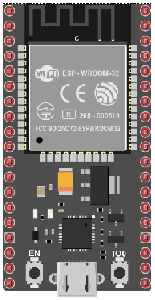
Acts as the brain of the robot.
Processes the input from the sensors and generates motor control signals.
KY-032 Sensors (Infrared Obstacle Sensors):

Used for detecting the line by differentiating between the line and the surface based on IR reflection.
Positioned on the front of the robot:
Left Sensor (L): Detects the left side of the line.
Right Sensor (R): Detects the right side of the line.
L298N Motor Driver Module:
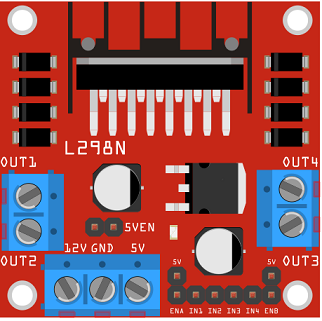
Controls two DC motors connected to the robot's wheels.
Allows bidirectional control of the motors (forward, backward, turn left/right).
DC Motors:
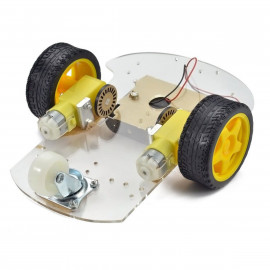
Provide movement for the robot.
Adjust speeds or directions based on signals from the L298N module.
Power Supply:
Batteries power the ESP32, motor driver, and motors .
Mounting of robot
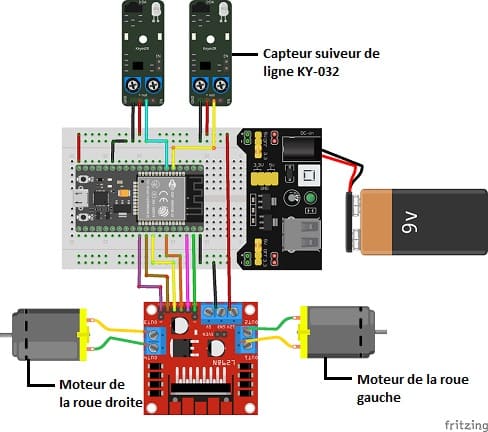
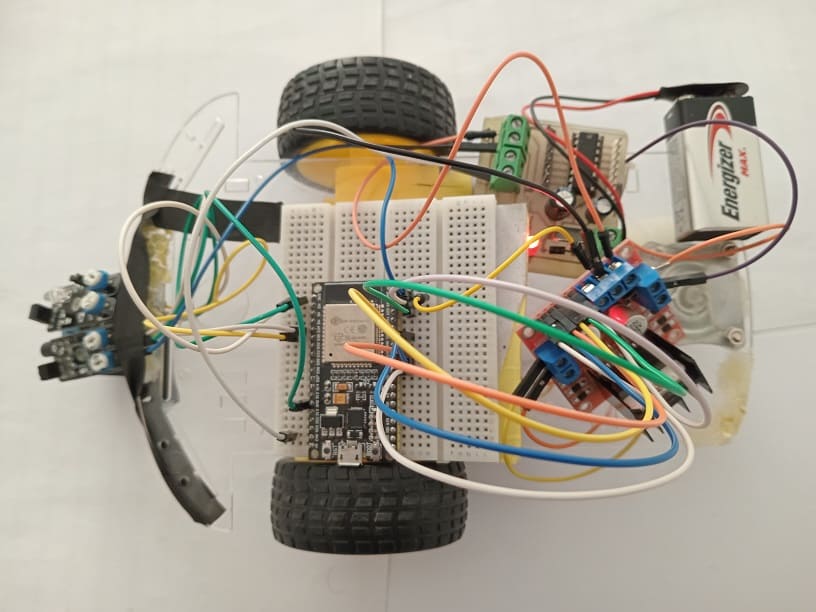
KY-032 Sensors to ESP32:
VCC → 3.3V from ESP32.
GND → GND of ESP32.
OUT (Left Sensor) → GPIO pin D25.
OUT (Right Sensor) → GPIO pin D26.
ESP32 to L298N:
IN1 (L298N) → GPIO pin D4 (Left motor direction control).
IN2 (L298N) → GPIO pin D5 (Left motor direction control).
IN3 (L298N) → GPIO pin D18 (Right motor direction control).
IN4 (L298N) → GPIO pin D19 (Right motor direction control).
ENA (L298N) → PWM-capable pin D32 (Left motor speed control).
ENB (L298N) → PWM-capable pin D33 (Right motor speed control).
Motors to L298N:
OUT1, OUT2 → Left motor terminals.
OUT3, OUT4 → Right motor terminals.
Power Supply:
ESP32: Powered via USB or a battery (e.g., 3.7V LiPo).
L298N: Powered by a 6–12V external battery to drive the motors (connect to the VIN and GND terminals on the L298N).
Programming the ESP32 board with Micropython
The ESP32 runs a program to process the sensor data and control the motors. Here's an example code:
You need to import DCMotor.py library to control the two motors.
|
1 2 3 4 5 6 7 8 9 10 11 12 13 14 15 16 17 18 19 20 21 22 23 24 25 26 27 28 29 30 31 32 33 34 35 36 37 38 39 40 |
from machine import Pin, ADC , PWM from time import sleep from DCMotor import DCMotor line1 = ADC(Pin(34)) line2 = ADC(Pin(35)) frequency = 15000 pin1 = Pin(22, Pin.OUT) pin2 = Pin(21, Pin.OUT) pin3 = Pin(19, Pin.OUT) pin4 = Pin(18, Pin.OUT) enable = PWM(Pin(23), frequency) enable1 = PWM(Pin(5), frequency) dc_motor = DCMotor(pin1, pin2, enable) dc_motor = DCMotor(pin1, pin2, enable, 350, 1023) dc_motor1 = DCMotor(pin3, pin4, enable1) dc_motor1 = DCMotor(pin3, pin4, enable1, 350, 1023) while True: line1_value = line1.read() line2_value = line2.read() print('motor1=',line1_value) print('motor2=',line2_value) if (line1_value < 1000) : dc_motor.forward(10) # Turn <strong>right</strong> dc_motor1.forward(90) if (line2_value < 1000) : dc_motor1.forward(10) # Turn <strong>left</strong> dc_motor.forward(90) if (line1_value > 1000) and (line2_value > 1000) : dc_motor.forward(75) # Move <strong>forward</strong> dc_motor1.forward(75) sleep(0.1) dc_motor.forward(10) dc_motor1.forward(10) sleep(0.2) if (line1_value < 1000) and (line2_value < 1000) : dc_motor.stop() dc_motor1.stop() |
Operating Principles
1. Sensor Logic:
The two KY-032 sensors are positioned at the front of the robot, close to the ground.
Their outputs are read by the ESP32:
Left Sensor (L) monitors the left side of the line.
Right Sensor (R) monitors the right side of the line.
The sensor values guide the robot's movement based on the following conditions:
(line1_value > 1000) and (line2_value > 1000): Both sensors on the line → Move forward.
(line2_value < 1000): Left sensor on the line, right sensor off → Turn left.
(line1_value < 1000): Right sensor on the line, left sensor off → Turn right.
(line1_value > 1000) and (line2_value > 1000) : Both sensors off the line → Stop .
2. Motor Control via L298N:
The ESP32 sends control signals to the L298N to adjust the direction and speed of the motors:
Move Forward: Both motors rotate forward.
Turn Left: Left motor slows down or stops, right motor keeps moving forward.
Turn Right: Right motor slows down or stops, left motor keeps moving forward.
Stop: Both motors stop.
