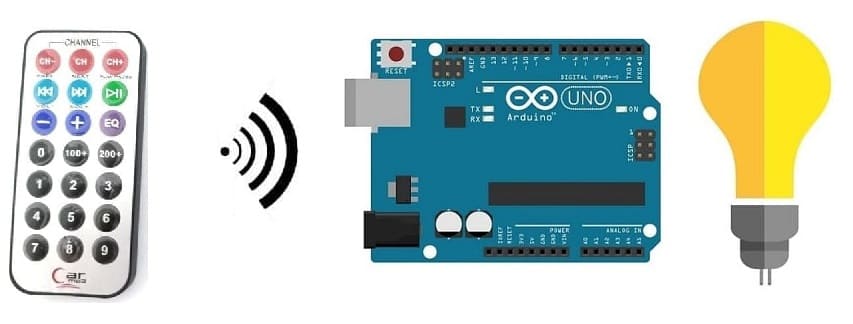
Light up a lamp connected to Arduino UNO by remote control
Tutorial plan
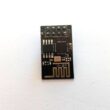
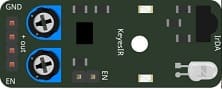
1- Introducing the KY-032 Infrared Sensor
2- How to receive the Arduino UNO an infrared signal from the remote control using the KY-032 sensor?
3- The components needed to use the KY-032 infrared sensor, a lamp and a relay with the Arduino UNO
4- Mounting the Arduino UNO with the KY-032 infrared sensor, a lamp and a relay
5- Programming of the Arduino UNO to receive data from the KY-032 infrared sensor and light up a lamp
Introducing the KY-032 Infrared Sensor
The KY-032 Infrared Sensor is a module that is commonly used in electronics and robotics projects for detecting the presence of infrared signals. It is also known as an infrared obstacle avoidance sensor module. The module consists of an infrared emitter (LED) and an infrared receiver (phototransistor) placed side by side.
Here are some key features and characteristics of the KY-032 Infrared Sensor:
1- Detection Method: The sensor module detects infrared light by emitting a modulated infrared signal and measuring the reflection. When an object is present in front of the module, the infrared light emitted by the LED bounces off the object and is detected by the phototransistor.
2- Operating Voltage: The KY-032 module typically operates at a voltage range of 3.3V to 5V, making it compatible with most microcontrollers and development boards.
3- Digital Output: The module provides a digital output that can be easily interfaced with microcontrollers or other digital circuits. It produces a HIGH (logic 1) output when no obstacle is detected and a LOW (logic 0) output when an obstacle is detected within its detection range.
4- Adjustable Detection Range: The detection range of the KY-032 sensor can be adjusted using a potentiometer on the module. This allows you to fine-tune the sensitivity of the sensor according to your specific requirements.
5- Applications: The KY-032 Infrared Sensor can be used in various applications, including obstacle detection and avoidance in robotics, line following robots, proximity sensing, object detection, and security systems.
When using the KY-032 Infrared Sensor, it's important to keep in mind that it primarily detects the presence of objects based on their reflective properties rather than their distance. The effectiveness of the sensor can be affected by factors such as ambient light and the reflective properties of the objects being detected.
How to receive the Arduino UNO board an infrared signal from the remote control using the KY-032 sensor?
To receive an infrared signal from a remote control using the KY-032 sensor and the Arduino UNO board, you can follow these steps:
1- Connect the KY-032 sensor to the Arduino UNO board. The KY-032 sensor typically has three pins: VCC, GND, and OUT.
- Connect the VCC pin of the KY-032 sensor to the 5V pin on the Arduino UNO board.
- Connect the GND pin of the KY-032 sensor to the GND pin on the Arduino UNO board.
- Connect the OUT pin of the KY-032 sensor to a digital pin on the Arduino UNO board, such as pin 5.
2- Download and install the IRremote library in your Arduino development environment. This library will enable you to receive and decode infrared signals.
- Open the Arduino IDE on your computer.
- Go to "Sketch" -> "Include Library" -> "Manage Libraries".
- Search for "IRremote" in the search box.
- Select the "IRremote" library by shirriff.
- Click "Install" to install the library.
3- In the Arduino IDE, create a new sketch and use the following code as a starting point:
|
1 2 3 4 5 6 7 8 9 10 11 12 13 14 15 16 17 18 19 20 21 22 |
#include <IRremote.h> int RECV_PIN = 2; // Use the same pin that you connected to the OUT pin of the KY-032 sensor IRrecv irrecv(RECV_PIN); decode_results results; void setup() { Serial.begin(9600); irrecv.enableIRIn(); // Enable infrared reception } void loop() { if (irrecv.decode(&results)) { unsigned long value = results.value; Serial.println(value, HEX); // Print the received infrared code in hexadecimal format irrecv.resume(); // Prepare the sensor to receive the next infrared signal } } |
4- Upload the sketch to the Arduino UNO board.
Now, when you press a button on your infrared remote control, the corresponding infrared code will be printed in the Serial Monitor of the Arduino IDE at a baud rate of 9600.
The components needed to use the KY-032 infrared sensor, a lamp and a relay with the Arduino UNO
To use the KY-032 infrared sensor, a lamp and a relay with the Arduin UNO, you will need a few components and connections. Here's a list of the required items:
Arduino UNO board:

The Arduino UNO board is a popular microcontroller board based on the ATmega328P microcontroller. It is one of the most commonly used Arduino boards and provides a versatile platform for creating interactive electronic projects.
The Arduino UNO board is suitable for beginners and experienced users alike, offering a flexible and accessible platform for prototyping and building various electronic projects, from simple LED blinking to complex robotics and home automation systems.
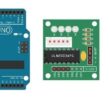
KY-032 Infrared Sensor:
This sensor detects infrared signals and can be used to detect objects or receive signals from a remote control.
Relay Module:
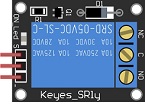
A relay module is an electronic device used to control high-power circuits with low-power signals. It consists of a relay, which is essentially an electromagnetically operated switch, and typically includes additional components like transistors, diodes, and optocouplers for protection and isolation.
You'll need a relay module that is compatible with the Arduino UNO and can switch the high-voltage lamp. Ensure it's rated for the voltage and current required for your lamp.
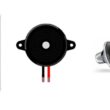
Lamp (220V):

The lamp you want to control, which is rated for 220V. Ensure it's in working condition and safe to use.
Power Supply for the Lamp:

You'll need a power source for the lamp, typically a 220V AC power supply.
Wiring:
Various wires and cables for connecting the components in your circuit.
Breadboard:

A breadboard is a prototyping board that allows you to build circuits without soldering. It provides a convenient way to connect the components together.
Jumper Wires:

You'll need jumper wires to make connections between the Arduino UNO, lamp, relay, and breadboard. Ensure you have male-to-male jumper wires or a mix of male-to-male and male-to-female wires, depending on your specific needs.
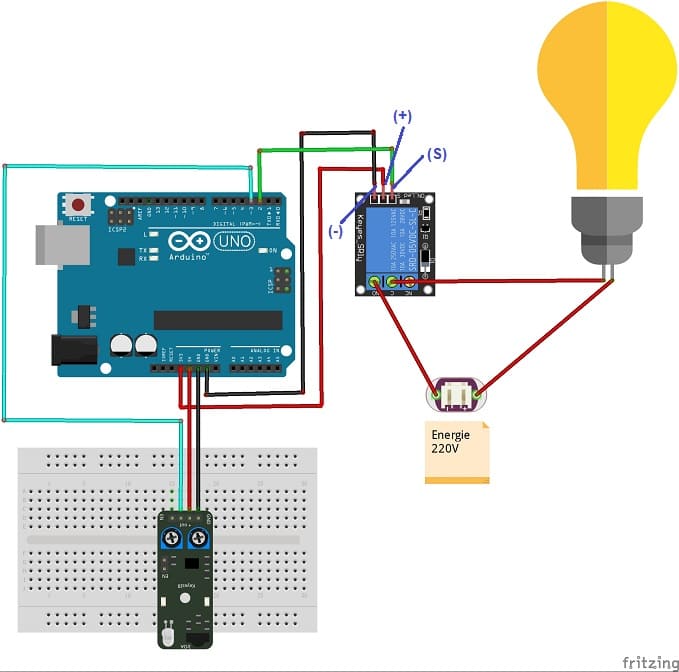
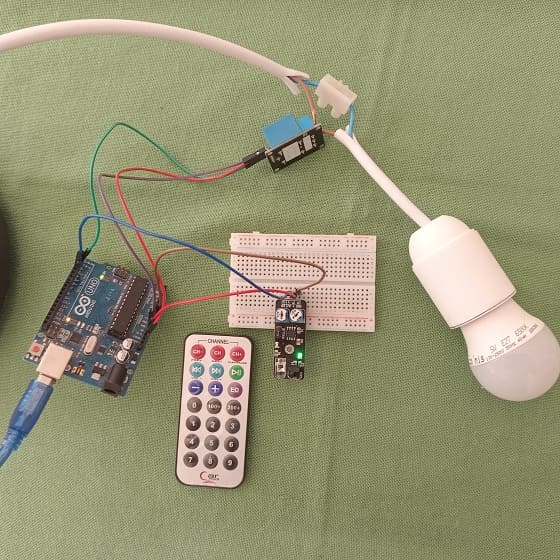
Mounting the Arduino UNO with the KY-032 infrared sensor, a lamp and a relay
To mount the Arduino UNO board with the KY-032 infrared sensor, a relay and a lamp, you can follow these steps:
1- Connect the KY-032 infrared sensor to the Arduino UNO board:
- Connect the VCC pin of the KY-032 sensor to the 5V pin on the Arduino UNO board.
- Connect the GND pin of the KY-032 sensor to the GND pin on the Arduino UNO board.
- Connect the OUT pin of the KY-032 sensor to a digital pin 3 on the Arduino UNO board.
2- Connect the Relay to the Arduino UNO:
- Connect the relay's control pin (S) to pin 2 of Arduino UNO board.
- Connect the pin (+) of relay to pin 3.3V of Arduino UNO board.
- Connect the relay's ground pin (GND) to the Arduino UNO's GND.
3- Connect the Lamp and the power supply to the Relay:
- Connect one of the lamp's wires to the relay's common (COM) terminal.
- Connect the phase (live) wire of the power supply to the normally open (NO) terminal of the relay.
- Connect the neutral wire of the power supply directly to the neutral wire of the lamp.
Arduino UNO programming of the Arduino UNO to receive data from the KY-032 infrared sensor and light up a lamp
To program the Arduino UNO board to receive data from the KY-032 infrared sensor and light up a lamp, use the following code as a starting point for your Arduino sketch:
|
1 2 3 4 5 6 7 8 9 10 11 12 13 14 15 16 17 18 19 20 21 22 23 24 25 26 27 28 29 30 31 32 33 34 |
#include <IRremote.h> int IR_RECEIVE_PIN = 3; // Use the same pin that you connected to the OUT pin of the KY-032 sensor int relay_PIN = 2; // Use the pin to connect arduino to relay IRrecv irrecv(IR_RECEIVE_PIN); decode_results results; void setup() { Serial.begin(9600); pinMode(relay_PIN, OUTPUT); irrecv.enableIRIn(); // Enable infrared reception } void loop() { if (irrecv.decode(&results)) { unsigned long value = results.value; Serial.println(value, HEX); // Print the received infrared code in hexadecimal format irrecv.resume(); // Prepare the sensor to receive the next infrared signal // Example: Turn on the lamp when a specific infrared code is received if (value == 0xFF30CF) // press button 1 on your remote control { digitalWrite(relay_PIN, HIGH); // Turn on the lamp by the relay } if (value == 0xFF18E7) // press button 2 on your remote control { digitalWrite(relay_PIN, LOW); // Turn off the lamp by the relay } } } |
Upload the sketch to your Arduino UNO board.
0 comment
Leave a comment
Passion for robotics

Recent tutorials


Robotics workshop

Polpular tutorials


Making robots

Most commented tutorials


Robotic arm

Categories
Smart Home