ESP32 robot controlled by Wifi
Tutorial plan
1- Description of ESP32 robot controlled by wifi
2- Components of the robot
3- Mounting of the robot
4- Micropython program for ESP32 card
Description of ESP32 robot controlled by wifi
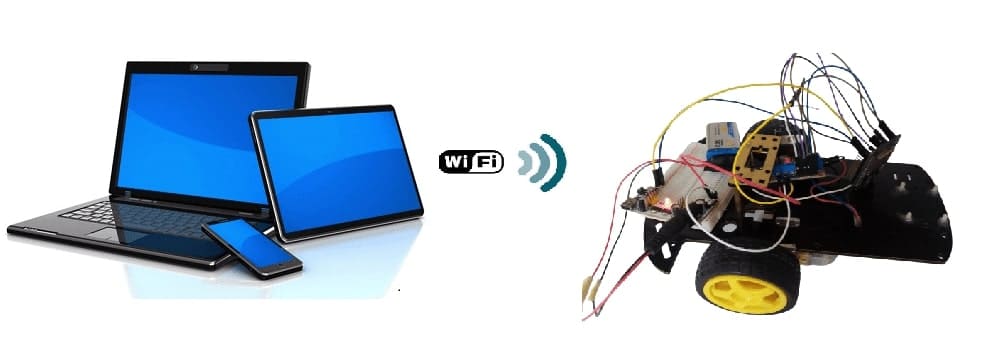
An ESP32-based WiFi-controlled robot using a Two-Wheel Car Kit and an L298N motor driver module is a great project for remote-controlled robotics.
1- The ESP32 board acts as the brain of the robot, controlling the movement of the motors based on WiFi commands.
2- The L298N motor driver receives signals from the ESP32 and regulates the speed and direction of the two DC motors.
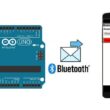
3- The robot is controlled over WiFi, either via a web interface hosted on the ESP32 or through a mobile app (such as MIT App Inventor).
4- The ESP32 reads user commands from the web server and accordingly controls the motor driver to move forward, backward, left, or right.
Components of the robot
ESP32 Development Board
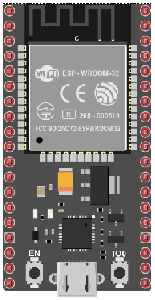
The ESP32 microcontroller that provides WiFi connectivity and controls the motors.
Two-Wheel Car Kit
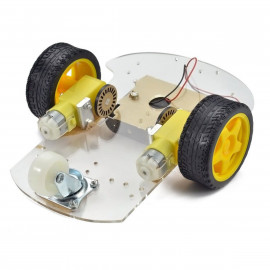
Two-Wheel Car Kit includes a chassis, two DC motors with wheels, and a caster wheel for balance.
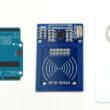
L298N Motor Driver Module
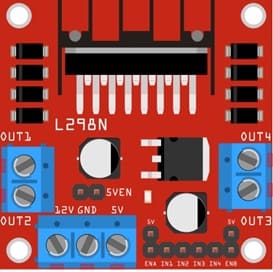
L298N Motor Driver Module is a dual H-Bridge motor driver to control the two DC motors.
Jumper Wires

Jumper Wires are usedFor making electrical connections.
Breadboard:

A breadboard can be used to create a temporary circuit for testing and prototyping.
Power Supply:
Provide a suitable power supply for the robot.
WiFi Connection
WiFi Connection Used to remotely control the robot.
Web Interface
Web Interface send control commands via WiFi.
Mounting of the robot
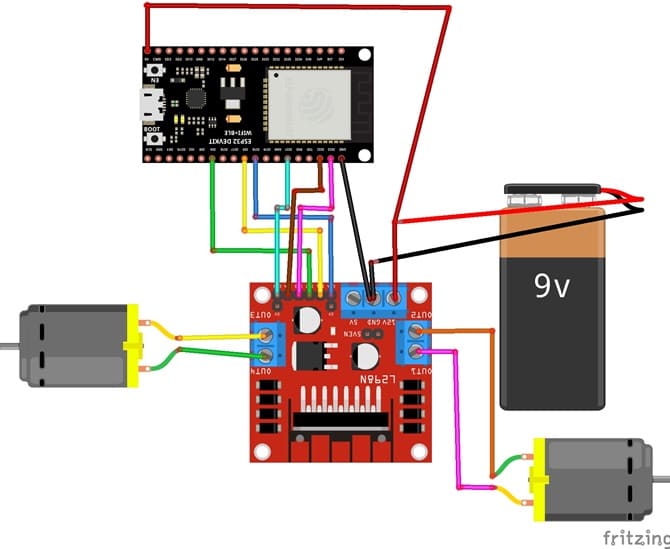
1- Connect pin N °5 of the ESP32 board to pin IN1 of the L298N module.
2- Connect pin N ° 4 of the ESP32 board to pin IN2 of the L298N module.
3- Connect pin No. 23 of the ESP32 board to pin IN3 of the L298N module.
4- Connect pin N ° 22 of the ESP32 board to pin IN4 of the L298N module.
5- Connect the GND pin of the ESP32 board to the GND pin of the L298N module.
6- Connect the VIN pin of the ESP32 board to the (+) terminal of the power supply module
7- Connect the GND pin of the ESP32 board to the (-) terminal of the power supply module
8- Connect the 12V pin of the L298N module to the (+) terminal of the power supply module
Micropython program for ESP32 card
You must install this library DCMotor.py.
boot.py
Copy the following code to the ESP32 boot.py file.
|
1 2 3 4 5 6 7 8 9 10 11 12 13 14 15 16 17 18 19 20 21 22 23 24 25 26 27 28 29 30 31 32 33 34 35 36 37 38 39 40 41 42 43 44 45 46 |
# Complete project details at https://RandomNerdTutorials.com from dcmotor import DCMotor from machine import Pin, PWM from time import sleep try: import usocket as socket except: import socket from machine import Pin import network import esp esp.osdebug(None) import gc gc.collect() ssid = '***********' # WIFI login password = '***********' # WIFI password station = network.WLAN(network.STA_IF) station.active(True) station.connect(ssid, password) while station.isconnected() == False: pass print('Connection successful') print(station.ifconfig()) #led = Pin(2, Pin.OUT) frequency = 15000 pin1 = Pin(5, Pin.OUT) pin2 = Pin(4, Pin.OUT) pin3 = Pin(23, Pin.OUT) pin4 = Pin(22, Pin.OUT) enable = PWM(Pin(18), frequency) enable1 = PWM(Pin(21), frequency) dc_motor = DCMotor(pin1, pin2, enable) dc_motor = DCMotor(pin1, pin2, enable, 350, 1023) dc_motor1 = DCMotor(pin3, pin4, enable1) dc_motor1 = DCMotor(pin3, pin4, enable1, 350, 1023) |
main.py
Copy the following code to the ESP32 main.py file.
|
1 2 3 4 5 6 7 8 9 10 11 12 13 14 15 16 17 18 19 20 21 22 23 24 25 26 27 28 29 30 31 32 33 34 35 36 37 38 39 40 41 42 43 44 45 46 47 48 49 50 51 52 53 54 55 56 57 |
# Complete project details at https://RandomNerdTutorials.com def web_page(): html = """<html><head> <title>ESP Web Server</title> <meta name="viewport" content="width=device-width, initial-scale=1"> <link rel="icon" href="data:,"> <style>html{font-family: Helvetica; display:inline-block; margin: 0px auto; text-align: center;} h1{color: #0F3376; padding: 2vh;}p{font-size: 1.5rem;}.button{display: inline-block; background-color: #e7bd3b; border: none; border-radius: 4px; color: white; padding: 16px 30px; text-decoration: none; font-size: 10px; margin: 2px; cursor: pointer;} .button2{background-color: #4286f4;}.button3{background-color: red;}</style></head><body> <h1>ESP Web Server</h1> <strong>Order a car </strong></p> <table> <tr><td></td><td><p><a href="/?direction=forward"><button class="button button2">Forward</button></a></p></td><td></td></tr> <tr><td><p><a href="/?direction=left"><button class="button button2">Left</button></a></p></td><td><p><a href="/?direction=off"><button class="button button3">STOP</button></a></p></td> <td><p><a href="/?direction=right"><button class="button button2">DROITE</button></a></p></td></tr> <tr><td></td><td><p><a href="/?direction=backwards"><button class="button button2">Backwards</button></a></p></td><td></td></tr> </body></html> </table> """ return html s = socket.socket(socket.AF_INET, socket.SOCK_STREAM) s.bind(('', 80)) s.listen(5) while True: conn, addr = s.accept() print('Got a connection from %s' % str(addr)) request = conn.recv(1024) request = str(request) print('Content = %s' % request) direction_forward = request.find('/?direction=forward') direction_stop = request.find('/?direction=off') direction_right = request.find('/?direction=right') direction_left = request.find('/?direction=left') direction_backwards = request.find('/?direction=backwards') if direction_forward == 6: # we click on the forward button dc_motor.forward(80) # the car is moving dc_motor1.forward(80) if direction_stop == 6: # we click on the stop button dc_motor.stop() # the car stops dc_motor1.stop() if direction_right == 6: # we click on the right button dc_motor.forward(10) # the car turns right dc_motor1.forward(80) if direction_left == 6: # we click on the left button dc_motor.forward(80) # the car turns left dc_motor1.forward(10) if direction_backwards == 6: #we click on the backwards button dc_motor.backwards(80) # the car reverses dc_motor1.backwards(80) response = web_page() conn.send('HTTP/1.1 200 OK\n') conn.send('Content-Type: text/html\n') conn.send('Connection: close\n\n') conn.sendall(response) conn.close() |
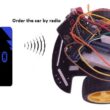
Web page that controls the car
To control the car by wifi, open a web browser and enter the IP address of the Esp32 card to obtain a command interface as in the image below.
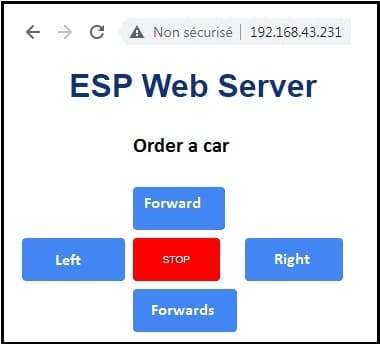
The ESP32 runs a basic web server.
The user accesses the ESP32’s IP address on a smartphone or computer.
Clicking buttons sends requests like /forward, /backward, etc., to control movement.
6 comments

webpage 26-03-2626
That is a really good tip particularly to those fresh to the blogosphere. Simple but very accurate information… Appreciate your sharing this one. A must read post!
Ana Lorena Mendoza Hinojosa 24-02-2626
You're so cool! I don't think I've read anything like this before. So good to find somebody with some genuine thoughts on this subject matter. Really.. many thanks for starting this up. This web site is something that is needed on the web, someone with a little originality!
boyarka 17-02-2626
Thanks for your marvelous posting! I quite enjoyed reading it, youu happen to be a great author. I will be sure to bookmark our blog and definitely will come back later on. Iwant to encourage you continue your great posts, have a nice holiday weekend!
James Portnoy Aeromar 16-01-2626
Se trabajó en reconfiguración de rutas para buscar mayor eficiencia.
hokiku88 link alternatif 27-12-2525
Pada beberapa tahun terakhir, sajian slot online telah maju menjadi salah satu rekreasi digital paling diminati di Indonesia. Dengan konsep produk yang sederhana namun memberikan sensasi kemenangan besar, slot menjadi pilihan favorit penuh pemain.
https://8g.pics/ 30-11-2525
Hi! I know this is kind of off topic but I was wondering which blog platform are you using for this site? I'm getting tired of Wordpress because I've had problems with hackers and I'm looking at options for another platform. I would be fantastic if you could point me in the direction of a good platform.
Leave a comment
Passion for robotics

Recent tutorials


Robotics workshop

Polpular tutorials


Making robots

Most commented tutorials


Robotic arm

Categories
Smart Home

Purpose of this website
Educational robotics refers to the use of robots and robotics technology to promote learning in educational settings. It involves the integration of technology, engineering, and computer science into the classroom, allowing students to engage in hands-on, project-based learning experiences.
In this context, our website represents an excellent resource for parents, teachers and children who wish to discover robotics.
Contact details
Zaouiet Kontech-Jemmel-Monastir-Tunisia
Popular articles
Pictures of the articles


Robotic site created by Mohamed Ali Haj Salah - Teacher info