Display temperature and humidity measured by DHT11 sensor connected to Arduino on I2C LCD display
Tutorial plan
1- How to use the DHT11 sensor by the Arduino UNO board ?
2- The components required to display the temperature and humidity measured by the DHT11 sensor connected to Arduino on the I2C LCD display
3- Mounting the Arduino board with the DHT11 sensor and the I2C LCD display
4- Programming the Arduino UNO board to display the temperature and humidity measured by the DHT11 sensor on the I2C LCD display
How to use the DHT11 sensor by the Arduino UNO board ?
The DHT11 is a basic, low-cost digital temperature and humidity sensor. It's commonly used in projects that require monitoring environmental conditions. This sensor comes in a small package with four pins, and it utilizes a digital signal to communicate temperature and humidity readings to a microcontroller or a computer. The DHT11 sensor is relatively simple to use and can be found in various applications like weather stations, home automation systems, and humidity control devices.
Arduino UNO is a popular microcontroller board known for its versatility and ease of use in various electronics projects, including interfacing with DHT11 sensor. Here's a breakdown of how sensors can be used with an Arduino UNO:
Hardware Connections:
Power: Connect the DHT11 sensor's power (VCC) and ground (GND) pins to the Arduino's 5V and GND pins, respectively.
Data/Signal: the DHT11 sensor have a data pin. Connect this pin to any digital or analog pin on the Arduino (refer to the sensor's datasheet for specific pin connections).
Arduino Sketch (Code):
Utilize Arduino's programming language (based on C/C++) to interface with the sensor.
Use libraries (if available) specific to the DHT11 sensor to simplify code and access sensor readings. For instance, the Adafruit DHT library for DHT temperature and humidity sensors.
Reading Sensor Data: In the Arduino sketch, you'll write code to read data from the sensor. This might involve initializing the DHT11 sensor, reading digital values, and interpreting sensor outputs into meaningful data (temperature and humidity).
Processing Sensor Data: Display the sensor data on an LCD screen, serial monitor, or communicate it to other devices via Bluetooth, Wi-Fi, or other communication modules connected to the Arduino.
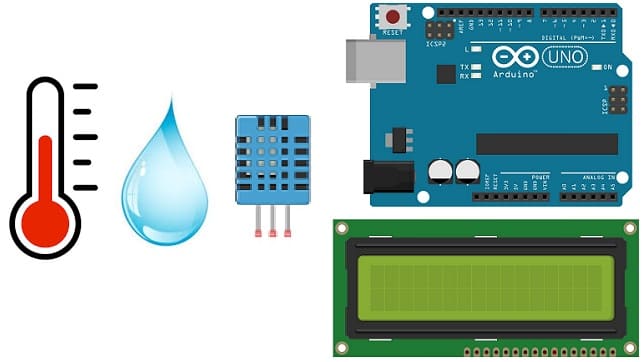
The components required to display the temperature and humidity measured by the DHT11 sensor connected to Arduino on the I2C LCD display
To display the temperature and humidity readings from the DHT11 sensor on an I2C LCD display using an Arduino, you'll need the following components:
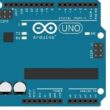
Arduino UNO Board

The Arduino Uno board is a microcontroller board based on the ATmega328P microcontroller. It's one of the most popular and widely used boards in the Arduino family due to its simplicity and versatility.
It is the central control unit for your project.
DHT11 Temperature and Humidity Sensor
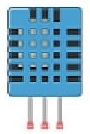
The DHT11 is a basic, low-cost digital temperature and humidity sensor.
I2C LCD Display (usually 16x2)

This display is used for displaying the temperature and humidity from the DHT11 sensor .
Jumper Wires:

For making temporary connections and wiring between components.
Breadboard:

A breadboard is a useful tool for creating temporary electronic circuits. It allows you to connect components without soldering.
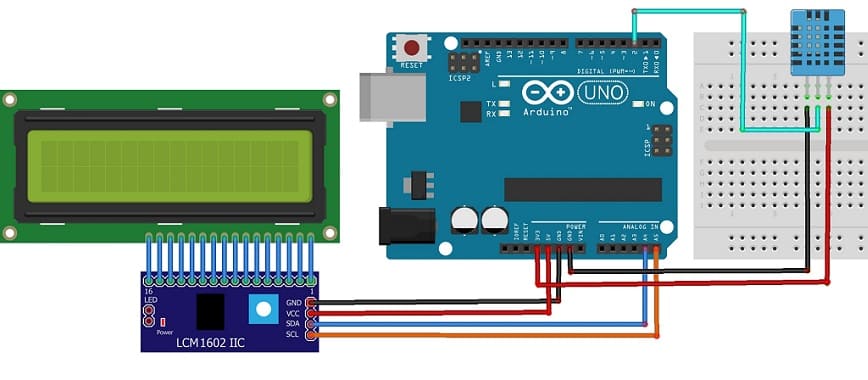
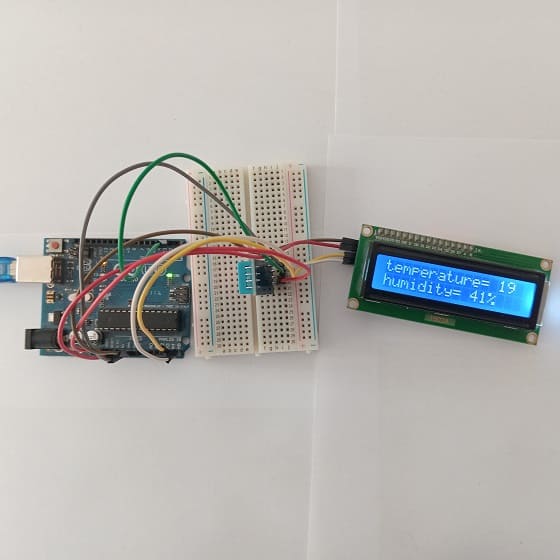
Mounting the Arduino board with the DHT11 sensor and the I2C LCD display
Mounting the Arduino board along with the DHT11 sensor and I2C LCD display can be done in various ways based on the preferences for the project's permanence, aesthetics, and convenience. Here's a suggestion on how to mount them:
Attaching the I2C LCD Display :
- connect the VCC pin of the display to 5V pin of the Arduino
- connect the GND pin of the display to GND pin of the Arduino
- connect the SDA pin of the display to A4 pin of the Arduino
- connect the SCL pin of the display to A5 pin of the Arduino
Mounting the DHT11 Sensor:
- connect the VCC pin of the DHT11 Sensor to 3.3V pin of the Arduino
- connect the GND pin of the DHT11 to GND pin of the Arduino
- connect the DATA pin of the DHT11 to pin 2 of the Arduino
Programming the Arduino UNO board to display the temperature and humidity measured by the DHT11 sensor on the I2C LCD display
To display the temperature and humidity measured by the DHT11 sensor on an I2C LCD display using an Arduino UNO, follow these steps:
1- Ensure you have the necessary libraries installed: DHT11 library and LiquidCrystal_I2C library
2- Use this code to read from the DHT11 sensor and display the temperature and humidity on the I2C LCD display.
|
1 2 3 4 5 6 7 8 9 10 11 12 13 14 15 16 17 18 19 20 21 22 23 24 25 26 |
#include <dht11.h> #include <LiquidCrystal_I2C.h> #define DHT11PIN 2 // broche DATA -> broche 2 LiquidCrystal_I2C lcd(0x27, 20, 4); dht11 DHT11; void setup() { lcd.init(); // initialization of the display } void loop() { DHT11.read(DHT11PIN); lcd.backlight(); // activates the backlight lcd.clear(); // clear the contents of the LCD Display lcd.setCursor(0, 0); // position at the front of the line lcd.print("temperature= "); lcd.print((int)DHT11.temperature); // Show temperature on LCD display lcd.setCursor(0,1); // position on the second line lcd.print("humidity= "); lcd.print((int)DHT11.humidity); // Show humidity on LCD display lcd.print("%"); delay(2000); } |
Upload this code to your Arduino UNO, and the temperature and humidity readings should appear on the LCD display. Adjust pin configurations and addresses if your setup differs.
0 comment
Leave a comment
Passion for robotics

Recent tutorials


Robotics workshop

Polpular tutorials


Making robots

Most commented tutorials


Robotic arm

Categories
Smart Home