Display temperature and humidity measured by DHT11 connected to ESP32 on SSD1306 display

Tutorial plan
1- How to use the DHT11 sensor by the ESP32 board ?
2- The components required to use the DHT11 and sensor the SSD1306 display by ESP32 board
3- Mounting the ESP32 board with the DHT11 sensor and the SSD1306 display
4- Program the ESP32 board with MicroPython to display the temperature and humidity measured by the DHT11 sensor on the SSD1306 display
How to use the DHT11 sensor by the ESP32 board ?
The DHT11 is a basic, low-cost digital temperature and humidity sensor. It's commonly used in projects that require monitoring environmental conditions. This sensor comes in a small package with four pins, and it utilizes a digital signal to communicate temperature and humidity readings to a microcontroller or a computer. The DHT11 sensor is relatively simple to use and can be found in various applications like weather stations, home automation systems, and humidity control devices.
ESP32 is a popular microcontroller board known for its versatility and ease of use in various electronics projects, including interfacing with DHT11 sensor.
Here's a breakdown of how sensors can be used with ESP32 board:
Hardware Connections:
Power: Connect the DHT11 sensor's power (VCC) and ground (GND) pins to the ESP32's 3.3V and GND pins, respectively.
Data/Signal: the DHT11 sensor have a data pin. Connect this pin to any digital or analog pin on the ESP32 board (refer to the sensor's datasheet for specific pin connections).
MicroPython program:
Utilize MicroPython's programming language to interface with the sensor.
Use libraries (if available) specific to the DHT11 sensor to simplify code and access sensor readings
Reading Sensor Data: In the Thonny IDE, you'll write code to read data from the sensor. This might involve initializing the DHT11 sensor, reading digital values, and interpreting sensor outputs into meaningful data (temperature and humidity).
Processing Sensor Data: Display the sensor data on SSD1306 screen connected to the ESP32 board.
The components required to use the DHT11 sensor and the SSD1306 display by ESP32 board
To display the temperature and humidity readings from the DHT11 sensor on SSD1306 display using an Arduino, you'll need the following components:
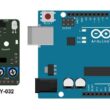
ESP32 board:
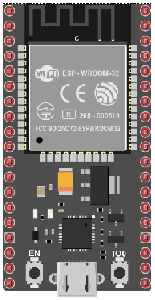
The ESP32 is a powerful microcontroller developed by Espressif Systems. It's renowned for its integrated Wi-Fi and Bluetooth capabilities, making it a popular choice for various IoT (Internet of Things) applications.
It is the central control unit for your project.
DHT11 Temperature and Humidity Sensor
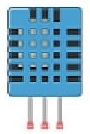
The DHT11 is a basic, low-cost digital temperature and humidity sensor.
SSD1306 Display
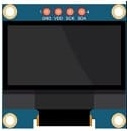
The SSD1306 is a popular display controller used in OLED (Organic Light-Emitting Diode) screens. It's commonly employed in various electronics projects to showcase information on small screens. The SSD1306 controller is compatible with different screen sizes and is often integrated with microcontrollers like ESP32 board to display text, graphics, and images.
This display is used for displaying the temperature and humidity from the DHT11 sensor .
Jumper Wires:

For making temporary connections and wiring between components.
Breadboard:

A breadboard is a useful tool for creating temporary electronic circuits. It allows you to connect components without soldering.
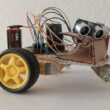
Mounting the ESP32 board with the DHT11 sensor and the SSD1306 display
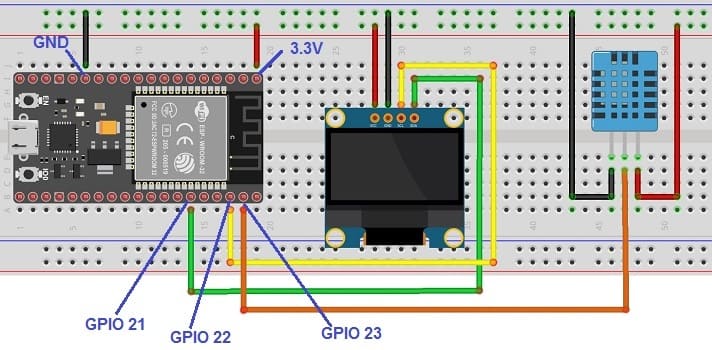
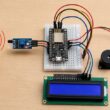
Mounting the ESP32 board along with the DHT11 sensor and SSD1306 display can be done in various ways based on the preferences for the project's permanence, aesthetics, and convenience. Here's a suggestion on how to mount them:
Attaching the SSD1306 Display :
- connect the VCC pin of the display to 3.3V pin of the ESP32 board
- connect the GND pin of the display to GND pin of the ESP32 board
- connect the SDA pin of the display to A4 pin of the ESP32 board
- connect the SCL pin of the display to A5 pin of the ESP32 board
Mounting the DHT11 Sensor:
- connect the VCC pin of the DHT11 Sensor to 3.3V pin of the ESP32 board
- connect the GND pin of the DHT11 to GND pin of the ESP32 board
- connect the DATA pin of the DHT11 to GPIO23 pin of the ESP32 board
Program the ESP32 board with MicroPython to display the temperature and humidity measured by the DHT11 sensor on the SSD1306 display
To display the temperature and humidity measured by the DHT11 sensor on SSD1306 display using ESP32 board, follow these steps:
1- Ensure you have the necessary libraries installed: dht library and ssd1306.py library
2- Use this code to read from the DHT11 sensor and display the temperature and humidity on the SSD1306 display.
|
1 2 3 4 5 6 7 8 9 10 11 12 13 14 15 16 17 18 19 20 21 22 23 24 25 26 27 28 29 30 31 32 |
from machine import Pin, I2C import ssd1306 import time from time import sleep import dht # Initialize the SSD1306 display with I2C (SDA: 21, SCL: 22) i2c = I2C(-1, scl=Pin(22), sda=Pin(21)) oled_width = 128 oled_height = 64 oled = ssd1306.SSD1306_I2C(oled_width, oled_height, i2c) # Initialize the DHT11 sensor p23=Pin(23, Pin.IN) d=dht.DHT11(p23) while True: d.measure() # Read sensor data t=d.temperature() #read temperature h=d.humidity() #read humidity # Display temperature and humidity on the OLED display oled.text('-Temperature', 0, 0) oled.show() time.sleep(1) oled.text(str(int(t))+" Degree C", 0, 10) oled.show() time.sleep(1) oled.text('-Humidity', 0, 20) oled.show() time.sleep(1) oled.text(str(int(h))+"%", 10, 30) oled.show() time.sleep(1) oled.fill(0) oled.show() |
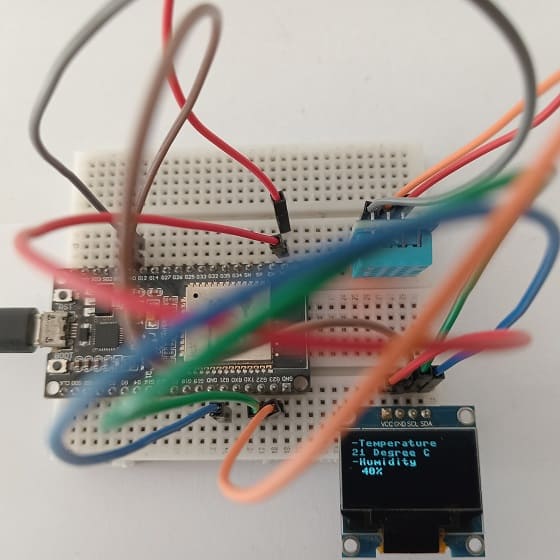
Upload this code to your ESP32 board, and the temperature and humidity readings should appear on the SSD1306 display.
0 comment
Leave a comment
Passion for robotics

Recent tutorials

Robotics workshop

Polpular tutorials


Making robots

Most commented tutorials


Robotic arm

Categories
Smart Home