Display on LCD screen a message transmitted to Micro:bit via Bluetooth
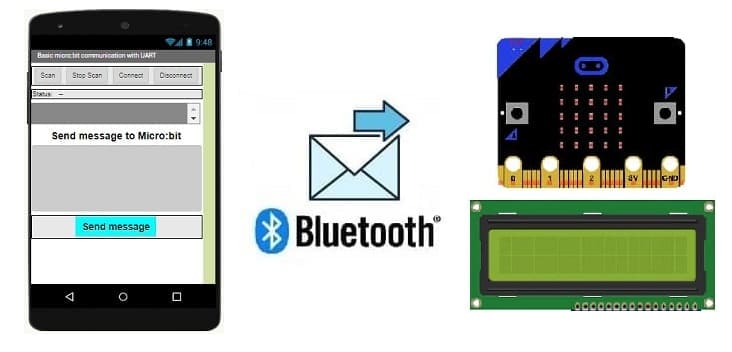
1- How to display on LCD screen a message transmitted to Micro:bit via Bluetooth ?
2- The necessary components to use the LCD I2C 1602 display by Micro:bit
3- Micro:bit board wiring diagram with LCD I2C 1602 display
4- Program Micro:bit to receive and display a message from the Smartphone
5- Develop a mobile application to send a message to Micro:bit
How to display on LCD screen a message transmitted to Micro:bit via Bluetooth ?
To display a message on the LCD screen of a Micro:bit that has been transmitted via Bluetooth, you need to follow these steps:
1- Set up Bluetooth communication:
Ensure that the Micro:bit and the transmitting device (e.g., smartphone) are paired via Bluetooth.
Write a program on the Micro:bit that listens for incoming messages over Bluetooth.
2- Send the message from the transmitting device:
Develop an application on the transmitting device (e.g., smartphone) that can connect and send messages via Bluetooth to the Micro:bit.
Make sure the message is sent in a format that the Micro:bit can understand, such as a text string.
3- Program the Micro:bit:
Use a Micro:bit code editor such as MakeCode or MicroPython.
Write a program that listens for incoming Bluetooth messages and displays them on the LCD screen.
4- Test and debug:
Upload the program to your Micro:bit.
Run your application on the transmitting device to send a message to the Micro:bit.
Ensure that the message is correctly displayed on the Micro:bit's LCD screen.
By following these steps, you should be able to display a message transmitted to a Micro:bit via Bluetooth on its LCD screen.
The necessary components to use the LCD I2C 1602 display by Micro:bit
Micro:bit board:
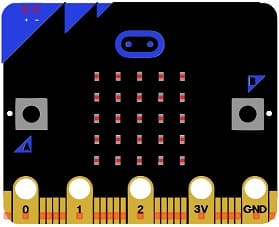
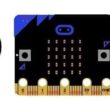
The Micro:bit board is a small, programmable microcontroller board designed for education and beginner-friendly coding projects. It was developed by the BBC, in collaboration with various partners, as a tool to introduce young people to programming and electronics.
The GPIO expansion card for the Micro:bit card
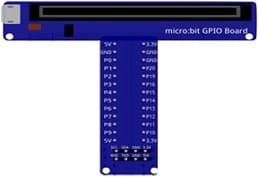
The GPIO expansion board for the Micro:bit board expands the capabilities of the Micro:bit board by adding more input/output (GPIO) pins and additional functionality.
LCD I2C 1602 Display:
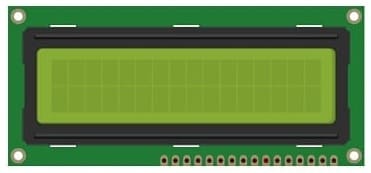
The LCD I2C 1602 display is a type of liquid crystal display (LCD) that utilizes the I2C (Inter-Integrated Circuit) communication protocol to interface with microcontrollers or other devices.
Jumper Wires:

To make the physical connections between the components.
Breadboard:
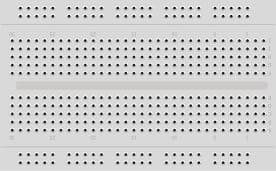
A breadboard is a useful tool for creating temporary electronic circuits. It allows you to connect components without soldering .
Micro:bit board wiring diagram with LCD I2C 1602 display
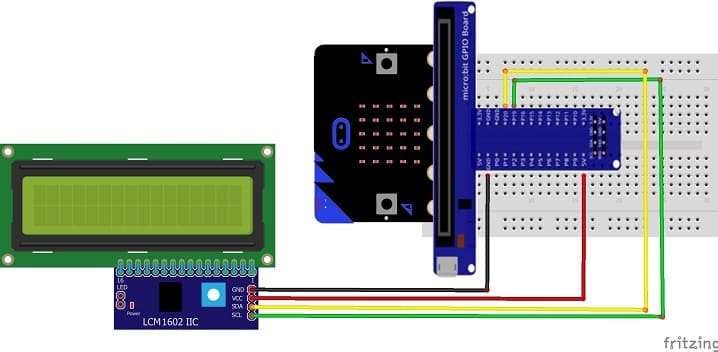
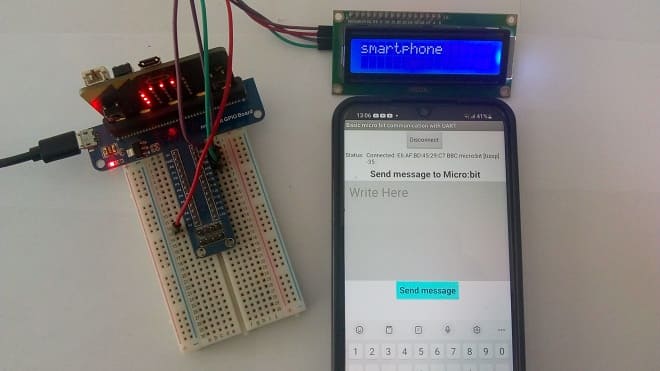
Connect the LCD I2C 1602 Display to the Micro:bit board as follows:
1- Connect the SDA (data line) of the LCD I2C 1602 display to P20 pin of the Micro:bit board.
2- Connect the SCL (clock line) of the LCD I2C 1602 display to P19 of the Micro:bit board.
3- Connect the VCC pin of the LCD I2C 1602 display to the 5V pin of the GPIO board or another energy source .
4- Connect the GND pin of the LCD I2C 1602 display to GND pin of the Micro:bi board.
Program Micro:bit to receive and display a message from the Smartphone
To program the Micro:bit to receive a message from a smartphone via Bluetooth using MakeCode, follow these steps:
1-Go to the MakeCode website (makecode.microbit.org).
2- Click on "New Project" to start.
3- Add Bluetooth Extension:
Click on the "Extensions" option in the bottom left corner.
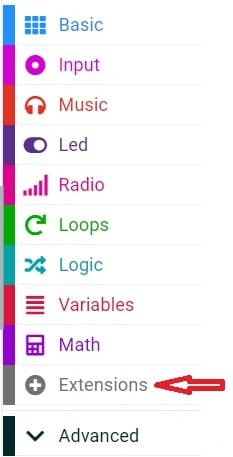
Search and add the "Bluetooth" extension by clicking on it.
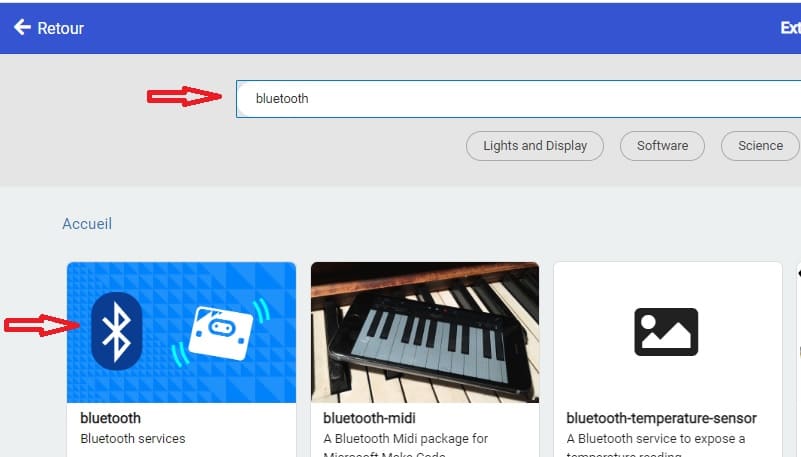
4- Add LCD Extension:
In the MakeCode editor, look for the "Extensions" option and click on it.

In the search bar, type "I2C LCD," and you should find an extension for the I2C LCD display. Add it to your project.
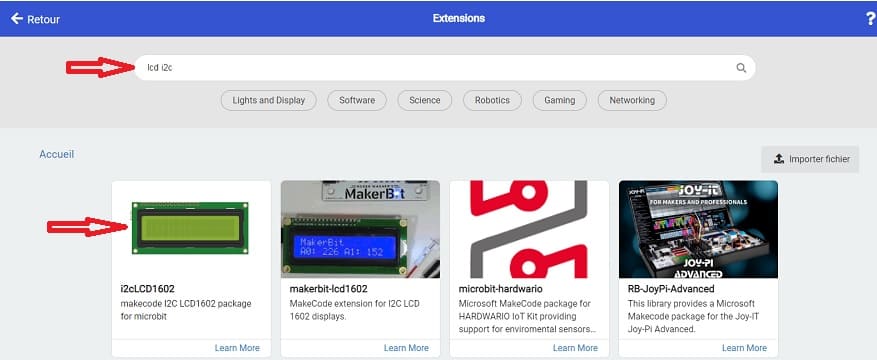
5- Program Message Reception:
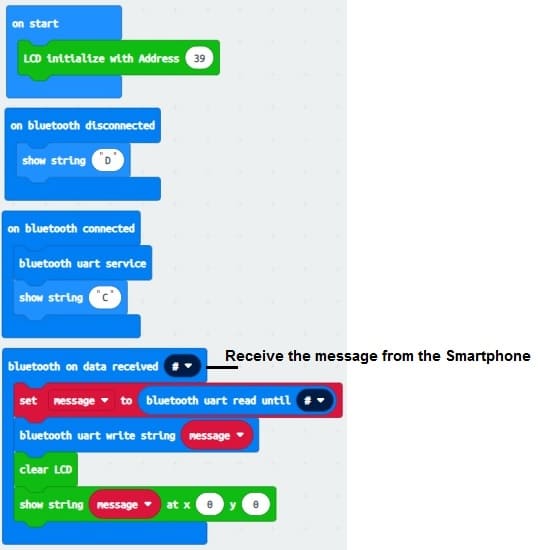
In the "Bluetooth" category, you will find the "Bluetooth on data received" block. Drag this block onto the workspace.
Inside this block, you can add code to process the received message and display the message on LCD screen using the "show string" block.
5- Export the Code:
Connect your Micro:bit to your computer using a USB cable.
Once you have programmed the message reception, click on "Download" to transfert .hex file to Micro:bit.
Here's a simple example of MakeCode blocks for receiving and displaying a message on the Micro:bit:
Develop a mobile application to send a message to the Micro:bit
To develop a mobile application that sends a message to the Micro:bit using MIT App Inventor, follow these steps:
1- Go to the MIT App Inventor website (ai2.appinventor.mit.edu).
2- Click on "Start new project" to create a new project.
Design the User Interface (UI):
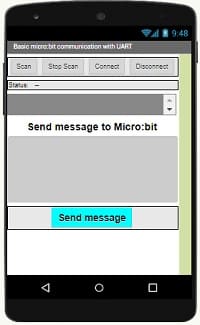
1- Use the components from the Palette to design the user interface of your application. For example, you can add a TextBox for entering the message and a Button for sending the message.
2- Add Bluetooth Functionality:
From the Palette, click on "Connectivity" and then drag the "BluetoothClient" component onto the design screen.
Design the user interface of your app. You might have two buttons to turn on and turn off the two lamps
3- Add the components to your app. ![]()
- The "BluetoothLE1" extension indeed refers to a specific extension for MIT App Inventor which allows you to manage Bluetooth Low Energy (BLE) communication in your mobile applications. This extension facilitates the interaction between your App Inventor application and BLE devices, such as sensors, trackers, wearables, etc.
- The "BluetoothClient1" extension in MIT App Inventor allows you to create mobile applications that can connect to Bluetooth devices, such as serial Bluetooth modules (eg HC-06) connected to microcontrollers, Bluetooth audio devices, etc. . This extension facilitates communication with these devices using serial Bluetooth connections.
- The "Microbit_UART1" extension allows you to use UART (Universal Asynchronous Receiver-Transmitter) communication with the Micro:bit card in the MakeCode programming environment.
- The "Notifier1" extension in MIT App Inventor is a component for displaying notifications or messages to the user of an application. It can be used to send pop-up messages, alerts or important information to the user while the application is running. It is a useful component to improve user experience by providing contextual information.
Here is an example of our mobile application interface:
Program the Message Sending Functionality:
1- Click on the "Blocks" tab to switch to the Blocks Editor.
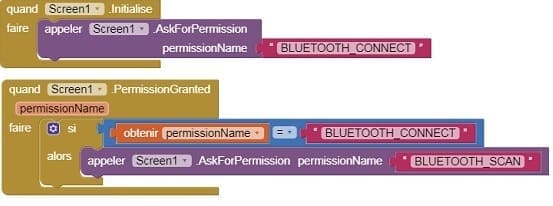
- Starting with Android 12, Bluetooth permissions have been enhanced to improve security and user data protection. This is why we must declare the authorizations that your application needs in the AndroidManifest.xml file. For Bluetooth, you'll need to include ACCESS_FINE_LOCATION, BLUETOOTH_SCAN, and possibly BLUETOOTH_CONNECT permissions, depending on the features you're using.
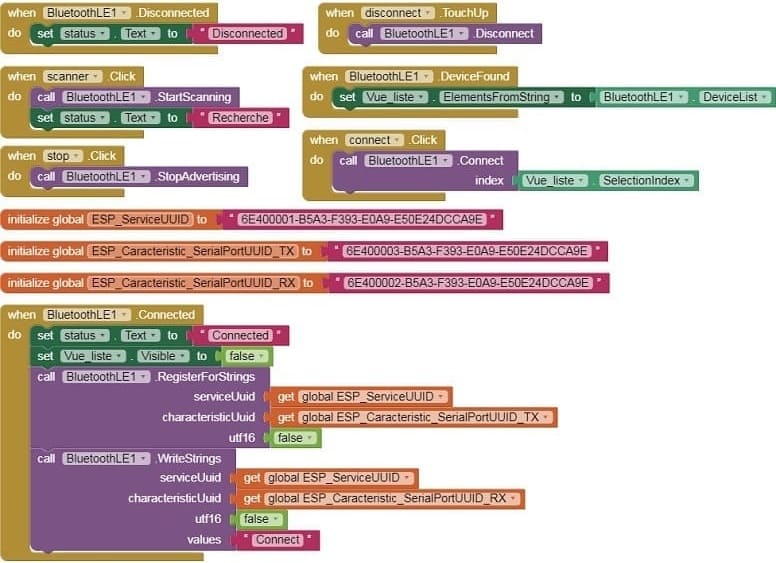
- Use these programming blocks to connect the smartphone to the Micro:bit board via Bluetooth:
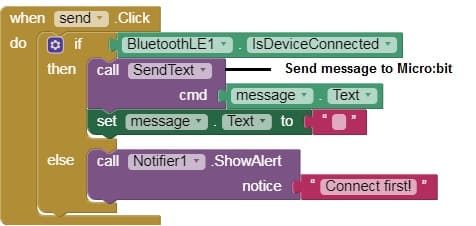
2- Use the blocks to program the functionality for sending a message via Bluetooth when the button is clicked.
3- Use the "When send.Click" block to trigger the sending of the message.
4- Inside this block, use the "Call.SendText.cmd" block to send the text entered in the TextBox to the Micro:bit.
Here's a simple example to send a message to the Micro:bit board:
Download project Download application
Test the Application:
1- Install the mobile app on your smartphone.
2- Connect your smartphone to the Micro:bit via Bluetooth.
3- Enter a message in the TextBox and click the Button to send the message to the Micro:bit.
4- Verify if the Micro:bit receives the message as expected.
1 comment
sex học sinh 23-10-2525
Just desire to say your article is as astonishing. The clearness to your put up is just spectacular and that i can assume you are an expert on this subject. Well with your permission let me to take hold of your feed to stay updated with forthcoming post. Thank you a million and please continue the enjoyable work.


