Dinausore game controlled by the Micro:bit card

Tutorial plan
1- Presentation of the Dinausore game
2- Objective of our project
3- Required Components
4- Component Wiring
5- Programming Micro:bit with Makecode
Presentation of the Dinausore game
The Dinosaur Game (also known as the "Chrome Dino" or "T-Rex Runner") is a built-in browser game in Google Chrome that appears when users lose their internet connection. It features a running T-Rex that players must control to jump over obstacles like cacti and flying pterodactyls.
How to Play:
1. Offline Mode: If you're disconnected from the internet, open Google Chrome and try visiting any website. The "No Internet" page with the T-Rex will appear.
2. Start the Game: Press the spacebar (or tap on mobile) to begin.
3. Jump Over Obstacles: Time your jumps to avoid cacti and pterodactyls.
4. Increase Your Score: The longer you survive, the higher your score gets.
5. Challenge Yourself: Keep playing to beat your personal best!
Objective of our project
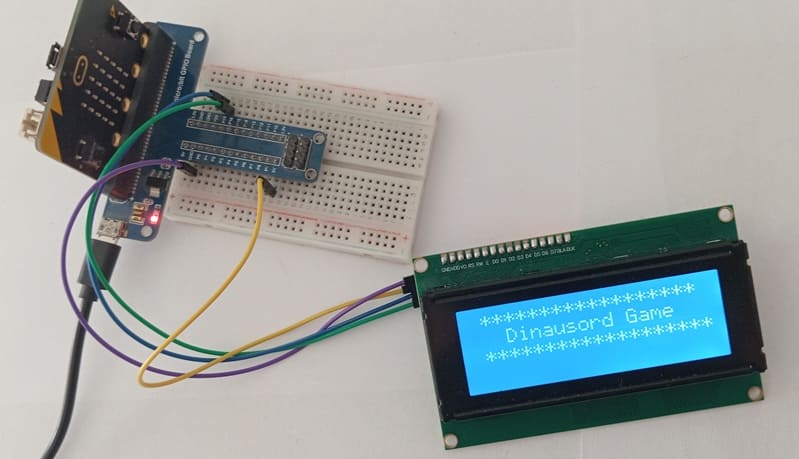
This project aims to recreate the Google Chrome Dinosaur Game using a BBC Micro:bit microcontroller and an LCD I2C screen. The goal is to control a dinosaur character that must jump over obstacles, mimicking the gameplay of the original Chrome Dino game.
1. Implement the Core Gameplay
Create a simple endless runner game where a dinosaur moves continuously on the Micro:bit.
Use an obstacle generation system to introduce cacti or birds at random intervals.
2. Display the Game on an LCD I2C Screen
Connect the I2C LCD screen to the Micro:bit to show game elements.
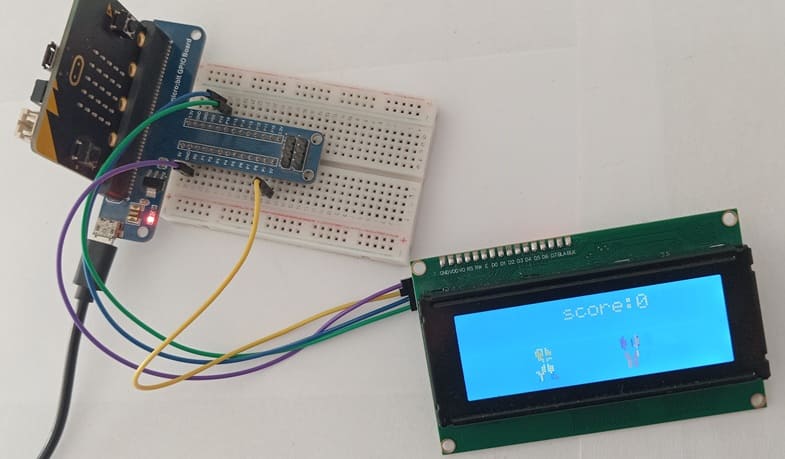
Render sprites (dinosaur,score and obstacles) using characters or pixel graphics.
Continuously update the screen to reflect the game state.
3. User Interaction with Micro:bit
Use button B to make the dinosaur jump.
Use button A to to restart the game.
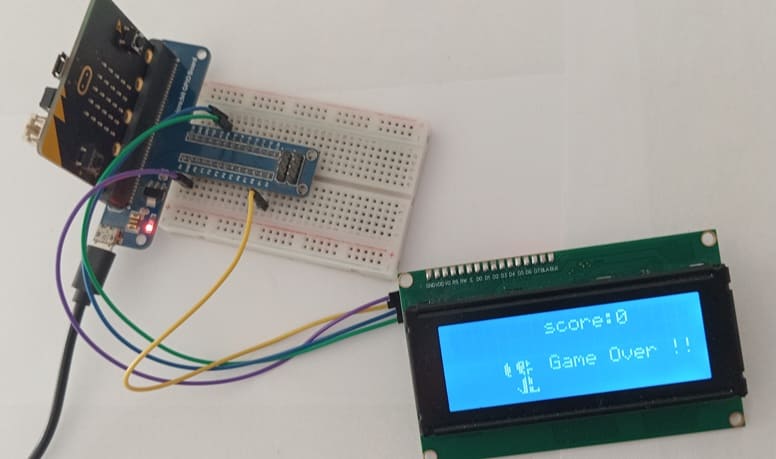
Detect collisions between the dinosaur and obstacles to end the game.
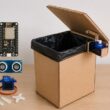
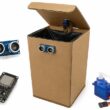
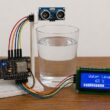
Required Components
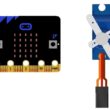
Micro:bit V2:

It acts as the game controller and processor.
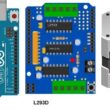
GPIO Expansion Board

It provides additional GPIO pins for interfacing the joystick and LCD screen with the Micro:bit.
LCD Screen with I2C
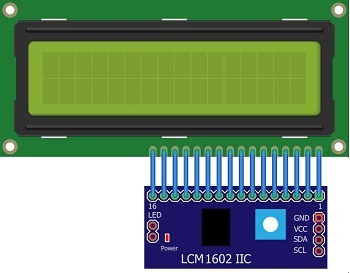
It displays the game graphics.
Jumper Wires

Jumper wires will be used to make connections between the components.
Breadboard:

A breadboard can be used to create a temporary circuit for testing and prototyping.
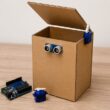
Component Wiring
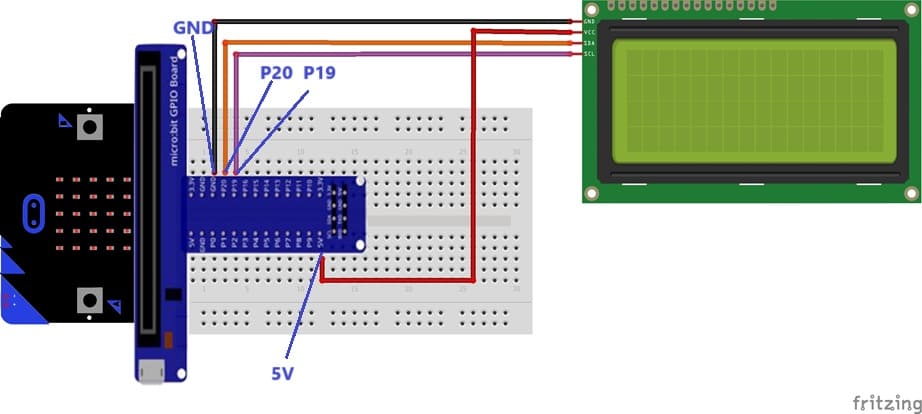
LCD Screen (I2C-based) to Micro:bit :
SDA → Pin 19 (I2C Data).
SCL → Pin 20 (I2C Clock).
VCC → 3.3V or 5V.
GND → Ground.
Programming Micro:bit Using MakeCode
1- Open the MakeCode editor.
2- Install LCD extension for I2C control :
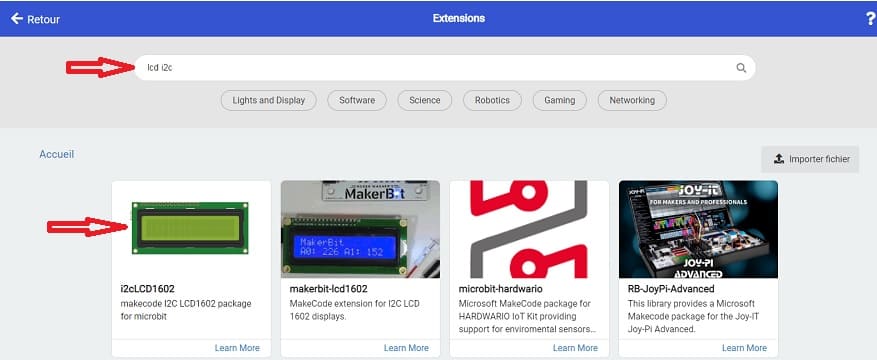
In the MakeCode editor, look for the "Extensions" option and click on it.

In the search bar, type "I2C LCD," and you should find an extension for the I2C LCD display. Add it to your project.
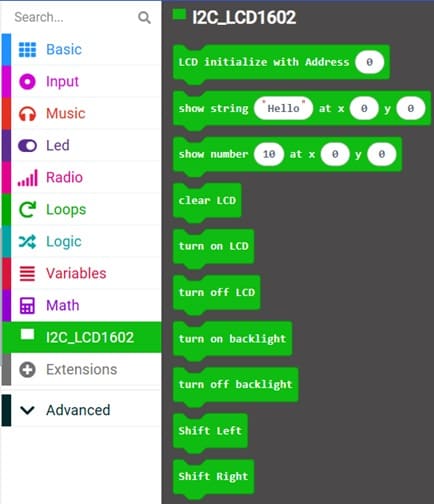
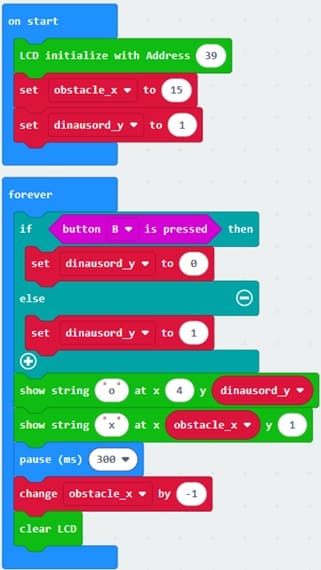
3- Initialize LCD and Variables :
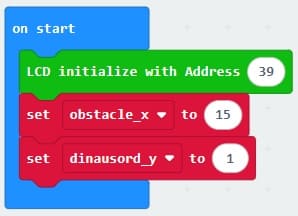
- Initializes the LCD I2C screen.
- Sets default values for dinosaur position, obstacle position, and score.
4- Display the Dinosaur and Obstacles :
- Displays the dinosaur (o) and obstacle (x).
![]()
![]()
- Moves obstacles from right to left.
![]()
- Clears and updates the LCD screen every loop.
![]()
5- Jump Mechanism (Button B)
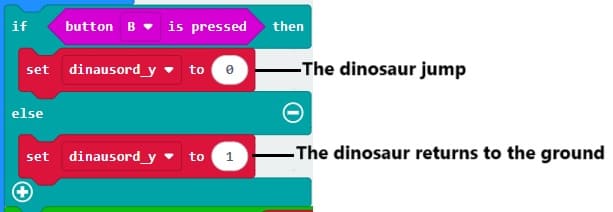
- Pressing Button B makes the dinosaur jump.
- Otherwise, the dinosaur returns to the ground.
Full MakeCode Program:
0 comment
Leave a comment
Passion for robotics

Recent tutorials

Robotics workshop

Polpular tutorials


Making robots

Most commented tutorials


Robotic arm

Categories
Smart Home