Creation of Snake game using ESP8266 card
Tutorial plan
1- Presentation of the Snake game
2- Objective of the Snake Game Project
3- Required Components
4- Component Wiring
5- Programming ESP8266 with Micropython
Presentation of the Snake game
The Snake Game is a classic arcade-style game that challenges players to control a growing snake navigating a grid to collect items (commonly represented as apples or food) while avoiding collisions with obstacles, including its own body. Its simplicity and addictive gameplay have made it one of the most iconic and enduring games.
Objective of the Game
Primary Goal:
Eat as many apples as possible to increase your score.
Challenges:
Avoid colliding with the walls or the snake's own body.
Navigate the snake as it grows longer, which makes the game more challenging.
End Condition:
The game ends when the snake collides with itself or the boundaries of the grid.
Gameplay Mechanics
1- Snake Movement:
The snake moves continuously in one of four directions: up, down, left, or right.
Players control the direction using input devices like arrow keys, a joystick, or buttons.
2- Apple Collection:
Apples appear randomly on the grid.
When the snake eats an apple, its length increases, and the player's score is incremented.
3- Collision Detection:
The game checks if the snake's head:
Hits the boundaries of the grid.
Collides with any part of its own body.
If a collision is detected, the game ends.
4- Scorekeeping:
Players earn points for each apple consumed.
The score is displayed on the screen, and some versions track high scores.
Objective of the Snake Game Project
The objective of a Snake Game Project using an ESP8266, LCD display, buzzer, and 4 push buttons is to create a functional, interactive, and retro-style snake game with embedded system components. This project integrates hardware and software to enhance programming and circuit design skills while offering a fun, hands-on experience.
Key Objectives:
1- Game Functionality:
Design a playable version of the snake game where the snake grows as it eats food, and the game ends when the snake collides with itself or the walls.
Display the snake's movement, food placement, and score on the LCD display.
2- Hardware Interfacing:
Utilize the ESP8266 microcontroller to control the game logic and interface with the other components.
Use 4 push buttons for directional control (up, down, left, right) of the snake's movement.
Add a buzzer to provide sound feedback for events such as eating food, collisions, or game over.
3- Skill Development:
Enhance programming skills through coding the game logic using Micropython.
Learn to interface an LCD display with the ESP8266 for graphical output.
Understand how to read input from push buttons and produce sound using a buzzer.
4- Real-Time Interaction:
Ensure smooth, real-time control of the game by implementing efficient coding practices and handling input/output operations seamlessly.
5- Cost-Effective Design:
Build the project using minimal, readily available, and cost-effective components to make it suitable for hobbyists, students, and electronics enthusiasts.
6- Educational Application:
Demonstrate the integration of hardware and software in embedded systems.
Show how microcontrollers like the ESP8266 can be used for creative, interactive applications.
This project can serve as a fun learning activity for beginners in embedded systems or as a stepping stone for more advanced IoT and gaming projects.
Required Components
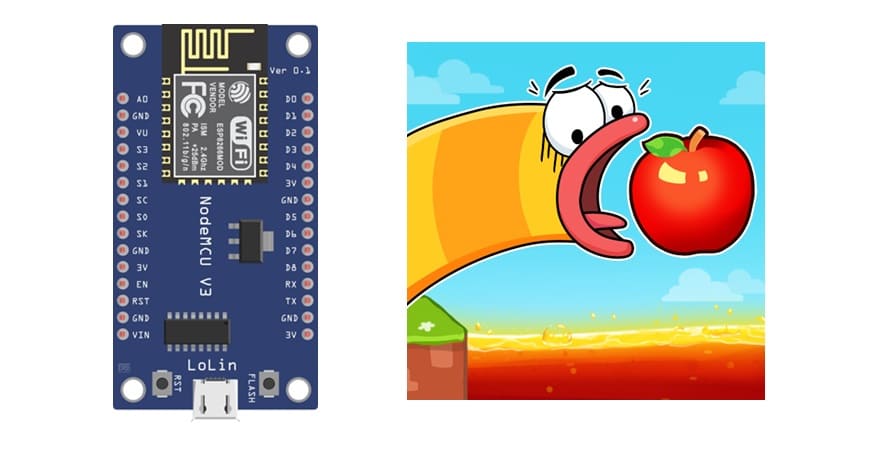
ESP8266 Microcontroller

The ESP8266 is the central processing unit of the project.
It executes the game logic, processes inputs from buttons, updates the LCD, and controls the buzzer.
LCD Display
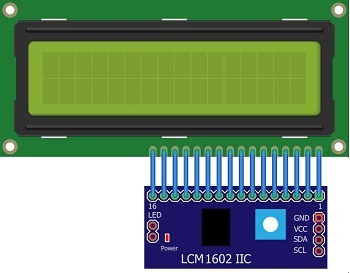
Displays the game grid, snake, food, and score.
Typically, a 20x4 character LCD or a graphical LCD (e.g., 128x64) is used to represent the game visually.
The LCD is interfaced with the ESP8266 to update the snake’s movement and game status in real time.
Push Buttons (4)
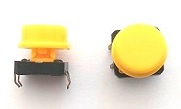
Used to control the movement of the snake: Up, Down, Left, and Right.
Each button sends a signal to the ESP8266 when pressed, updating the direction of the snake.
Buzzer

Provides audio feedback for game events:
Short beep when the snake eats food.
Longer beep when the game is over.
Enhances the user experience by adding a layer of interaction.
Resistors (typically 10kΩ)

Prevent floating inputs for push buttons.
Ensure stable and noise-free button operation.
Wires:

Connect components to the ESP8266 and breadboard.
Breadboard:
Provides a platform for prototyping and organizing connections.
Simplifies connections without the need for soldering.
Component Wiring
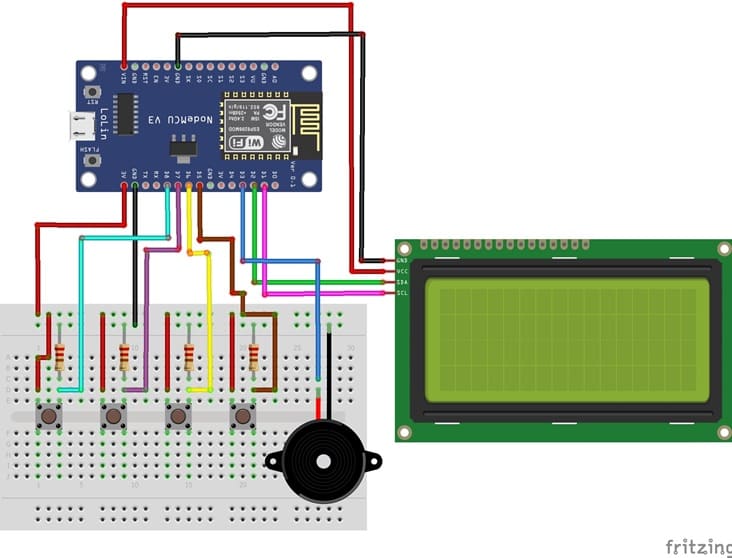
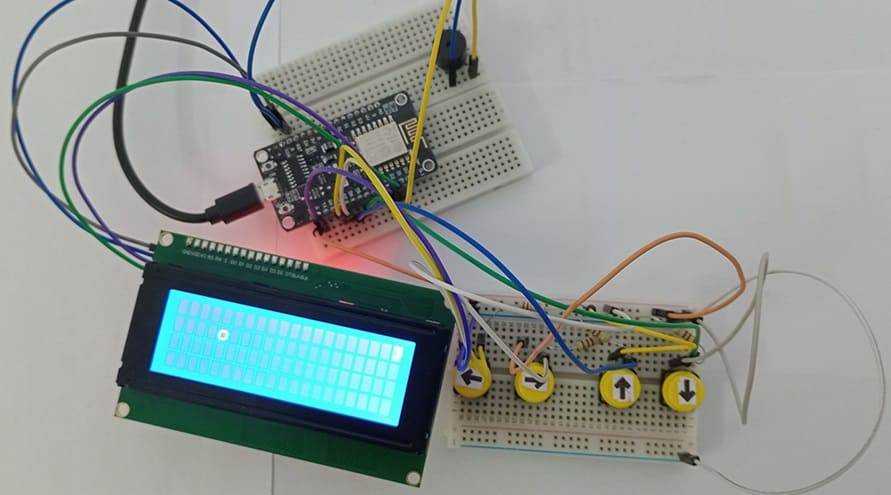
ESP8266 to LCD Display
For this project, the 16x2 LCD Display can be interfaced using I2C.
SDA: Connect to GPIO 4 (D2 on some ESP8266 boards).
SCL: Connect to GPIO 5 (D1 on some ESP8266 boards).
VCC: Connect to the 3.3V pin.
GND: Connect to GND.
ESP8266 to Push Buttons
Each push button will control one direction (Up, Down, Left, Right).
Use pull-down resistors (10kΩ) for stable input signals.
Wiring for Each Button:
One leg of the button: Connect to GND through a 10kΩ resistor.
Other leg of the button:
Connect to a GPIO pin of the ESP8266 (e.g., D8, D7, D6, D5 for Right, Left, Up, and Down respectively).
Also connect this leg directly to VCC (3.3V) to complete the circuit.
ESP8266 to Buzzer
Positive terminal of the buzzer: Connect to a GPIO pin (e.g., D3) through a 220Ω resistor.
egative terminal of the buzzer: Connect to GND.
Programming ESP8266 with Micropython
1- Ensure MicroPython is installed on your ESP32
2- Flash your ESP8266 with MicroPython using this file ESP8266_GENERIC-20241129-v1.24.1.bin
3- Import this two libraries : i2c_lcd and lcd_api for I2C LCD screen
Below is the MicroPython code for the Snake Game:
|
1 2 3 4 5 6 7 8 9 10 11 12 13 14 15 16 17 18 19 20 21 22 23 24 25 26 27 28 29 30 31 32 33 34 35 36 37 38 39 40 41 42 43 44 45 46 47 48 49 50 51 52 53 54 55 56 57 58 59 60 61 62 63 64 65 66 67 68 69 70 71 72 73 74 75 76 77 78 79 80 81 82 83 84 85 86 87 88 89 90 91 92 93 |
import machine from machine import Pin, SoftI2C,ADC from lcd_api import LcdApi from i2c_lcd import I2cLcd from time import sleep import urandom import time def randint(min, max): span = max - min + 1 div = 0x3fffffff // span offset = urandom.getrandbits(30) // div val = min + offset return val I2C_ADDR = 0x27 totalRows = 4 totalColumns = 20 i2c = SoftI2C(sda=Pin(4), scl=Pin(5), freq=400000) #D2(SDA) D1(SCL) #initializing the I2C method for ESP32 lcd_snake = I2cLcd(i2c, I2C_ADDR, totalRows, totalColumns) lcd_food = I2cLcd(i2c, I2C_ADDR, totalRows, totalColumns) button_left = Pin(15, Pin.IN) #D8 button_right = Pin(13, Pin.IN) #D7 button_up = Pin(12, Pin.IN) #D6 button_down = Pin(14, Pin.IN) #D5 buzzer = machine.PWM(machine.Pin(0))#D3 # Snake coordonee x=0 y=0 snake='>' # Food coordonne x1=10 y1=0 # Définir une fonction tone qui prend en entrée un objet Pin représentant le buzzer, une fréquence en Hz et une durée en millisecondes def tone(pin, frequency, duration): pin.freq(frequency) # Définir la fréquence pin.duty(50) # Définir le cycle de service time.sleep_ms(duration) # Pause pour la durée en millisecondes pin.duty(0) # Définir le cycle de service à 0 pour arrêter le son B4 = 494 sens='right' while True: if button_up.value()==1 : sens='up' snake='^' if button_right.value()==1 : sens='right' snake='>' if button_left.value()==1 : sens='left' snake='<' if button_down.value()==1 : sens='down' snake='v' if sens == 'up' and y>0: y=y-1 if sens=='right' and x<19: x=x+1 if sens=='left' and x>0: x=x-1 if sens=='down' and y<3: y=y+1 if x==x1 and y==y1 : tone(buzzer, B4, 500) x1=randint(0, 15) y1=randint(0, 1) lcd_food.move_to(x1,y1) lcd_food.putstr('o') lcd_snake.move_to(x,y) lcd_snake.putstr(snake) # Afficher du texte sur l'écran LCD tone(buzzer, B4, 50) sleep(0.5) lcd_snake.clear() lcd_food.clear() |
Explanation of the Code
Initializations:
The LCD is initialized in I2C mode using the i2c_lcd library.
|
1 2 3 4 |
I2C_ADDR = 0x27 totalRows = 4 totalColumns = 20 i2c = SoftI2C(sda=Pin(4), scl=Pin(5), freq=400000) #D2(SDA) D1(SCL) #initializing the I2C method for ESP32 |
Connect buttons to GPIO of ESP8266
|
1 2 3 4 |
button_left = Pin(15, Pin.IN) #D8 button_right = Pin(13, Pin.IN) #D7 button_up = Pin(12, Pin.IN) #D6 button_down = Pin(14, Pin.IN) #D5 |
Initialse game variables
|
1 2 3 4 5 6 7 8 |
# Snake coordonee x=0 y=0 snake='>' # Food coordonne x1=10 y1=0 |
Input Handling:
Push buttons control the snake's direction, ensuring no reverse movement.
|
1 2 3 4 5 6 7 8 9 10 11 12 13 14 15 |
if button_up.value()==1 : sens='up' snake='^' if button_right.value()==1 : sens='right' snake='>' if button_left.value()==1 : sens='left' snake='<' if button_down.value()==1 : sens='down' snake='v' |
Update the snake’s position.
|
1 2 3 4 5 6 7 8 9 10 11 |
if sens == 'up' : y=y-1 # The snake moves upwards if sens=='right': x=x+1 # The snake moves to the right if sens=='left' : x=x-1 # The snake moves to the left if sens=='down' : y=y+1 # The snake moves downwards |
Buzzer Feedback:
A short beep is generated when the snake eats food.
|
1 |
tone(buzzer, B4, 500) |
Check for collisions or food consumption.
|
1 2 3 4 |
if x==x1 and y==y1 : tone(buzzer, B4, 500) x1=randint(0, 15) y1=randint(0, 1) |
Refresh the display with updated graphics.
|
1 2 3 4 5 6 7 8 |
lcd_food.move_to(x1,y1) lcd_food.putstr('o') # show food on LCD screen lcd_snake.move_to(x,y) lcd_snake.putstr(snake) # show Snake on LCD screen tone(buzzer, B4, 50) # activate Buzzer sleep(0.5) lcd_snake.clear() lcd_food.clear() |


