Control two LEDs by ESP32
Tutorial plan
1- Role of LEDs in robotics
2- The components needed to control two LEDs by ESP32
3- Mounting ESP32 card with two LEDs
4- Lighting two LEDs by ESP32 card
5- Blink two LEDs by ESP32 card
Role of LEDs in robotic projects
LEDs (Light Emitting Diodes) play a significant role in robotic projects. They are versatile electronic components that emit light when an electric current passes through them. Here are some common roles of LEDs in robotic projects:
Indication and Status: LEDs are commonly used to provide visual feedback on the status of a robot. They can indicate power on/off, battery levels, system errors, or specific robot modes. Different colors can be used to convey different information, making it easier for users to understand the robot's current state.
Sensory Input: LEDs can be used as light sensors, where they detect and measure ambient light levels. This capability can be utilized in robotic projects that require light detection or tracking, such as line-following robots or light-seeking robots. By using LEDs as light sensors, robots can respond to changes in light intensity or follow light sources.
Communication: LEDs can be employed as visual indicators for communication between robots and humans or between robots themselves. For example, a robot can use LEDs to display patterns or signals to convey messages or to establish simple communication protocols with other robots or users.
Environmental Perception: In some robotic projects, LEDs are used to emit light and measure the reflected light intensity to perceive the environment. This technique, known as reflectance sensing, can help robots detect obstacles, distinguish colors, or identify surfaces in their surroundings.
Decoration and Aesthetics: LEDs are often used in robots for decorative purposes to enhance their appearance. They can be integrated into the robot's chassis or body to create visually appealing effects or to add personality to the robot.
Education and Visualization: LEDs can be employed in educational robotics projects to teach basic electronics or programming concepts. By connecting LEDs to microcontrollers or programmable boards, students can learn about controlling output signals and creating simple light patterns, fostering their understanding of robotics and coding principles.
The components needed to control two LEDs by ESP32
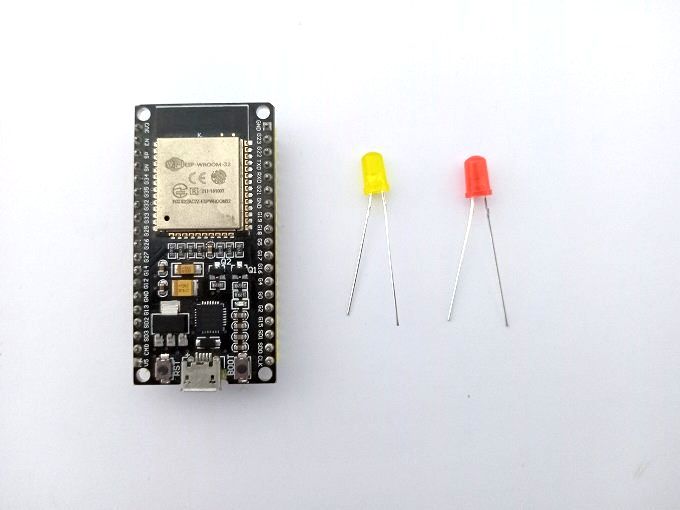
To control two LEDs using an ESP32 microcontroller, you will need the following components:
ESP32 Development Board: The ESP32 is a powerful microcontroller that integrates Wi-Fi and Bluetooth capabilities. It can be programmed using the Arduino IDE or other compatible development environments. 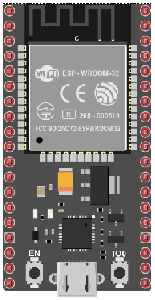
LEDs: You will need two LEDs of your choice. They can be standard LEDs of any color or specialized LEDs like RGB LEDs. 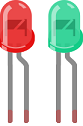
Resistors: LEDs require current-limiting resistors to prevent excessive current flow. The value of the resistor depends on the LED's forward voltage and desired brightness. A typical value for a standard LED is around 220 to 470 ohms. 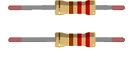
Breadboard or Prototyping Board: A breadboard or prototyping board provides a platform to connect and test your circuit before soldering it permanently. 
Jumper Wires: You will need jumper wires to make electrical connections between the components on the breadboard. 
Mounting ESP32 card with two LEDs
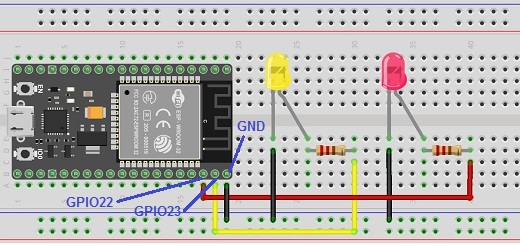
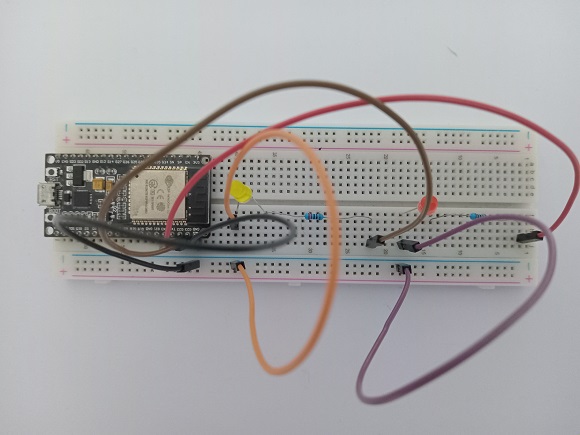
To mount an ESP32 board with two LEDs, you can follow these steps:
1- Connect the positive terminal (anode) of the yellow LED to GPIO23 pin of the ESP32 through a current-limiting resistor.
2- Connect the negative terminal (cathode) of the first LED to the ground (GND) pin of the ESP32.
3- Repeat the above connections for the second LED, using GPIO22 pin and resistor.
Lighting two LEDs by ESP32 card
To light two LEDs using an ESP32 board and MicroPython, you can follow these steps:
1- Write the MicroPython code: Now, you can write the MicroPython code to control the LEDs. Here's an example code to alternate the blinking of two LEDs:
|
1 2 3 4 5 6 7 8 9 10 |
import machine import time # Pin assignments led1_pin = machine.Pin(0, machine.Pin.OUT) led2_pin = machine.Pin(1, machine.Pin.OUT) #Lighting the two LEDs led1_pin.value(1) led2_pin.value(1) |
2- Upload and run the code: Save the code in a .py file and upload it to the ESP32 board. You can use tools like ampy or the WebREPL interface to upload the file. Once uploaded, the code will run, and the leds should light up
Blink two LEDs by ESP32 card
To blink two LEDs using the ESP32 board with MicroPython, use a text editor to write the following MicroPython code and save it to a file with the ".py" extension (for example, "blinker_leds.py "):
|
1 2 3 4 5 6 7 8 9 10 11 12 13 14 15 |
import machine import time # Declaration of GPIO pins for yellow and red LEDs led_pin1 = machine.Pin(23, machine.Pin.OUT) led_pin2 = machine.Pin(22, machine.Pin.OUT) # main loop while True: led_pin1.value(1) #Turn on yellow LED led_pin2.value(0) #Turn off red LED time.sleep(2) # Wait 2 seconds led_pin1.value(0) Turn ooff yellow LED led_pin2.value(1) #Turn on red LED time.sleep(2) # Wait 2 seconds |
The code turns the two LEDs on and off alternately. In the main loop, the two LEDs flash alternately with an interval of 2 seconds.
When you run the program on the ESP32, both LEDs should start flashing according to the defined pattern.
0 comment
Leave a comment
Passion for robotics

Recent tutorials


Robotics workshop

Polpular tutorials


Making robots

Most commented tutorials


Robotic arm

Categories
Smart Home