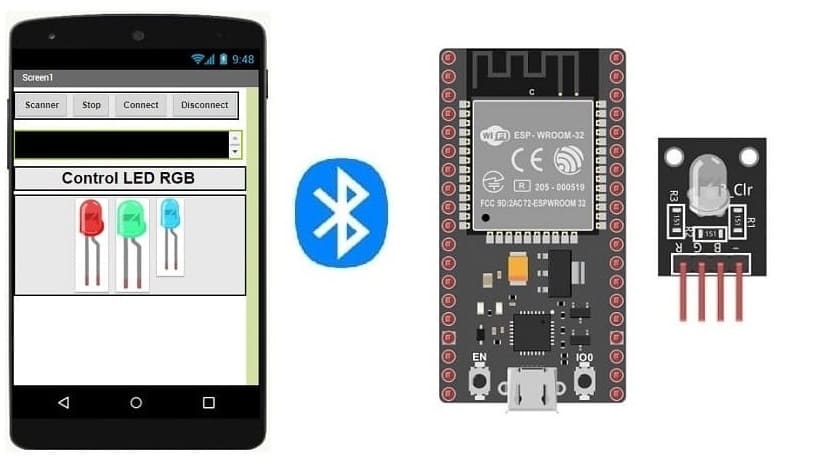
Control RGB LED module connected to ESP32 board via Bluetooth
Tutorial plan
1- The ESP32 board and Bluetooth
2- Why do we use App Inventor to create a mobile application capable of communicating the smartphone with the ESP32 board ?
3- The components needed to use the RGB LED module with the ESP32 board
4- Mounting the ESP32 board with the RGB LED module
5- Lighting RGB LED module connected to the ESP32 board by a smartphone via Bluetooth
The ESP32 board and Bluetooth
The ESP32 is a popular microcontroller board that is known for its versatility and capabilities. It is based on the Espressif ESP32 system-on-chip (SoC), which includes both Wi-Fi and Bluetooth capabilities.
One of the key features of the ESP32 is its built-in support for both classic Bluetooth (often referred to as Bluetooth Classic) and Bluetooth Low Energy (BLE). This makes the ESP32 a powerful choice for projects that require wireless communication.
Here are some key points about using Bluetooth with the ESP32:
Bluetooth Classic (BR/EDR): This is the traditional Bluetooth protocol used for things like audio streaming, file transfer, and other applications. The ESP32 supports this protocol, allowing it to communicate with other devices that use Bluetooth Classic.
Bluetooth Low Energy (BLE): BLE is a power-efficient version of Bluetooth that is designed for applications like sensors, fitness trackers, and other low-power devices. The ESP32 includes support for BLE, which enables it to act as a BLE peripheral or central device.
Dual-mode Bluetooth: The ESP32 can operate in both Bluetooth Classic and BLE modes simultaneously. This means it can communicate with a wide range of devices using different Bluetooth protocols.
Bluetooth Profiles: The ESP32 supports various Bluetooth profiles, which define how devices communicate with each other. Common profiles include Serial Port Profile (SPP) for classic Bluetooth and Generic Attribute Profile (GATT) for BLE.
Programming the ESP32 for Bluetooth: To use Bluetooth functionality on the ESP32, you typically use a development environment like the Arduino IDE with the ESP32 board package installed, or use the Espressif IDF (IoT Development Framework) if you need more advanced control.
Libraries and SDKs: There are libraries and SDKs available for both Arduino and ESP-IDF that simplify the process of working with Bluetooth on the ESP32. These libraries provide high-level APIs for tasks like setting up a Bluetooth server, connecting to other devices, and exchanging data.
Applications: With Bluetooth capabilities, the ESP32 can be used in a wide range of projects. For example, you can create IoT devices that communicate with smartphones or other Bluetooth-enabled devices, build wearable devices, or even create custom controllers for applications like home automation.
Why do we use App Inventor to create a mobile application capable of communicating the smartphone with the ESP32 board ?
MIT App Inventor is a visual mobile app development platform used to create applications for Android devices. It's often utilized for building mobile applications that can communicate with ESP32 boards or other IoT devices for several reasons:
Ease of use: MIT App Inventor is designed to be user-friendly and intuitive, making it accessible even to individuals without advanced programming expertise. It employs a drag-and-drop programming approach, reducing the learning curve.
Rapid development: MIT App Inventor allows for the quick creation of mobile applications. This is particularly important in the IoT field where projects can evolve rapidly. You can rapidly design and test applications for interacting with your ESP32.
Connectivity support: MIT App Inventor provides pre-defined components and libraries for wireless communication, including Bluetooth communication. This makes it easy to create applications that can connect and interact with ESP32 boards through Bluetooth.
Cross-platform: Applications created with MIT App Inventor are intended for Android but can be used on various Android devices, making it a versatile solution for communicating with ESP32 boards that support Bluetooth communication.
Customization: While MIT App Inventor focuses on simplicity, it still offers a degree of customization. You can personalize the appearance and behavior of your application using the available components and programming blocks.
Community and resources: There is an active community around MIT App Inventor, with many online resources, tutorials, and examples available. This makes learning and troubleshooting easier.
The components needed to use the RGB LED module with the ESP32 board
To control the RGB LED module using the ESP32 board, you will need the following components:
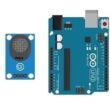
ESP32 board :
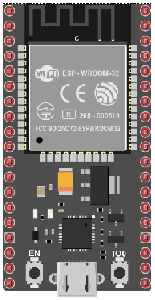
The ESP32 is a popular and versatile microcontroller board that is widely used in the field of embedded systems and Internet of Things (IoT) development. It is developed by Espressif Systems and is part of the ESP (Espressif) series of microcontrollers.
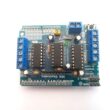
RGB LED Module:
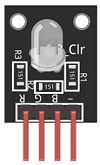
This module contains a red, green, and blue LED, allowing you to produce various colors by controlling the intensity of each color component.
Breadboard:

A breadboard is a prototyping board that allows you to build circuits without soldering. It provides a convenient way to connect the components together.
Jumper Wires:

You'll need jumper wires to make connections between the ESP32 board, RGB LED module and breadboard.
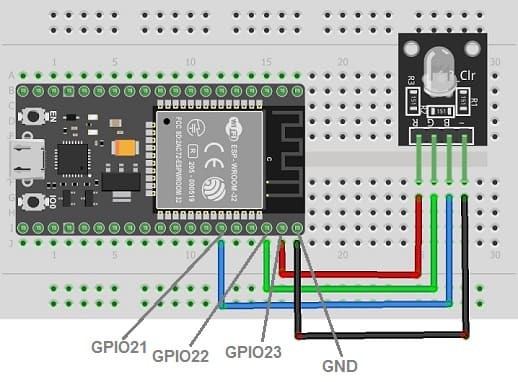
Mounting the ESP32 board with the RGB LED module
Once you have the necessary components, you can proceed with the following steps to control the RGB LED module:
1- Connect pin R (red) of RGB LED module to GPIO23 of the ESP32 board
2- Connect pin G (green) of RGB LED module to GPIO22 of the ESP32 board
3- Connect pin B (blue) of RGB LED module to GPIO21 of the ESP32 board
4- Connect pin GND of RGB LED module to pin GND of the ESP32 board
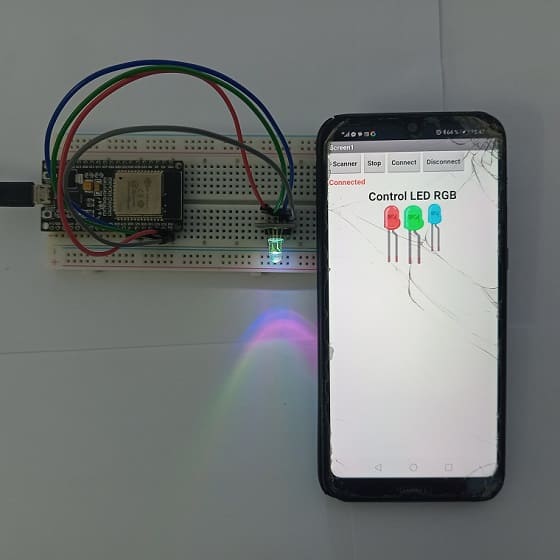
Lighting RGB LED module connected to the ESP32 board by a smartphone via Bluetooth
To light the modu connected to an ESP32 board using a smartphone via Bluetooth, you can follow these steps using MicroPython for the ESP32 and the MIT App Inventor:
1. ESP32 MicroPython Code:
Write a simple MicroPython script to control the RGB LED module using Bluetooth.
You'll need to use ble_uart_peripheral.py and ble_advertising.py.
you must use the following firmware: esp32-20210902-v1.17.bin .
|
1 2 3 4 5 6 7 8 9 10 11 12 13 14 15 16 17 18 19 20 21 22 23 24 25 26 27 28 29 30 31 32 33 34 35 36 37 38 39 |
########## DIGITAL MANUFACTURING ########## # PIKACHU Project # Authors: Miguel Angel Guzman # Kadriye Nur Bakirci ########################################### ########## IMPORT REQUIRED LIBRARIES ########## import bluetooth from ble_uart_peripheral import BLEUART from machine import Pin red_led=Pin(23, Pin.OUT) # GPIO pin connected to pin R of RGB LED module green_led=Pin(22, Pin.OUT) # GPIO pin connected to pin G of RGB LED module blue_led=Pin(21, Pin.OUT) # GPIO pin connected to pin B of RGB LED module # Create BLE object ble = bluetooth.BLE() # Open UART session for BLE uart = BLEUART(ble) # Define ISR for an UART input on BLE connection def on_rx(): # Read UART string, AppInventor sends raw bytes uart_in = uart.read() # read the message received from the Smartphone via Bluetooth print("UART IN: ", uart_in.decode()) # display the message received from the Smartphone on the Thonny console if (uart_in.decode().find('red_on')==0): red_led.value(1) # Turn on the red color of RGB LED module if (uart_in.decode().find('red_off')==0): red_led.value(0) # Turn off the red color of RGB LED module if (uart_in.decode().find('green_on')==0): green_led.value(1) # Turn on the green color of RGB LED module if (uart_in.decode().find('green_off')==0): green_led.value(0) # Turn off the green color of RGB LED module if (uart_in.decode().find('blue_on')==0): blue_led.value(1) # Turn on the blue color of RGB LED module if (uart_in.decode().find('blue_off')==0): blue_led.value(0) # Turn off the blue color of RGB LED module # Map ISR to UART read interrupt uart.irq(handler=on_rx) uart.close() |
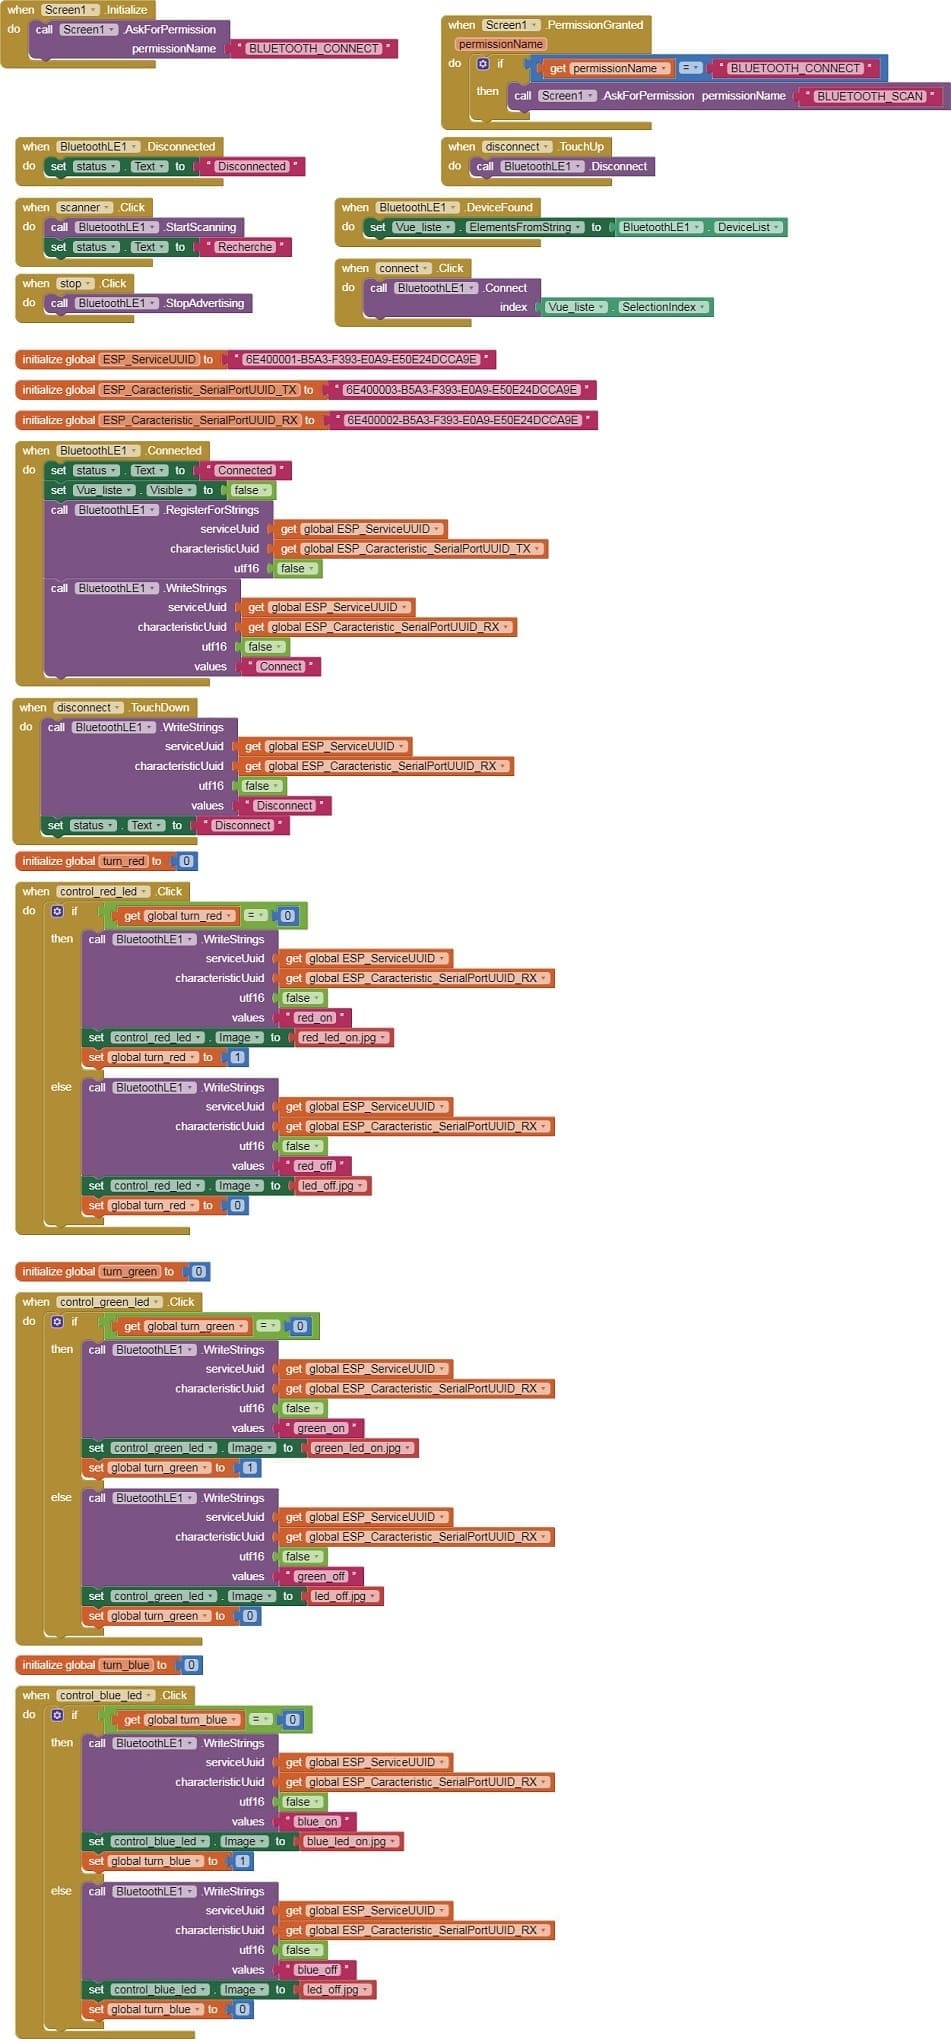
3. MIT App Inventor Setup:
1- Create a new project in MIT App Inventor.
2- Add the BluetoothClient component to your project.
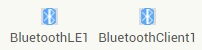
- The "BluetoothLE1" extension indeed refers to a specific extension for MIT App Inventor which allows you to manage Bluetooth Low Energy (BLE) communication in your mobile applications. This extension facilitates the interaction between your App Inventor application and BLE devices, such as sensors, trackers, wearables, etc.
- The "BluetoothClient1" extension in MIT App Inventor allows you to create mobile applications that can connect to Bluetooth devices, such as serial Bluetooth modules (eg HC-06) connected to microcontrollers, Bluetooth audio devices, etc. . This extension facilitates communication with these devices using serial Bluetooth connections.
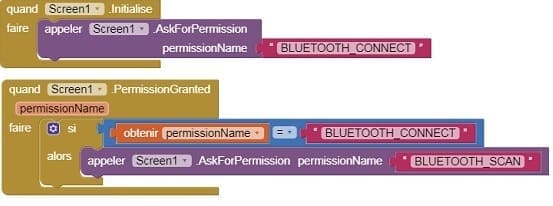
3- Starting with Android 12, Bluetooth permissions have been enhanced to improve security and user data protection. This is why we must declare the authorizations that your application needs in the AndroidManifest.xml file. For Bluetooth, you'll need to include ACCESS_FINE_LOCATION, BLUETOOTH_SCAN, and possibly BLUETOOTH_CONNECT permissions, depending on the features you're using.
4- Use these programming blocks to connect the smartphone to the ESP32 board via Bluetooth:
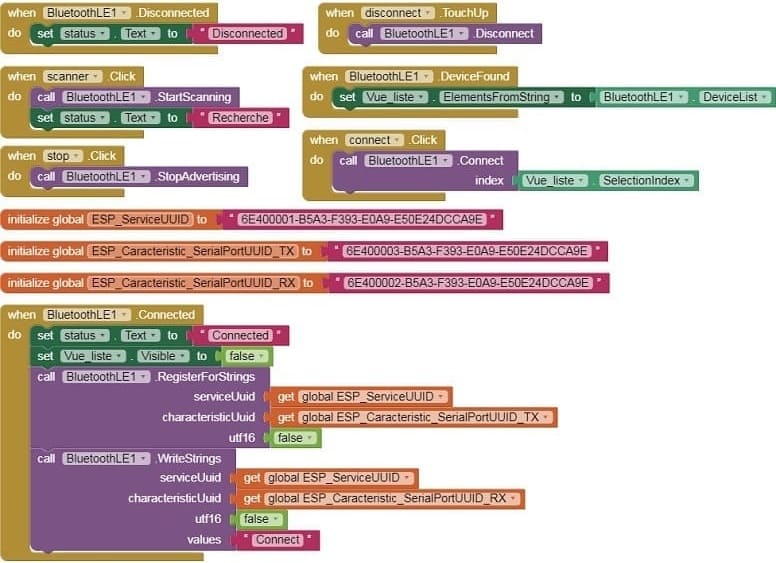
4. MIT App Inventor Blocks:
- Design a simple interface with three buttons to turn the RGB LED module on and off.
- Use programming blocks to send Bluetooth commands to the ESP32 when the three buttons are clicked.
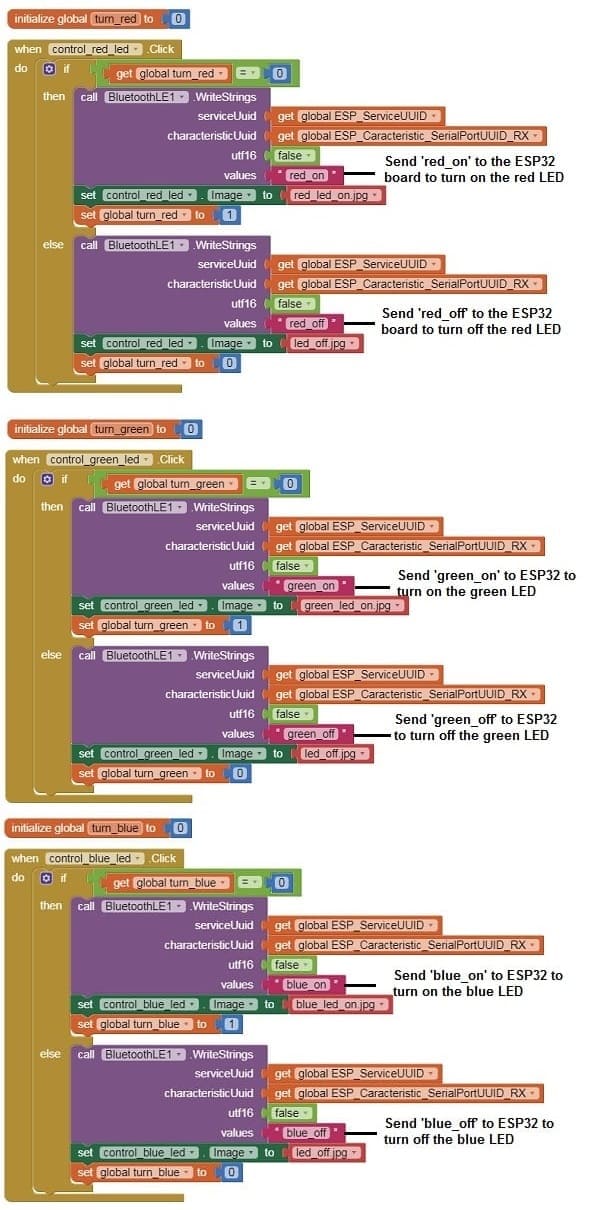
Here's a complete example of what this might look like in App Inventor:
Designer part of the mobile application
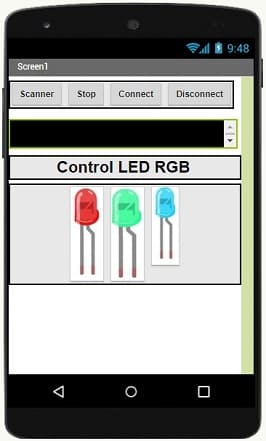
Program part of the mobile application
Download aia projectDownload apk file
5. Test:
- Load the MicroPython code onto your ESP32.
- Install the MIT App Inventor app on your smartphone and install the app you created.
- Pair and connect your smartphone with the ESP32 through Bluetooth.
- Open the app and use the buttons to control the RGB LED module connected to the ESP32.
0 comment
Leave a comment
Passion for robotics

Recent tutorials


Robotics workshop

Polpular tutorials


Making robots

Most commented tutorials


Robotic arm

Categories
Smart Home