Control four LEDs by Arduino UNO and mBlock
Tutorial plan
1- Role of LEDs in robotics
2- The components needed to control four LEDs by Arduino UNO
3- Mounting the Arduino UNO with four LEDs
4- Lighting four LEDs by the Arduino UNO and mBlock
5- Alternately light four LEDs by the Arduino UNO and mBlock
Role of LEDs in robotics
LEDs (Light-Emitting Diodes) play various roles in robotics. Here are some common applications of LEDs in robotics:
Status Indicators: LEDs are often used as status indicators in robotic systems. They can be programmed to provide visual feedback about the state of different components or subsystems within the robot. For example, LEDs can indicate whether the robot is powered on, charging, in standby mode, or performing a specific task.
Sensor Readouts: LEDs can be used in conjunction with sensors to provide visual feedback on the readings or measurements obtained by the sensors. For instance, in line-following robots, an array of sensors detects the line, and LEDs are used to indicate which sensors are activated or which path the robot is following.
Communication: LEDs can be used as part of a communication system in robots. For example, LEDs can be integrated into a robot's body to display signals or messages to interact with humans or other robots. These visual cues can help convey information or intentions in a clear and intuitive manner.
Illumination: LEDs are widely used for illuminating the working area of robots. They provide bright and energy-efficient lighting solutions for vision systems, enabling robots to perceive and navigate their environment effectively. LEDs are particularly useful in low-light conditions or for specific applications such as machine vision, inspection, or object recognition.
Aesthetics: LEDs are sometimes incorporated into robotic designs for aesthetic purposes. They can enhance the visual appeal of robots by adding customizable lighting effects or creating an engaging display. This is often seen in entertainment robots, humanoid robots, or robot companions.
The components needed to control four LEDs by Arduino UNO
To control two LEDs using an Arduino UNO, you will need the following components:
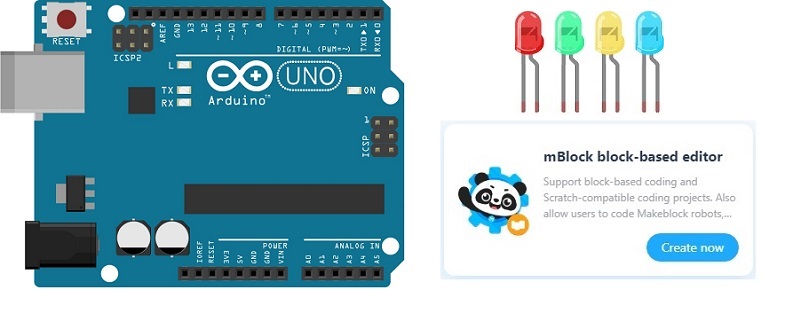
Arduino UNO board: This is the microcontroller board that will be responsible for programming and controlling the LEDs.
Four LEDs: Choose the LEDs of your choice, considering their color and brightness. Ensure that they are compatible with the Arduino in terms of voltage and current.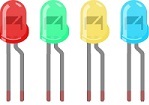
Four resistors: Resistors are needed to limit the current flowing through the LEDs to protect them. The value of the resistors will depend on the specifications of the LEDs and the operating voltage of the Arduino.
Breadboard : will be used to connect the LEDs, resistors, and Arduino together. 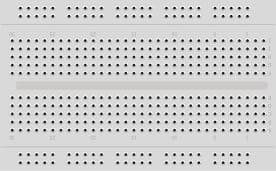
Jumper wires: These wires are used to make connections between the Arduino UNO and the LEDs. 
Mounting the Arduino UNO with four LEDs
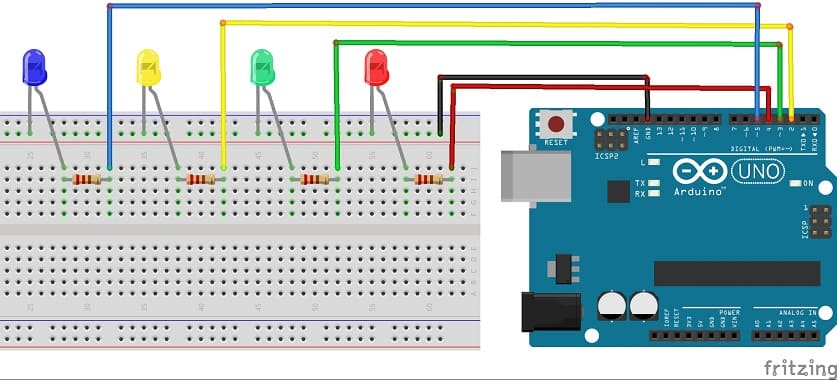
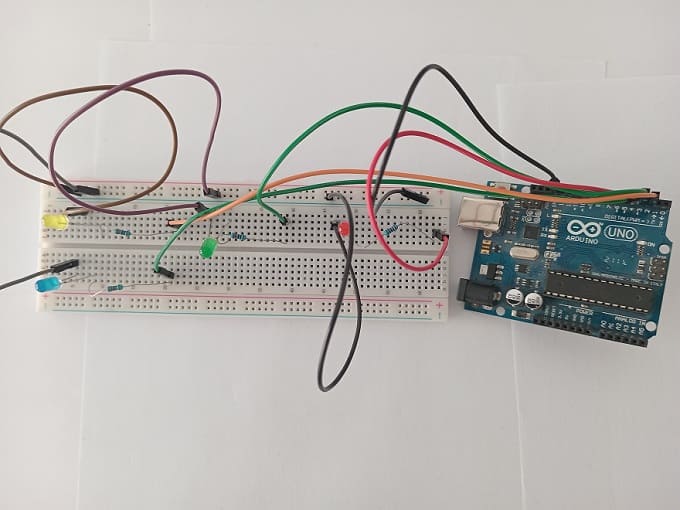
To mount an Arduino UNO with four LEDs, follow these steps:
1- Place the Arduino UNO on the breadboard, spanning the middle gap. Make sure the side with the USB port is facing outwards.
2- Insert the four LEDs into the breadboard, one near each edge, as follows:
Insert the cathode (shorter leg) of the first LED into a row on one edge of the breadboard.
Insert the cathode of the second LED into a row on the other edge of the breadboard.
Insert the cathode of the third LED into a row on the same edge as the first LED.
3- Connect the anode (longer leg) of each LED to a separate resistor. The other end of each resistor will be connected to the Arduino UNO.
4- Connect one end of the first resistor to digital pin 2 on the Arduino UNO.
Connect one end of the second resistor to digital pin 3 on the Arduino UNO.
Connect one end of the third resistor to digital pin 4 on the Arduino UNO.
Connect one end of the fourth resistor to digital pin 5 on the Arduino UNO.
5- Connect the cathode (shorter leg) of each LED to the adjacent GND (Ground) pin on the Arduino UNO. This will complete the circuit.
6- Ensure that the Arduino UNO is powered either via USB connected to your computer or an external power source.
You have now mounted the Arduino UNO with four LEDs. You can proceed with programming the Arduino to control the LEDs using the appropriate code.
Programming Arduino with mBlock
To program an Arduino board with mBlock, you can follow these steps:
1- Download and install mBlock: 
Visit the official mBlock website (https://www.mblock.cc/) and download the appropriate version for your operating system (Windows, macOS, Linux).
Once the download is complete, run the installation file and follow the instructions to install the software on your computer.
2- Connect the Arduino board:
Connect your Arduino board to your computer using a USB cable.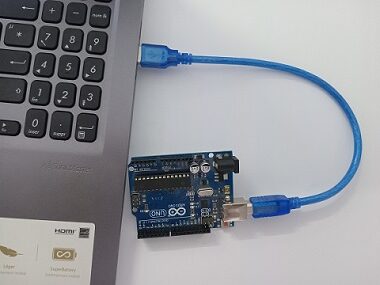
Ensure that the necessary drivers for your Arduino board are installed on your computer.
3- Launch mBlock: After installation, open mBlock by clicking on its icon in your applications menu or on the desktop.
4- Select the Arduino platform:
When you launch mBlock, you click on the Add button. 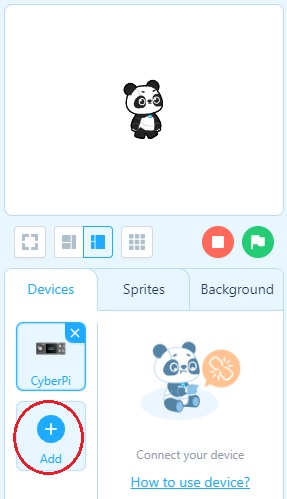
Choose Arduino if you want to program an Arduino board. 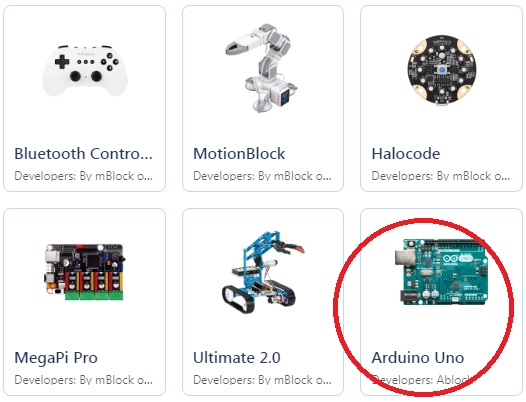
5- Configure the serial port:
In mBlock, click on the "Connect" menu at the top of the window.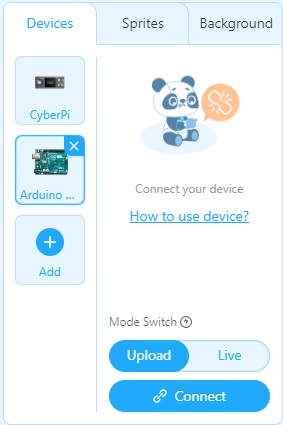
Select the serial port to which your Arduino board is connected. If you're unsure about the port, you can check in your operating system's device manager. 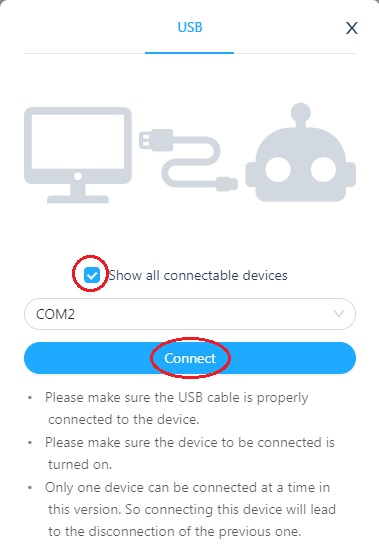
6- Programming with mBlock:
mBlock uses a graphical interface with blocks that you can drag and drop to create your program.
On the right side of the window, you'll find different categories of blocks, including specific blocks for Arduino.
Explore the available blocks and use them to build your program by assembling them in the central workspace.
7- Upload the program to the Arduino board:
Once your program is complete, click on the "Upload" button to transfer the code to your Arduino board. 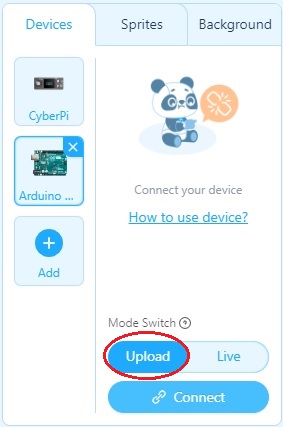
mBlock will compile the program and upload it to the connected board.
Wait for the upload to complete. You'll see messages in the mBlock window indicating the status of the upload.
8- Run the program:
After a successful upload, the program will start running on your Arduino board.
You can observe the results of your program using the components connected to the Arduino board, such as LEDs, sensors, motors, etc.
By following these steps, you should be able to use mBlock to program an Arduino board. Feel free to explore the tutorials, project examples, and additional resources available within mBlock to deepen your knowledge and programming skills with mBlock.[/vc_column_text]
Lighting four LEDs by the Arduino UNO and mBlock
Now, you can program the Arduino to control the LEDs with mBlock. Here's an example code to turn on and off the LEDs sequentially:
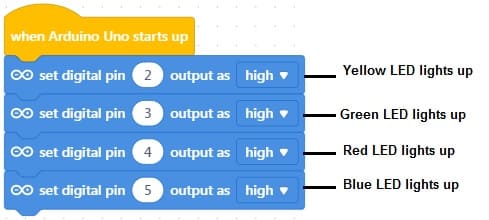
Upload this code to your Arduino UNO using the mBlock or any other compatible programming environment. The four LEDs will now light up[
Alternately light four LEDs by the Arduino UNO and mBlock
To alternately light four LEDs using an Arduino UNO, you can program the Arduino to alternate the LEDs with mBlock.
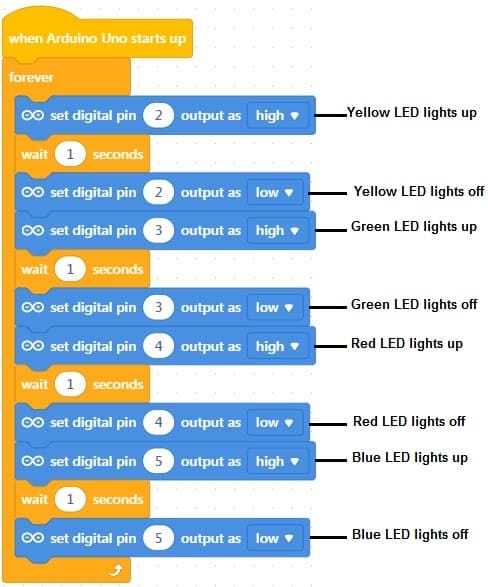
Upload this code to your Arduino UNO using the Arduino IDE or any other compatible programming environment.
The four LEDs will now alternately light up one after the other, with a delay of 1 second between each LED. Adjust the delay according to your preference.

