Control an LED by Arduino UNO
Tutorial plan
1- Role of LEDs in robotics
2- The components needed to control an LED by Arduino UNO
3- Mounting the Arduino UNO with an LED
4- Lighting an LED by Arduino UNO
5- Blink an LED by Arduino UNO
Role of LEDs in robotics
LEDs (Light-Emitting Diodes) play a significant role in robotics and are commonly used for various purposes. Here are some key roles of LEDs in robotics:
Indication and Status Display: LEDs are often used in robotics to provide visual feedback and indicate the status of different components or functionalities. For example, LEDs can be used to indicate power-on/off, battery level, error conditions, or the activation of specific robot modes. These indicators help users and operators understand the state of the robot and its operations.
Sensory Feedback: LEDs can be integrated into robotic systems to provide sensory feedback. For instance, LEDs can emit light in different colors or patterns to communicate information to the surrounding environment or interact with humans. They can be used to signal the robot's intent, express emotions, or establish a communication channel between the robot and users.
Vision Systems: LEDs are commonly used in robotic vision systems for illumination purposes. By providing controlled and consistent lighting conditions, LEDs help robots capture accurate images and perform visual tasks with greater precision. LEDs can be arranged in arrays or used as structured lighting sources to enhance depth perception, improve object recognition, or facilitate 3D scanning.
Navigation and Localization: LEDs can serve as markers or beacons to aid in navigation and localization for robots. By placing LEDs in specific patterns or arrangements, robots can detect and track these markers using sensors such as cameras or photodiodes. This enables robots to determine their position, orientation, or movement relative to the markers, which is useful in tasks like mapping, localization, or following predefined paths.
Safety and Warning Signals: In robotics applications where safety is a concern, LEDs can be utilized to provide warning signals or alerts. For example, flashing or high-intensity LEDs can indicate hazardous conditions or act as warning lights to ensure that humans or other robots are aware of the robot's presence, especially in environments where visibility may be limited.
Human-Robot Interaction: LEDs can enhance the interaction between robots and humans by serving as visual cues or feedback elements. For instance, robots can use LEDs to direct attention, guide gestures or movements, or indicate points of interaction. By incorporating LEDs into the robot's design, the communication and engagement between humans and robots can be more intuitive and effective.
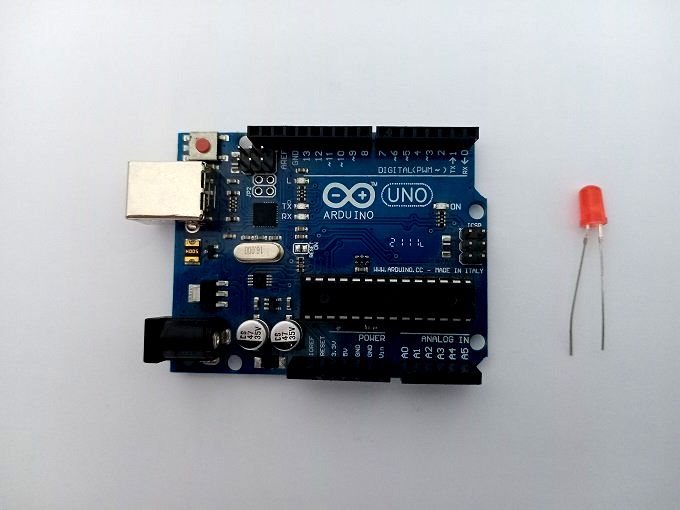
The components needed to control an LED by Arduino UNO
To control an LED using an Arduino UNO, you will need the following components:
Arduino UNO: The Arduino UNO is a microcontroller board that serves as the brain of your project. It provides the necessary I/O pins and processing power to control the LED. 
LED (Light-Emitting Diode): Choose an LED of your preferred color. LEDs are available in various sizes and shapes, but for basic projects, a standard 5mm LED will suffice. ![]()
Resistor: LEDs require current limiting to prevent excessive current flow and protect them from damage. You will need a resistor in series with the LED. The value of the resistor depends on the LED's forward voltage and desired current. A commonly used resistor value is 220 ohms. ![]()
Breadboard: A breadboard is a prototyping board that allows you to build circuits without soldering. It provides a convenient way to connect the components together. 
Jumper Wires: You'll need jumper wires to make connections between the Arduino UNO, LED, resistor, and breadboard. Ensure you have male-to-male jumper wires or a mix of male-to-male and male-to-female wires, depending on your specific needs. 
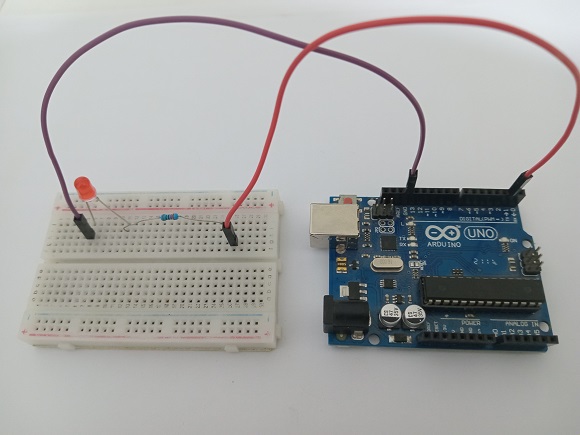
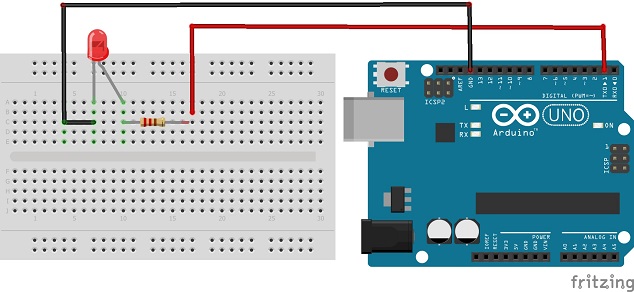
Mounting the Arduino UNO with an LED
Once you have the necessary components, you can proceed with the following steps to control the LED:
1- Connect the Arduino UNO to your computer using a USB cable and open the Arduino IDE.
2- Place the LED on the breadboard. The longer leg of the LED (anode) should connect to the Arduino, and the shorter leg (cathode) should connect to the resistor.
3- Connect one end of the resistor to the cathode of the LED.
4- Connect the other end of the resistor to any digital pin on the Arduino UNO. For example, you can use digital pin 1.
5- Connect the Arduino UNO's ground (GND) pin to the breadboard's ground rail.
Lighting an LED by Arduino UNO
Once the connections are made, upload the following code to the Arduino UNO using the Arduino IDE:
|
1 2 3 4 5 6 7 |
void setup() { pinMode(1, OUTPUT); digitalWrite(1, HIGH); // Turns the LED on } void loop() { } |
Once the code is uploaded, the LED connected to digital pin 1 will light up.
The digitalWrite() function is used to control the state of the LED by setting the pin to HIGH (on)
Blink an LED by Arduino UNO
To blink an LED using an Arduino UNO, upload the following code to the Arduino UNO using the Arduino IDE:
|
1 2 3 4 5 6 7 8 9 10 |
void setup() { pinMode(1, OUTPUT); } void loop() { digitalWrite(1, HIGH); // Turns the LED on delay(1000); // Wait for 1 second digitalWrite(1, LOW); // Turns the LED off delay(1000); // Wait for 1 second } |
Once the code is uploaded, the LED connected to digital pin 1 will start blinking on and off at one-second intervals. The digitalWrite() function is used to control the state of the LED by setting the pin to HIGH (on) and LOW (off) with a delay of 1 second (delay(1000)).
0 comment
Leave a comment
Passion for robotics

Recent tutorials

Robotics workshop

Polpular tutorials


Making robots

Most commented tutorials


Robotic arm

Categories
Smart Home