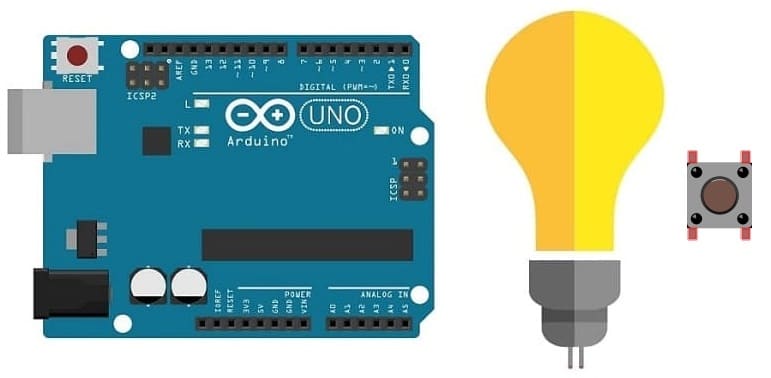
Control a lamp connected to Arduino UNO using push button
Tutorial plan
1- The components necessary to control a lamp by push button through the Arduino UNO board
2- Mounting the Arduino UNO board with a lamp, a relay and push button
3- Programming the Arduino UNO board to turn on a lamp using the push button
The components necessary to control a lamp by push button through the Arduino UNO board
To control the lamp using Arduino UNO, relay and push buttons, you will need the following components:
1- Arduino UNO board:

The Arduino UNO board is a popular microcontroller board based on the ATmega328P microcontroller. It is one of the most commonly used Arduino boards and provides a versatile platform for creating interactive electronic projects.
The Arduino UNO board is suitable for beginners and experienced users alike, offering a flexible and accessible platform for prototyping and building various electronic projects, from simple LED blinking to complex robotics and home automation systems.
2- Relay Module:
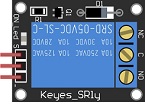
You'll need a relay module that is compatible with the Arduino UNO and can switch the high-voltage lamp. Ensure it's rated for the voltage and current required for your lamp.
3- Lamp (220V):

The lamp you want to control, which is rated for 220V. Ensure it's in working condition and safe to use.
4- Power Supply for the Lamp:

You'll need a power source for the lamp, typically a 220V AC power supply.
5- Wiring:
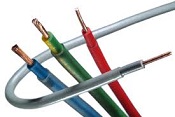
Various wires and cables for connecting the components in your circuit.
6- Push button:
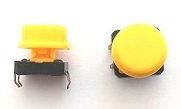
A push button, also known as a momentary switch or tactile switch, is a simple yet commonly used electromechanical component in electronics. It is designed to make or break an electrical connection temporarily when pressed or released.
7- Resistance
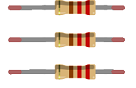
In the context of electronics and electrical circuits, a resistance refers to a passive two-terminal electrical component that restricts the flow of electric current. It is typically measured in ohms (Ω).
8- Breadboard:

A breadboard is a prototyping board that allows you to build circuits without soldering. It provides a convenient way to connect the components together.
9- Jumper Wires:

You'll need jumper wires to make connections between the Arduino UNO, lamp, relay, push button and breadboard.
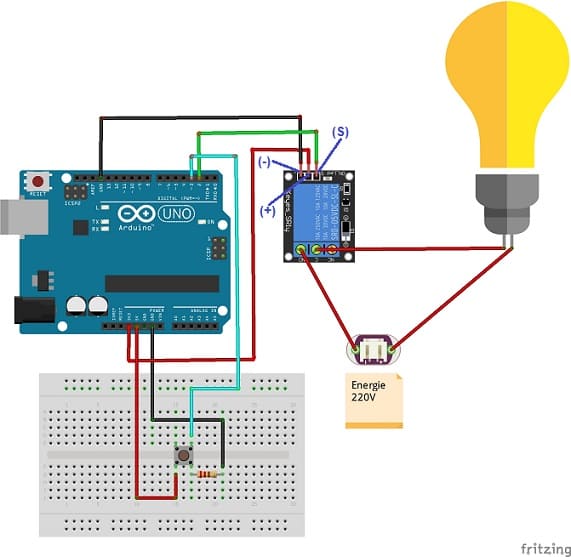
Mounting the Arduino UNO board with a lamp, a relay and push button
Once you have the necessary components, you can proceed with the following steps to control the lamp with push button:
1- Connect the Relay to the Push button:
- Connect one leg of the push button to pin 3 of the Arduino.
- Connect another leg of the push button to the 5V pin of the Arduino.
- Place a 10k Ohm resistor between the third leg of the push button and the GND pin of the Arduino.
2- Connect the Relay to the Arduino UNO:
- Connect the relay's control pin (S) to pin 2 of Arduino UNO board.
- Connect the pin (+) of relay to pin 3.3V of Arduino UNO board.
- Connect the relay's ground pin (GND) to the Arduino UNO's GND.
3- Connect the Lamp and the power supply to the Relay:
- Connect one of the lamp's wires to the relay's common (COM) terminal.
- Connect the phase (live) wire of the power supply to the normally open (NO) terminal of the relay.
- Connect the neutral wire of the power supply directly to the neutral wire of the lamp.
Programming the Arduino UNO board to turn on a lamp using the push button
To program an Arduino Uno board to turn on a lamp using relay and push button, you'll need to write the Arduino code. Here's a sample code to get you started:
|
1 2 3 4 5 6 7 8 9 10 11 12 13 14 15 16 17 18 19 20 21 22 23 24 25 26 27 28 29 |
#define Relay_PIN 2 // relay connected to pin 2 of the Arduino #define BUTTON_PIN 3 // the push button connected to pin 3 of the Arduino byte lastButtonState = LOW; // to keep the state of the button byte RelayState = LOW; // to keep the state of relay unsigned long debounceDuration = 50; // millis unsigned long lastTimeButtonStateChanged = 0; void setup() { // initialize the relay pin as an output: pinMode(Relay_PIN, OUTPUT); // initialize the pushbutton pin as an input: pinMode(BUTTON_PIN, INPUT); } void loop() { if (millis() - lastTimeButtonStateChanged > debounceDuration) { byte buttonState = digitalRead(BUTTON_PIN); if (buttonState != lastButtonState) { // the pushbutton is pressed lastTimeButtonStateChanged = millis(); lastButtonState = buttonState; if (buttonState == LOW) { RelayState = (RelayState == HIGH) ? LOW: HIGH; // Toggle the state of the relay when the button has been released digitalWrite(Relay_PIN, RelayState); // Turn the lamp on or off depending on the state of the relay } } } } |
This code sets up the push button to toggle the relay state when pressed. When you press the button, it will turn the lamp on, and when you press it again, it will turn the lamp off.
Upload this code to your Arduino Uno using the Arduino IDE, and you should see the lamp respond to the push button's state.
0 comment
Leave a comment
Passion for robotics

Recent tutorials


Robotics workshop

Polpular tutorials


Making robots

Most commented tutorials


Robotic arm

Categories
Smart Home