Connect Arduino UNO to Wifi with ESP8266 module
Tutorial plan
1- What is the ESP8266 Wifi module ?
2- The components necessary to control the ESP8266 module by Arduino UNO
3- Wiring Overview
4- Programming Arduino
What is the ESP8266 Wifi module ?
The ESP8266 is a low-cost Wi-Fi microchip with a full TCP/IP stack and microcontroller capability. It was originally developed by Espressif Systems, a Shanghai-based company, and quickly became popular in the DIY and maker communities due to its low cost, ease of use, and versatility.
Key Features and Specs of the ESP8266
Wi-Fi Connectivity: The ESP8266 can connect to Wi-Fi networks, allowing devices to communicate over the internet. It has built-in support for 802.11 b/g/n protocols.
Integrated Microcontroller: The ESP8266 includes a low-power 32-bit CPU, which means it can function as a standalone microcontroller or work as a Wi-Fi adapter for another microcontroller.
Memory and Storage: It comes with a small amount of RAM (usually 80 KB) and ROM, and additional flash storage to save programs.
GPIO Pins: It has several GPIO (General Purpose Input/Output) pins that you can use to connect sensors, LEDs, and other components.
Low Power Consumption: It’s designed with low power modes, which makes it suitable for battery-operated applications.
TCP/IP Protocol Stack: The chip has a full TCP/IP stack, which allows it to handle common internet protocols directly, like HTTP, making it great for IoT applications.
Applications of the ESP8266
The ESP8266 is often used in Internet of Things (IoT) projects where Wi-Fi connectivity is needed. Popular uses include:Home Automation: Controlling lights, appliances, or monitoring sensors remotely.
Weather Stations: Reading environmental data from sensors and sending it to cloud storage or a web app.
Wireless Data Logging: Collecting data from sensors and pushing it to a web server or database.
Smart Devices: Embedding into various consumer devices for network control.
Programming the ESP8266
The ESP8266 can be programmed using several platforms, including:
Arduino IDE: With the ESP8266 library, it can be programmed in the familiar Arduino language.
AT Commands: It can be controlled by sending AT commands over a serial interface from another microcontroller.
Lua (NodeMCU): The NodeMCU firmware allows programming the ESP8266 in Lua.
MicroPython: The ESP8266 can also run MicroPython, making it accessible to Python programmers.
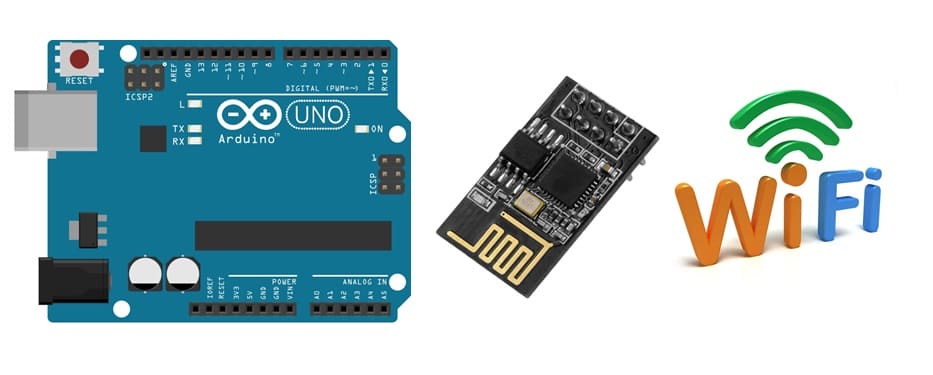
To control an ESP8266 module with an Arduino Uno, you'll need some additional components
Arduino UNO :

The Arduino Uno is the main microcontroller that will control the ESP8266 and handle data received over Wi-Fi. It will also be responsible for sending data to the I2C display to show information.
ESP8266 Wi-Fi Module

The ESP8266 is a low-cost Wi-Fi microchip with a full TCP/IP stack and microcontroller capability, making it ideal for Internet of Things (IoT) projects. It can be controlled using AT commands over a serial interface, allowing the Arduino to use its Wi-Fi capabilities.
I2C LCD Display
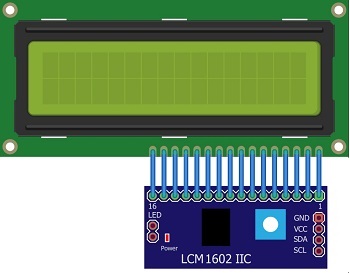
An I2C LCD Display (typically 16x2 or 20x4) is used to show data in a simple, easy-to-read format. The I2C (Inter-Integrated Circuit) communication protocol allows the Arduino to control the display with only two pins, SDA and SCL.
Purpose: This display will show data retrieved by the ESP8266 or status messages, making it ideal for projects that require feedback or monitoring.
3V/5V power module
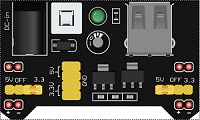
A 3.3V/5V Power Module is a small breakout board that provides stable 3.3V and 5V power from a higher voltage source, like an external battery or USB input. This module is essential because:
ESP8266 Power: It supplies a stable 3.3V with sufficient current for the ESP8266, which often draws more than the Arduino Uno’s 3.3V pin can provide.
4- Power supply for the water pump (matching the pump's requirements)
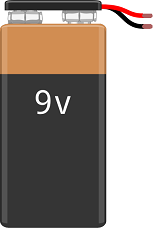
A 9V Battery is used as the primary power source for the setup. It is used power the board, ESP8266.
5- Jumper Wires

Jumper wires will be used to make connections between the components.
6- Breadboard:
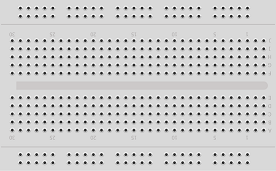
A Breadboard provides a platform to arrange and connect components without soldering. It helps keep wires and components organized, especially when integrating multiple modules like the ESP8266, I2C LCD, and power module.
Purpose: Simplifies wiring for prototyping and testing the circuit.
Wiring Overview
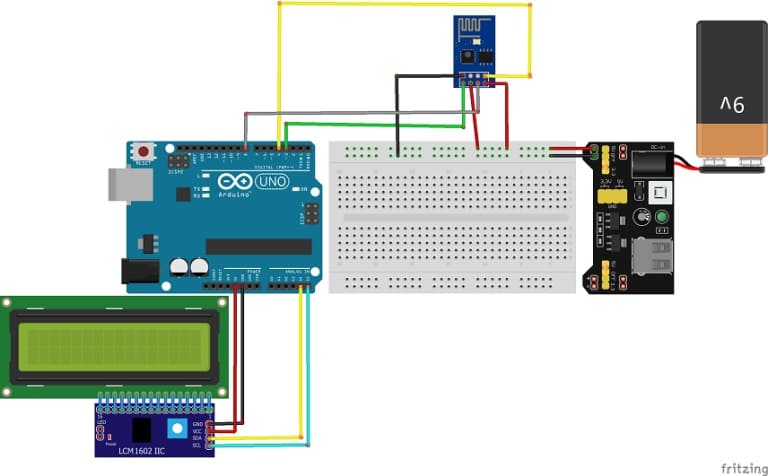
1- ESP8266 Connections:
VCC → 5V output from the Power Module.
GND → Common Ground with Arduino and Power Module.
RX (Receive) → Arduino pin 3.
TX (Transmit) → Arduino pin 4.
RST → Arduino pin 8.
2- I2C LCD Connections:
VCC → 5V from the Arduino or Power Module.
GND → Ground.
SDA → Arduino A4 (I2C data line).
SCL → Arduino A5 (I2C clock line).
Programming Arduino
Below is a basic example Arduino sketch that demonstrates sending AT commands to the ESP8266, receiving data, and displaying information on the I2C LCD display. This assumes the ESP8266 is connected via serial, and the LCD is using the I2C interface.
We must use these two libraries: LiquidCrystal_I2C and Adafruit_ESP8266
|
1 2 3 4 5 6 7 8 9 10 11 12 13 14 15 16 17 18 19 20 21 22 23 24 25 26 27 28 29 30 31 32 33 34 35 36 37 38 39 40 41 42 43 44 45 46 47 48 49 50 51 52 53 54 55 56 57 58 59 60 61 62 63 64 65 66 67 68 69 70 71 72 73 74 75 76 77 78 79 80 81 82 83 84 85 86 87 88 89 90 91 92 93 94 |
#include <Adafruit_ESP8266.h> #include <SoftwareSerial.h> #include <LiquidCrystal_I2C.h> #define ESP_RX 3 #define ESP_TX 4 #define ESP_RST 8 SoftwareSerial softser(ESP_RX, ESP_TX); LiquidCrystal_I2C lcd(0x27, 20, 4); // Must declare output stream before Adafruit_ESP8266 constructor; can be // a SoftwareSerial stream, or Serial/Serial1/etc. for UART. Adafruit_ESP8266 wifi(&softser, &Serial, ESP_RST); // Must call begin() on the stream(s) before using Adafruit_ESP8266 object. #define ESP_SSID "HUAWEI Y5 2019" // Your network name here #define ESP_PASS "b582058c4d86" // Your network password here #define PORT 80 // Find/Google your email provider's SMTP outgoing port for unencrypted email int count = 0; // we'll use this int to keep track of which command we need to send next bool send_flag = false; // we'll use this flag to know when to send the email commands void setup() { lcd.init(); char buffer[50]; // This might work with other firmware versions (no guarantees) // by providing a string to ID the tail end of the boot message: // comment/replace this if you are using something other than v 0.9.2.4! wifi.setBootMarker(F("Version:0.9.2.4]\r\n\r\nready")); softser.begin(9600); // Soft serial connection to ESP8266 Serial.begin(57600); while(!Serial); // UART serial debug // Test if module is ready lcd.backlight(); Serial.print(F("Hard reset...")); lcd.print(F("Hard reset...")); if(!wifi.hardReset()) { Serial.println(F("no response from module.")); for(;;); } Serial.println(F("OK.")); lcd.print(F("OK.")); Serial.print(F("Soft reset...")); lcd.print(F("Soft reset...")); if(!wifi.softReset()) { Serial.println(F("no response from module.")); for(;;); } Serial.println(F("OK.")); lcd.clear(); lcd.print(F("OK.")); Serial.print(F("Checking firmware version...")); lcd.clear(); lcd.print(F("Checking firmware version...")); delay(2000); wifi.println(F("AT+GMR")); if(wifi.readLine(buffer, sizeof(buffer))) { Serial.println(buffer); lcd.clear(); lcd.print(buffer); delay(2000); wifi.find(); // Discard the 'OK' that follows } else { Serial.println(F("error")); } Serial.print(F("Connecting to WiFi...")); lcd.clear(); lcd.print(F("Connect to WiFi...")); delay(2000); if(wifi.connectToAP(F(ESP_SSID), F(ESP_PASS))) { // The ESP8266 wifi module is connected to the network // IP addr check isn't part of library yet, but // we can manually request and place in a string. Serial.print(F("OK\nChecking IP addr...")); wifi.println(F("AT+CIFSR")); if(wifi.readLine(buffer, sizeof(buffer))) { lcd.clear(); Serial.println(buffer); // show ip address of wifi module ESP8266 lcd.setCursor(0, 0); lcd.print("IP de ESP8266 "); lcd.setCursor(0, 1); lcd.print(buffer); } } } void loop() { } |
