Arduino UNO and Joystick
Tutoriel plan
1- What is a Joystick ?
2- Objective of the tutorial
3- Materials needed to control Joystick by Arduino board
4- Wiring the Components
5- Programming the Arduino board
What is a Joystick ?
A joystick is an input device used to control the movement or operation of a system by manipulating a stick or lever. It is widely used in gaming, robotics, and industrial applications for real-time control.
Parts of a Joystick
Stick/Lever:
The main handle that can be tilted or rotated in different directions.
In some joysticks, it may have buttons on top for additional control.
Base:
Houses the electronic components, sensors, and sometimes additional buttons or triggers.
Potentiometers/Analog Sensors:
Measure the angular displacement of the stick and convert it into an analog electrical signal.
Switches:
In digital joysticks, switches detect the direction (up, down, left, right).
Additional Features:
Some joysticks include vibration feedback, wireless connectivity, or extra programmable buttons.
How It Works
When the joystick is moved, sensors (like potentiometers or Hall-effect sensors) detect the direction and degree of movement.
The joystick converts this movement into an electrical signal, which is sent to the connected system.
The connected system interprets this signal to control movement (e.g., moving a character in a video game or steering a robot).
Objective of the tutorial
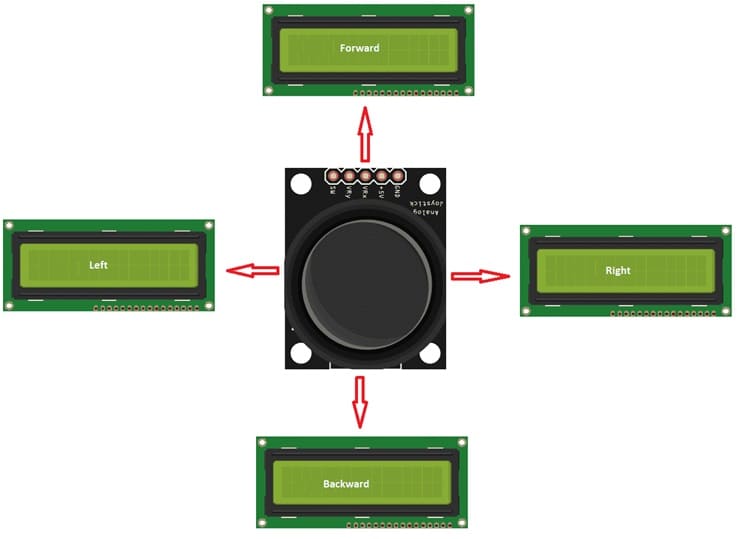
To control and display the joystick direction on an Arduino UNO with an LCD I2C screen, we need to:
1- Read the joystick's X-axis and Y-axis analog values.
2- Determine the direction of the joystick movement based on these values.
3- Display the direction (up, down, left, right, or center) on the LCD screen.
Materials needed to control Joystick by Arduino board
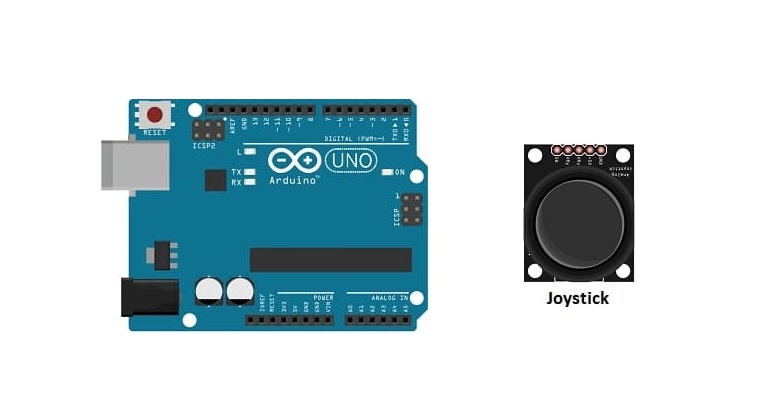
Arduino UNO

The Arduino will serve as the "brain" of this project. It will read the analog values from the joystick’s X and Y axes, process this data to determine the direction of the joystick, and display the information on the LCD I2C screen.
Joystick Module

The joystick provides analog input data to the Arduino, which the Arduino processes to determine the direction of movement. The two potentiometers in the joystick allow it to move along X and Y axes, with values typically ranging from 0 to 1023.
LCD I2C Screen
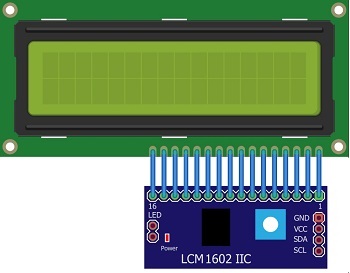
The LCD will display the joystick's direction (up, down, left, right, or center). I2C allows the use of only two data lines (SDA and SCL), which makes it easier to interface with the Arduino compared to traditional parallel LCD displays that require more pins.
Jumper Wires

These are used to make the necessary connections between the Arduino, joystick, and the LCD I2C display, ensuring that data is passed correctly from the joystick to the Arduino and from the Arduino to the LCD.
Wiring the Components
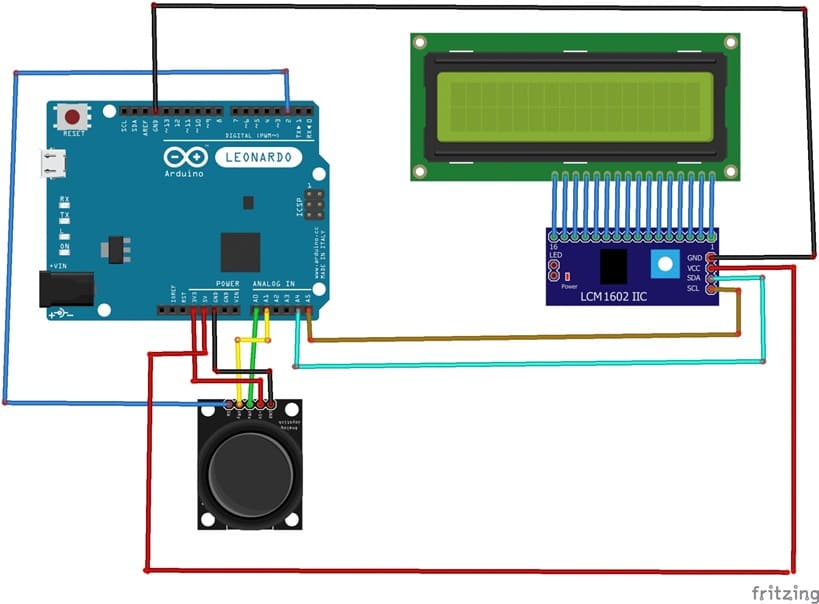
1. Joystick Module Connections:
The joystick has three main components:
X-axis potentiometer (VRx): Reads the horizontal movement.
Y-axis potentiometer (VRy): Reads the vertical movement.
Push button (SW): Detects if the joystick button is pressed (optional).
For Arduino UNO:
VCC (Joystick) to 3V3 (Arduino): Powers the joystick.
GND (Joystick) to GND (Arduino): Ground connection.
VRx (Joystick) to A0 (Arduino): X-axis analog reading.
VRy (Joystick) to A1 (Arduino): Y-axis analog reading.
SW (Joystick button) to D2 (Arduino): Digital input for button press (optional).
2. LCD I2C Screen Connections:
VCC (LCD) to 5V (Arduino): Power supply to the LCD.
GND (LCD) to GND (Arduino): Ground connection.
SDA (LCD) to A4 (Arduino): Data line.
SCL (LCD) to A5 (Arduino): Clock line.
Programming the Arduino board
This program allows the Arduino board to read the different values of the joystick inputs and display the direction of the joystick on the I2C LCD 1602 display.
You need to import this library : LiquidCrystal_I2C for I2C LCD screen.
|
1 2 3 4 5 6 7 8 9 10 11 12 13 14 15 16 17 18 19 20 21 22 23 24 25 26 27 28 29 30 31 32 33 34 35 36 37 38 39 40 |
#include <LiquidCrystal_I2C.h> LiquidCrystal_I2C lcd(0x27, 20, 4); int VRx = A0; int VRy = A1; int SW = 2; int xPosition = 0; int yPosition = 0; int SW_state = 0; int mapX = 0; int mapY = 0; void setup() { lcd.init(); pinMode(VRx, INPUT); pinMode(VRy, INPUT); pinMode(SW, INPUT_PULLUP); } void loop() { lcd.backlight(); lcd.clear(); xPosition = analogRead(VRx); yPosition = analogRead(VRy); SW_state = digitalRead(SW); mapX = map(xPosition, 0, 1023, -512, 512); mapY = map(yPosition, 0, 1023, -512, 512); if ((mapX>=-515)&& (mapX<=-510)&&(mapY>=-175)&& (mapY<=-168)) lcd.print("Forward");//When the user points the joystick controller forward, the word “Forward” is displayed. if ((mapX>=168)&& (mapX<=175)&&(mapY>=-175)&& (mapY<=-168)) lcd.print("Backward");//When the user moves the joystick to the rear, the word “Backward” is displayed. if ((mapX<=-166)&& (mapX>=-175)&&(mapY>=-515)&& (mapY<=-510)) lcd.print("Right");//When the user points the joystick to the right, the word “Right” is displayed if ((mapX>=-175)&& (mapX<=-170)&&(mapY>=165)&& (mapY<=175)) lcd.print("Left");//When the user points the joystick to the left, the word “Left” is displayed. if (SW_state==0) lcd.print("Pressed button"); delay(1000); } |
Upload and Test:
1- Connect the Arduino UNO to your computer.
2- Open the Arduino IDE and select the correct board and port.
3- Upload the code to your Arduino.
4- After uploading, you should see the joystick's direction displayed on the LCD screen as you move the joystick in different directions.

