Arduino Obstacle-Avoiding Robot
Tutorial plan
1- What is the Obstacle-Avoiding robot ?
2- Operation of Arduino Obstacle-Avoiding robot
3- Components needed
4- Wiring Configuration
5- Arduino program for the robot
What is the Obstacle-Avoiding robot ?
A robot avoiding obstacles refers to an autonomous or semi-autonomous system designed to navigate its environment while detecting and avoiding obstacles in its path. This is achieved using various sensors and algorithms that enable the robot to identify obstacles, calculate alternative paths, and move safely without collisions.
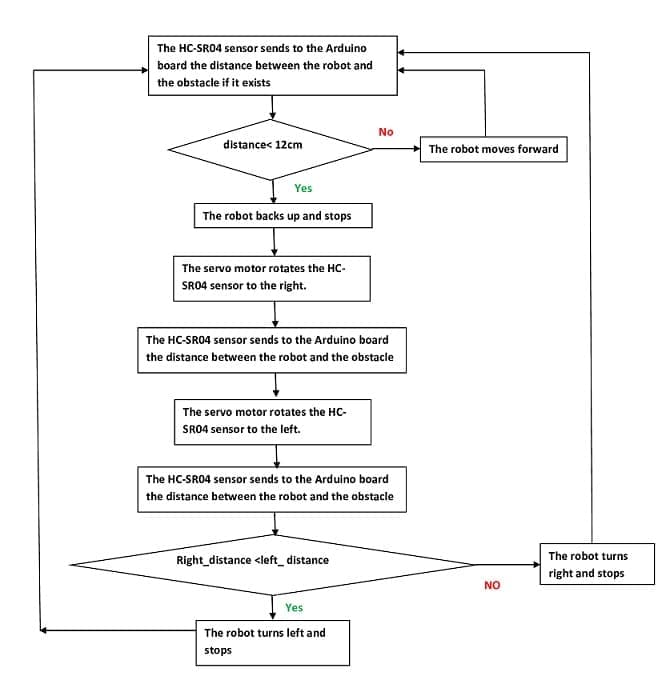
1. The robot continuously scans its surroundings using an ultrasonic sensor.
2. If an object is detected within a certain threshold distance (e.g., 20 cm):
The robot stops moving forward.
It turns left or right until the path is clear.
3. The robot resumes its forward motion once no obstacles are detected.
This principle is the foundation of many real-world robots and autonomous systems.
Operation of Arduino Obstacle-Avoiding robot
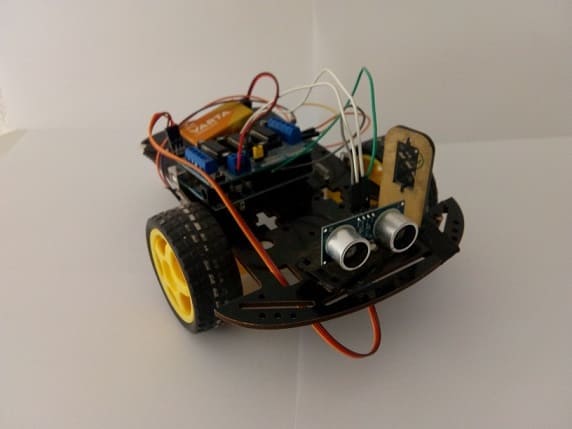
This project involves using an Arduino UNO, an L293D motor driver module, an HC-SR04 ultrasonic sensor, a servo motor, and a 2-wheel kit to build a robot that can navigate its environment while avoiding obstacles.
Working Principle:
1. Obstacle Detection Using the HC-SR04 Sensor:
The HC-SR04 emits ultrasonic waves when the Trig pin is triggered.
The sensor measures the time it takes for the ultrasonic waves to return after hitting an obstacle.
The Arduino calculates the distance
2. Scanning the Environment with the Servo Motor:
The servo motor rotates the ultrasonic sensor to scan the left, center, and right directions (e.g., at angles 0°, 90°, and 180°).
The Arduino reads the distance for each direction.
3. Decision Making:
Based on the distances measured in different directions:
If the center is clear, the robot moves forward.
If an obstacle is detected in the center:
- The robot scans the left and right distances.
- It turns towards the direction with the greater distance.
4. Motor Control via L293D:
The Arduino sends signals to the L293D to control the motors for forward, backward, left, and right movements:
- Forward: Left motor (clockwise), right motor (clockwise).
- Left Turn: Left motor (stopped), right motor (clockwise).
- Right Turn: Left motor (clockwise), right motor (stopped).
Components needed
Arduino UNO:

The main microcontroller that processes sensor input and controls the motors and servo.
L293D Motor Driver Module:
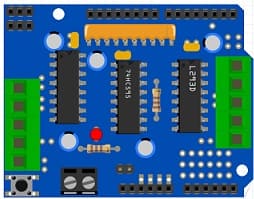
Controls the speed and direction of the two DC motors based on signals from the Arduino.
HC-SR04 Ultrasonic Sensor:
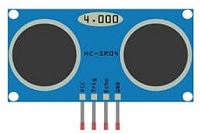
Detects obstacles by emitting ultrasonic waves and measuring the time it takes for the waves to bounce back.
Servo Motor:

Rotates the ultrasonic sensor to scan the environment in multiple directions.
2-Wheel Kit:
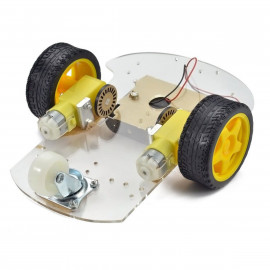
Provides mobility. Each wheel is driven by a DC motor connected to the L293D motor driver.
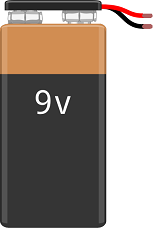
9V Battery:
Provides power to the entire system.
Wiring Configuration
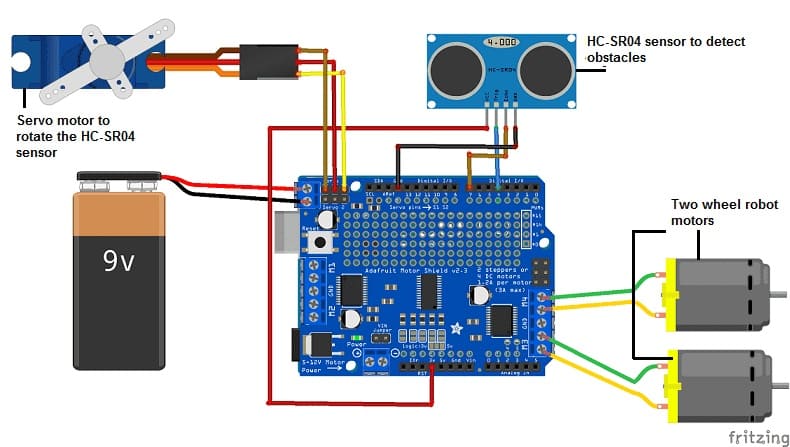
1. Arduino UNO to L293D Motor Driver Module:
IN1, IN2 (left motor): Connected to Arduino digital pins (e.g., D4, D5).
IN3, IN4 (right motor): Connected to Arduino digital pins (e.g., D6, D7).
Enable pins: Connected to 5V (for maximum motor speed).
Power connections:
VCC: External power source for the motors (e.g., battery).
GND: Common ground with Arduino.
2. HC-SR04 Ultrasonic Sensor:
VCC: Connected to Arduino 5V.
GND: Connected to Arduino GND.
Trig: Connected to an Arduino digital pin (e.g., D4).
Echo: Connected to an Arduino digital pin (e.g., D7).
3. Servo Motor:
Signal: Connected to an Arduino PWM pin (e.g., D10).
VCC: Connected to Arduino 5V.
GND: Connected to Arduino GND.
4. Power Supply:
The motors are powered by an external power source (e.g., 9V or 12V battery).
The Arduino can be powered by USB or an external battery.
Arduino program for the robot
You need to import AFMotor library to control the two motor and HCSR04 library to control the HC-SR04 sensors .
|
1 2 3 4 5 6 7 8 9 10 11 12 13 14 15 16 17 18 19 20 21 22 23 24 25 26 27 28 29 30 31 32 33 34 35 36 37 38 39 40 41 42 43 44 45 46 47 48 49 50 51 52 53 54 55 56 57 58 59 60 61 62 63 64 65 66 67 68 69 70 71 72 73 74 |
#include <HCSR04.h> #include <AFMotor.h> #include <Servo.h> Servo myservo; // create servo object to control a servo AF_DCMotor motor1(3); // connect the two robot wheel motors to the L293D module AF_DCMotor motor2(4); // HC-SR04 sensor pin definition const int trigPin = 4; const int echoPin = 7; int distance,distance_droite,distance_gauche; int pos; // initialization of the sensor with the pins used. UltraSonicDistanceSensor distanceSensor(trigPin, echoPin); void setup() { myservo.write(90); // tell servo to go to position 90 myservo.attach(10); // attaches the servo on pin 10 to the servo object motor1.setSpeed(100); motor2.setSpeed(100); // initialisation du port serie a 9600 band pour afficher les valeurs mesurees par le capteur. Serial.begin(9600); } void loop() { distance = distanceSensor.measureDistanceCm(); Serial.println(distance); delay(50); if ((distance<15)and(distance>0)){ // the HC-SR04 sensor detects an obstacle motor1.run(RELEASE); // the robot stops motor2.run(RELEASE); delay(500); motor1.run(BACKWARD); // the robot is backing up motor2.run(BACKWARD); delay(500); motor1.run(RELEASE); // the robot stops motor2.run(RELEASE); for (pos = 90; pos > 10; pos -= 1) { // Faire tourner le capteur HC-SR04 vers la droite myservo.write(pos); delay(15); } delay(500); distance_droite = distanceSensor.measureDistanceCm(); // calculer la distance entre le capteur HC-SR04 et un obstacle s'il existe delay(500); for (pos = 0; pos < 170; pos += 1) { // Rotate the HC-SR04 sensor to the left // in steps of 1 degree myservo.write(pos); delay(15); } delay(500); distance_gauche = distanceSensor.measureDistanceCm();// calculate the distance between the HC-SR04 sensor and an obstacle if there is delay(500); for (pos = 170; pos > 90; pos -= 1) { // return to the initial position myservo.write(pos); delay(15); delay(500); } if (distance_droite<distance_gauche){ motor2.run(FORWARD); // turn the robot left delay(1000); motor2.run(RELEASE); delay(500); } else { motor1.run(FORWARD); // turn the robot right delay(1000); motor1.run(RELEASE); delay(500); } } else if (distance>0) { motor1.run(FORWARD); // move the car forward motor2.run(FORWARD); } } |
Testing and Tuning:
1. Place the robot in an environment with obstacles.
2. Test the robot's ability to detect and avoid obstacles.
3. Adjust the distanceThreshold and servo angles as needed for better performance.
