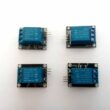
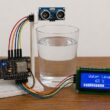
1602 LCD display with I2C
What is a 1602 LCD display ?
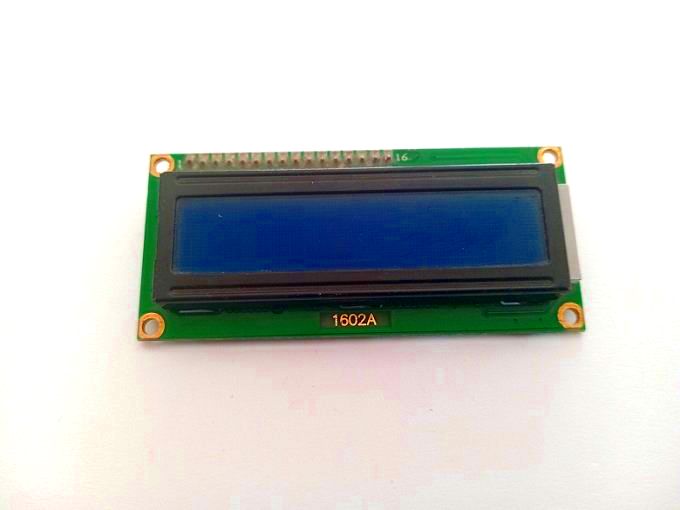
The 1602 LCD display is a popular alphanumeric display module that consists of a 16x2 character matrix. It is widely used in various electronic projects, such as clocks, thermometers, and other DIY projects.
The 1602 LCD display uses the HD44780 controller, which is compatible with the industry-standard Hitachi 44780 LCD controller. It has a built-in character generator and can display up to two lines of 16 characters each.
The module has a backlight and contrast adjustment, which can be controlled by a potentiometer. It also has a 16-pin header that can be easily connected to a microcontroller or other electronic devices.
To use the 1602 LCD display, you need to connect the pins to a microcontroller and program it to display the desired text or characters. There are many libraries available for various microcontrollers that make it easy to use the 1602 LCD display.
What is a 1602 LCD display with I2C ?
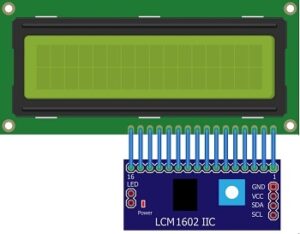
A 1602 LCD display with I2C is a variant of the standard 1602 LCD display that uses I2C communication protocol to interface with a microcontroller or other electronic device.
The I2C interface uses only two wires, SDA (serial data) and SCL (serial clock), to transfer data between the display module and the microcontroller, which simplifies the wiring and reduces the number of pins needed to connect the display to the microcontroller.
In the case of the 1602 LCD display with I2C, a small module is added to the standard 1602 LCD display that contains an I2C interface chip and other necessary components. This module allows the display to communicate over I2C protocol, which makes it easier to use with microcontrollers that have limited numbers of available pins.
To use the 1602 LCD display with I2C, you need to connect the SDA and SCL pins of the module to the corresponding pins of the microcontroller, and use an I2C library to control the display.
Programming the 1602 LCD display with I2C
To program a 1602 LCD display with I2C, you will need an I2C library for your microcontroller. The library will allow you to communicate with the display over the I2C protocol. Here's a step-by-step guide for programming the 1602 LCD display with I2C using Arduino:
1- Connect the I2C module to the 1602 LCD display. The module typically has four pins: VCC, GND, SDA, and SCL. Connect the VCC pin to +5V, the GND pin to GND, the SDA pin to A4, and the SCL pin to A5 on the Arduino board.
2- Download and install the LiquidCrystal_I2C library for Arduino from the Arduino IDE Library Manager. This library provides an easy way to interface with the 1602 LCD display over I2C.
3- Include the LiquidCrystal_I2C library in your Arduino sketch by adding the following line of code at the beginning of your sketch:
|
1 |
#include <LiquidCrystal_I2C.h> |
5- Create an instance of the LiquidCrystal_I2C class, specifying the I2C address of your display. The default I2C address of the 1602 LCD display with I2C is usually 0x27. You can create an instance of the LiquidCrystal_I2C class using the following code:
|
1 |
LiquidCrystal_I2C lcd(0x27, 16, 2); |
This code creates an instance of the LiquidCrystal_I2C class, specifying the I2C address of the display as 0x27, and the number of columns and rows of the display as 16 and 2 respectively.
6- Initialize the LCD display by calling the begin() method of the LiquidCrystal_I2C class, as shown below:
|
1 |
lcd.begin(); |
7- Write to the display using the print() and setCursor() methods of the LiquidCrystal_I2C class. For example, you can display "Hello, world!" on the first line of the display using the following code:
|
1 2 |
lcd.setCursor(0, 0); lcd.print("Hello, world!"); |
This code sets the cursor position to the first column of the first row (0, 0), and prints the string "Hello, world!" on the display.
That's it! You can now use the 1602 LCD display with I2C in your Arduino projects.
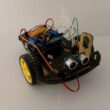
Role of the 1602 LCD display with I2C in robotic projects
The 1602 LCD display with I2C is a useful component in many robotic projects. It can be used to display sensor readings, motor status, and other important information to the user. Here are some examples of how the 1602 LCD display with I2C can be used in robotic projects:
Display sensor readings: The 1602 LCD display with I2C can be used to display sensor readings such as temperature, humidity, or distance. This can be helpful in robot projects where you need to monitor the environment or track changes in conditions.
Display motor status: In robotic projects that use motors, the 1602 LCD display with I2C can be used to display the status of the motors, such as the speed or direction. This can help you debug problems with the motors or monitor their performance.
Display robot status: The 1602 LCD display with I2C can be used to display the status of the robot, such as battery level, current mode of operation, or other important information. This can help you monitor the robot's behavior and detect any problems or issues.
Display user interface: The 1602 LCD display with I2C can be used as a user interface for the robot, allowing the user to interact with the robot and control its behavior. This can be useful in robotic projects where you need to provide a simple interface for users to interact with the robot.
0 comment
Leave a comment
Passion for robotics

Recent tutorials


Robotics workshop

Polpular tutorials


Making robots

Most commented tutorials


Robotic arm

Categories
Smart Home