Smart door access control using Arduino and RFID card
Tutorial plan
1- Introduction
2- Description of our Smart Door Access
3- Required Components
4- Circuit Connections of system
5- Arduino program of system
Introduction
A smart door access control system using a card is a modern security solution that allows users to unlock doors using RFID, NFC, or smart cards instead of traditional keys. These systems are commonly used in offices, schools, hotels, and even smart homes.
How It Works (General Concept)
1- User presents a smart card (RFID, NFC, or magnetic stripe) near a card reader installed at the door.
2- The reader scans the card and checks its unique identifier (UID).
3- The system then:
a) Verifies the UID against a database.
b) Grants or denies access based on the card’s permissions.
4- If access is granted, the system sends a signal to an electronic lock or relay to unlock the door.
5- Optionally, the system logs the event (e.g., who entered and when).
Advantages
Keyless entry = no lost keys
Access can be granted or revoked instantly
Logs entries/exits for better security
Supports multi-user access with different permissions
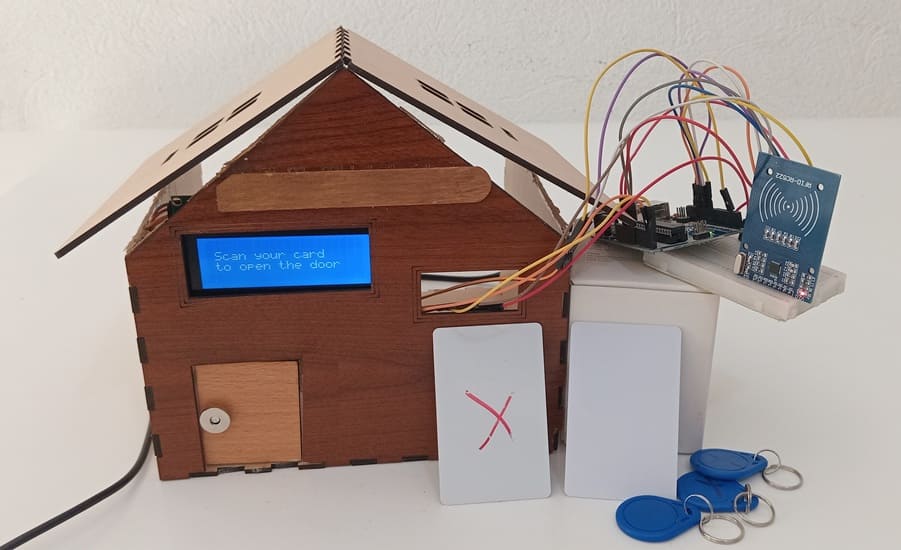
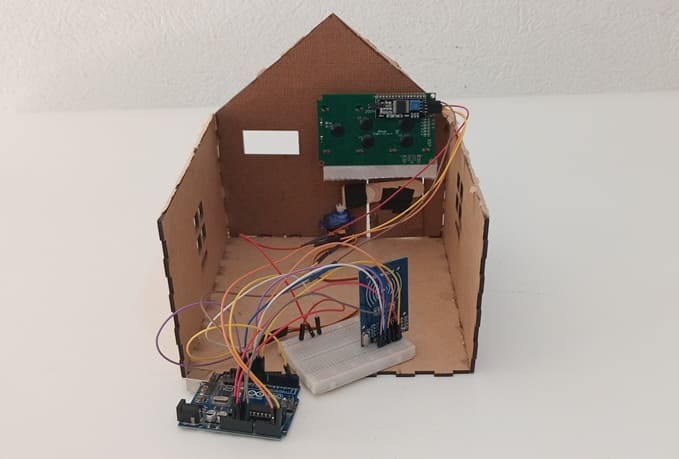
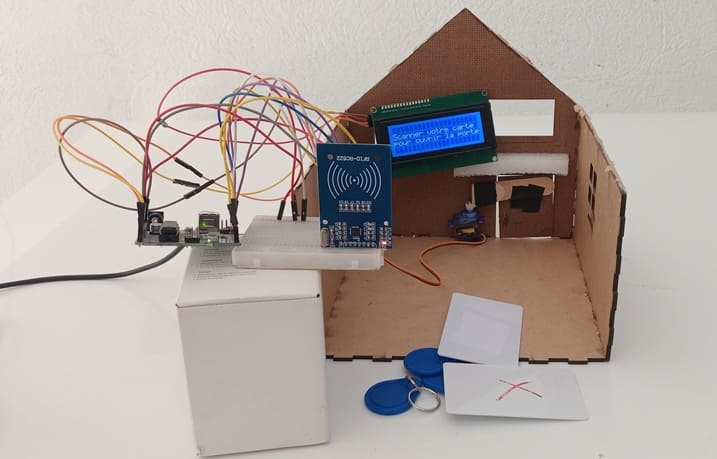
Description of our Smart Door Access
This project demonstrates how to securely control access to a door using an RFID card. The system uses an Arduino to control components, an RFID reader to identify users, an I2C LCD to provide feedback, and a servomotor to open or close a simulated lock.
1. System Initialization
When powered on, the Arduino initializes all components:
RFID module (RC522)
I2C LCD screen
Servo motor
The LCD displays:Scan your card...
2. Waiting for RFID Card
The RFID module constantly checks for the presence of a card/tag.
When a card is placed near the reader (~3–5 cm), it detects the UID (Unique Identifier).
3. Reading and Verifying the UID
The UID from the RFID card is read and sent to the Arduino.
The UID is compared with a list of authorized UIDs stored in the Arduino code (or EEPROM if dynamic storage is used).
4. Access Granted (if UID is valid)
If the UID matches an authorized one:
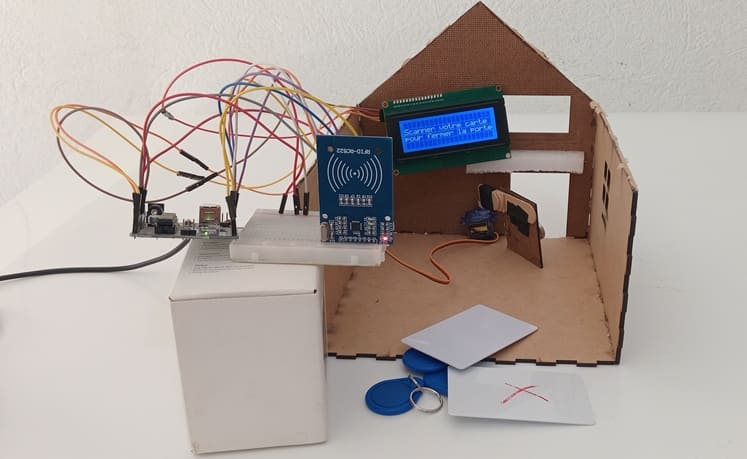
LCD displays: "Door opens"
The servomotor rotates to unlock the door (e.g., 20° position).
The user approaches the RFID card to the RC522 reader again, the servomotor close the door.
5. Access Denied (if UID is not valid)
If the UID doesn't match:
LCD displays: "Card not validated"
The servomotor does not move; the door remains locked.
6. System Resets
After granting or denying access, the system:
Displays Scan your card... again.
Waits for the next RFID scan.
Required Components
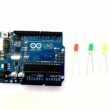
Arduino UNO

Role: Acts as the central controller of the project.
Function:
Communicates with the RFID reader to read the card UID.
Compares the UID to authorized IDs.
Sends messages to the LCD.
Controls the servomotor to lock/unlock the door.
RFID Module (RC522)
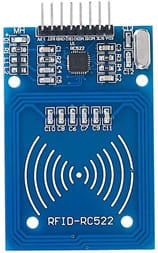
Role: Used to read RFID tags/cards wirelessly.
Function:
Operates at 13.56 MHz frequency.
Uses SPI communication with the Arduino.
Reads the UID of RFID cards when placed near (~3–5 cm).
RFID Cards/Tags

![]()
Role: Serve as electronic keys.
Function:
Each card contains a unique identifier (UID).
When placed near the RFID reader, the UID is transmitted.
If the UID is recognized, access is granted.
I2C LCD Display
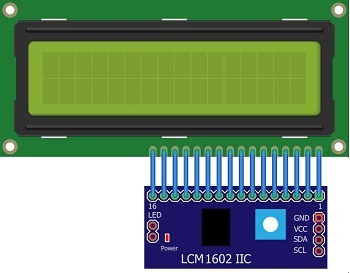
Role: Displays messages such as “Access Granted” or “Access Denied”.
Function:
Simplifies LCD wiring using I2C protocol (only 2 wires).
Shows system status and feedback to the user.
Servomotor (e.g., SG90)
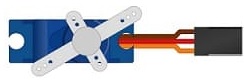
Role: Simulates a door lock mechanism.
Function:
Rotates to 20° to unlock the door when access is granted.
Returns to 85° to lock the door after a few seconds.
Breadboard

The breadboard is used for prototyping and connecting components without soldering.
It allows the easy insertion of wires and components for a flexible setup.
Jumper Wires

Jumper wires are used to make connections between components on the breadboard, Micro:bit, and GPIO extension card.
Wooden house prototype
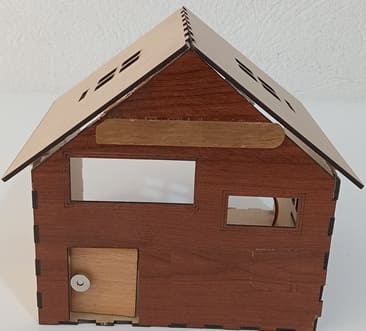
A miniature wooden house represents a real-world structure.
The door mechanism is attached to a servo motor, which rotates to open or close it.
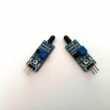
The wooden prototype provides a stable frame for installing components like the IR sensor and LCD screen.
Circuit Connections of system
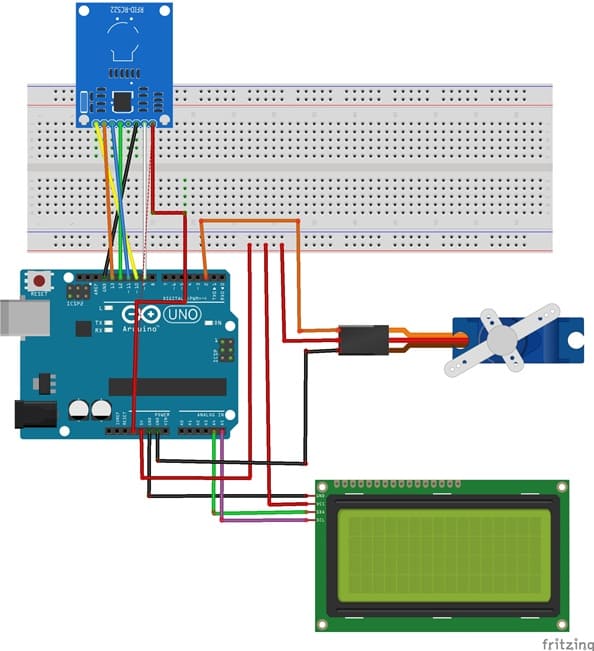

Connection of LCD I2C display to Arduino
LCD I2C Display Pin | Arduino Pin |
GND | GND |
VCC | 5V |
SDA | A4 |
SCL | A5 |
Connection of servo motor to Arduino
Servo motor | Arduino UNO |
Brown wire (-) | GND |
Red wire (+) | 5V |
Yellow wire (Signal) | D2 |
Connection RFID-RC522 to Arduino
RFID-RC522 | Arduino UNO | Description |
VCC | 3.3V | Power supply |
GND | GND | Ground |
SDA (SS) | Pin 10 | Slave Select (SS) |
SCK | Pin 13 | SPI Clock (SCK) |
MOSI | Pin 11 | Master Out Slave In (MOSI) |
MISO | Pin 12 | Master In Slave Out (MISO) |
RST | Pin 9 | Reset |
Arduino program of system
Here is a complete Arduino sketch for your Smart Door Access Control System using RFID, I2C LCD, and Servo motor, with clear comments for each section:
This code uses the MFRC522 library for RFID communication and the LiquidCrystal_I2C library for the LCD display.
1- Open Arduino IDE.
2- Go to Sketch → Include Library → Manage Libraries.
3- Search for MFRC522 and install it.
4- Search for LiquidCrystal_I2C and install it
|
1 2 3 4 5 6 7 8 9 10 11 12 13 14 15 16 17 18 19 20 21 22 23 24 25 26 27 28 29 30 31 32 33 34 35 36 37 38 39 40 41 42 43 44 45 46 47 48 49 50 51 52 53 54 55 56 57 58 59 60 61 62 63 64 65 66 67 68 69 70 71 72 73 74 75 76 77 78 79 80 81 82 83 84 85 86 87 88 89 90 91 92 93 94 95 96 97 98 99 100 101 102 103 104 105 106 107 108 109 110 111 112 113 114 115 116 117 118 119 120 121 122 123 124 |
#include <LiquidCrystal_I2C.h> #include <SPI.h> #include <MFRC522.h> #include<Servo.h> //include the servo library // RFID module pins #define SS_PIN 10 #define RST_PIN 9 // Initialize LCD (40x4) with I2C address 0x27 LiquidCrystal_I2C lcd(0x27, 40, 4); MFRC522 rfid(SS_PIN, RST_PIN); // Create instance of MFRC522 Servo servo; //create a servo object int position_servo = 85; //initial position of the servo bool cardDetected = false; // Track card status void setup() { servo.attach(2); //pin used by the servo servo.write(85); Serial.begin(9600); lcd.init(); lcd.backlight(); SPI.begin(); rfid.PCD_Init(); lcd.setCursor(1, 1); lcd.print("Scan your card"); // print "Scan your card" on LCD display lcd.setCursor(1, 2); lcd.print("to open the door"); } void loop() { if (!rfid.PICC_IsNewCardPresent() || !rfid.PICC_ReadCardSerial()) { // Look for new RFID cards if (cardDetected) { // Only update LCD if the message changes cardDetected = false; // Reset status } return; } cardDetected = true; // Read and display UID String uid = ""; for (byte i = 0; i < rfid.uid.size; i++) { Serial.print(rfid.uid.uidByte[i], HEX); uid += String(rfid.uid.uidByte[i], HEX); if (i < rfid.uid.size - 1) { uid += ":"; } } lcd.clear(); lcd.setCursor(1, 1); if ((uid=="a9:f0:e8:b8") || (uid=="23:34:a7:3")) { // verify if the card is accepted lcd.print("Authorized access"); if (position_servo==85) { // if the door is closed lcd.clear(); lcd.setCursor(1, 1); lcd.print("The door opens"); for (int i=85; i>20 ; i--) { servo.write(i); // rotate the servo to open the door delay(100); } lcd.clear(); lcd.setCursor(1, 2); lcd.print("Door opened"); delay(3000); position_servo=20; lcd.clear(); lcd.setCursor(1, 1); lcd.print("Scan your card"); lcd.setCursor(1, 2); lcd.print("to close the door"); } else { // If the door is open lcd.clear(); lcd.setCursor(1, 1); lcd.print("The door closes"); if (position_servo==20) { for (int i=20; i<85 ; i++) { servo.write(i); // rotate the servo to close the door delay(100); } lcd.clear(); lcd.setCursor(1, 1); lcd.print("Door closed"); delay(3000); lcd.clear(); lcd.setCursor(1, 1); lcd.print("Scan your card"); lcd.setCursor(1, 2); lcd.print("to open the door"); position_servo=85; } } } else { // If the Crad is not validated lcd.clear(); lcd.setCursor(1, 1); lcd.print("Card not validated"); delay(5000); lcd.clear(); lcd.setCursor(1, 1); lcd.print("Scan your card"); lcd.setCursor(1, 2); lcd.print("to open the door"); } rfid.PICC_HaltA(); rfid.PCD_StopCrypto1(); } |
0 comment
Leave a comment
Passion for robotics

Recent tutorials


Robotics workshop

Polpular tutorials


Making robots

Most commented tutorials


Robotic arm

Categories
Smart Home