ESP32 PACMAN Game
Tutorial plan
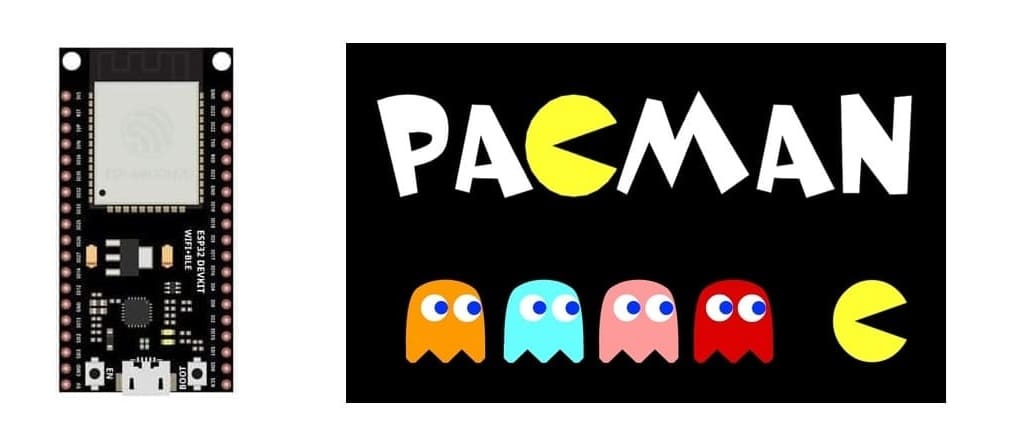
1- Presentation of PACMAN game
2- Objective of our PACMAN Game
3- Required Components
4- Component Wiring
5- Programming ESP32 card with Micropython
Presentation of PACMAN game
PAC-MAN is an iconic arcade maze-chase video game originally developed by Namco and released in 1980. Created by Toru Iwatani, PAC-MAN became one of the most influential and recognizable games in video game history, appealing to both casual and hardcore gamers.
Objective: Control PAC-MAN, a yellow, circular character with a mouth, to navigate a maze, eat all the pellets (dots), and avoid being caught by ghosts.
Win Condition: Clear the maze by eating all the pellets.
Lose Condition: Lose all lives by getting caught by the ghosts.
Pac-Man (The Player) :
A yellow, circular character resembling a pizza with a missing slice (representing his mouth).
Constantly moves through the maze in four directions: up, down, left, right.
Controlled via a joystick or arrow keys.
Ghosts (The Enemies)
Inky (blue), Blinky (red), Pinky (pink), Clyde (orange)—each with unique movement patterns:
Blinky (Chaser): Directly chases Pac-Man.
Pinky (Ambusher): Tries to position ahead of Pac-Man’s path.
Inky (Tricky): Moves unpredictably, combining strategies.
Clyde (Random): Alternates between chasing and moving randomly.
Behavior Modes:
Chase Mode: Actively pursue Pac-Man.
Scatter Mode: Move to predetermined maze corners.
Frightened Mode: Turn blue and flee when Pac-Man eats a power pellet (can be eaten for bonus points).
Pellets (Dots)
Small Pellets: Regular dots scattered across the maze.
Power Pellets: Larger dots that give Pac-Man temporary invincibility, allowing him to eat ghosts for bonus points.
Bonus Fruits
Occasionally appear in the maze for extra points (e.g., cherries, strawberries, oranges).
Objective of our PACMAN Game
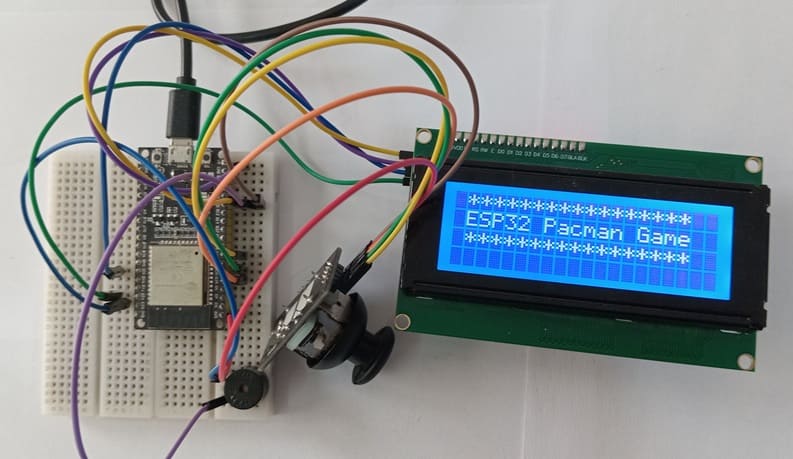
This project replicates the classic PAC-MAN game on an ESP32 microcontroller, with an LCD screen for display, a joystick for controls, and a buzzer for sound effects. Here's how each component contributes to the game's functionality:
The game logic runs on one core of the ESP32 for smooth performance.
✔️ Pac-Man Movement:
Move Pac-Man in the joystick’s direction if there’s no wall.
Implement edge wrapping (Pac-Man exits one side and reappears on the opposite side).
👻 Ghost AI Behavior:
Use simple AI algorithms:
Random Movement: For unpredictable ghost paths.
Chase Mode: Some ghosts follow Pac-Man using basic pursuit logic.
Scatter Mode: Ghosts retreat to maze corners periodically.
Frightened State: After Pac-Man eats a power pellet, ghosts turn blue and flee.
💥 Collision Detection:
Pac-Man & Pellets:
Check for pellet presence at Pac-Man’s location.
Update score and remove the pellet from the maze.
Pac-Man & Ghosts:
If collided:
Normal State: Pac-Man loses a life.
Powered-Up State: Ghost is “eaten,” resets to starting position, and adds bonus points.
Required Components
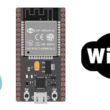
ESP32 Microcontroller:
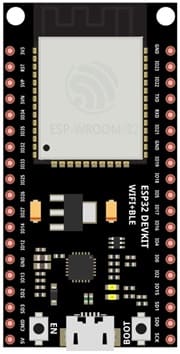
The core processor managing game logic, input handling, display rendering, and sound control.
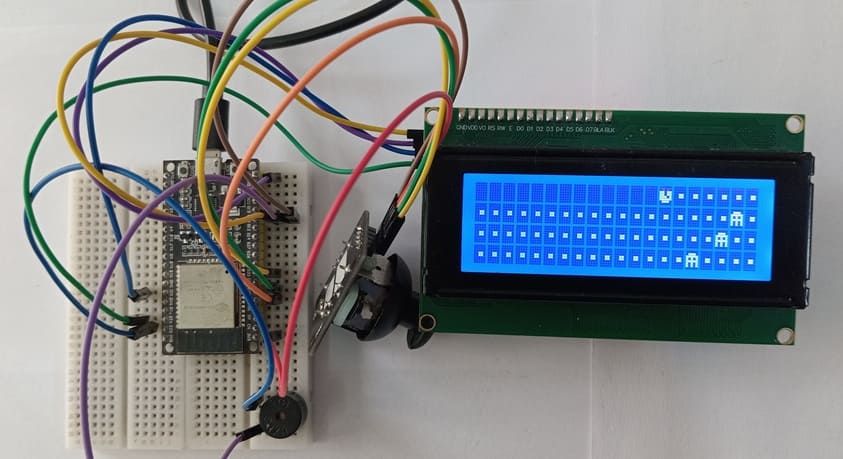
LCD Screen (I2C):
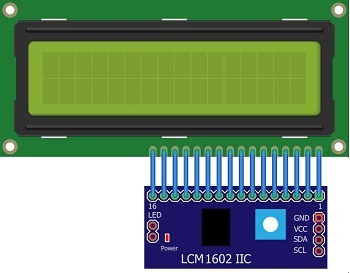
Displays the PAC-MAN maze, characters, score, and animations.
Joystick Module:
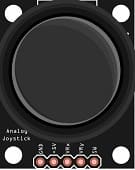
Provides analog control for moving Pac-Man in four directions.
Buzzer:
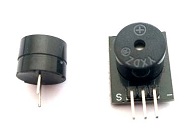
Generates sound effects for actions like pellet collection, power-ups, and collisions.
Jumper Wires

Jumper wires will be used to make connections between the components.
Breadboard:

A breadboard can be used to create a temporary circuit for testing and prototyping.
Component Wiring
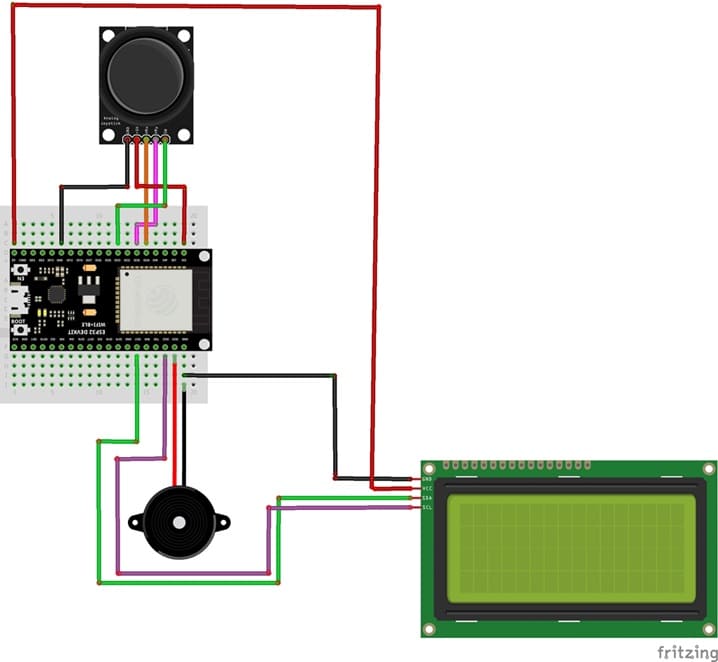
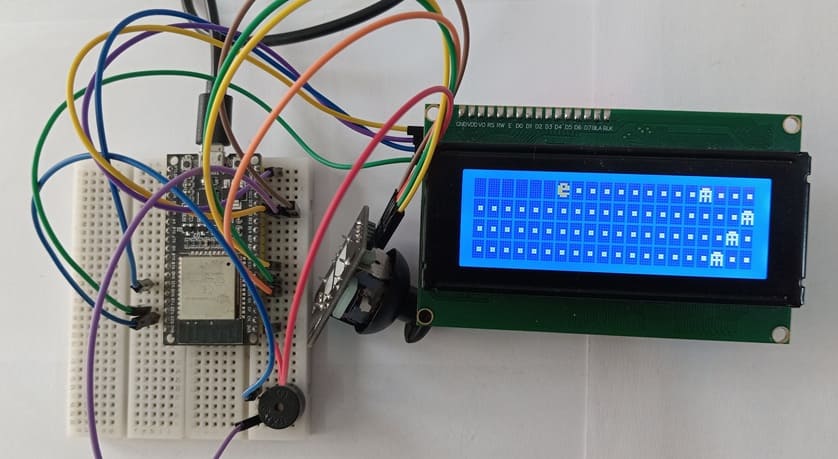
1- Joystick to ESP32 :
GND → GND
VCC → 3V3
X-axis (VRx pin ) → GPIO34
Y-axis (VRy pin) → GPIO35
Button (SW pin) → GPIO33
LCD Screen (I2C-based) to ESP32 :
SDA → GPIO21 (I2C Data).
SCL → GPIO22 (I2C Clock).
VCC → 5V
GND → GND
Programming ESP32 with Micropython
1- Ensure MicroPython is installed on your ESP32
2- Flash your ESP32 with MicroPython using this file esp32-20210902-v1.17.bin
3- Import this two libraries : i2c_lcd and lcd_api for I2C LCD screen
|
1 2 3 4 5 6 7 8 9 10 11 12 13 14 15 16 17 18 19 20 21 22 23 24 25 26 27 28 29 30 31 32 33 34 35 36 37 38 39 40 41 42 43 44 45 46 47 48 49 50 51 52 53 54 55 56 57 58 59 60 61 62 63 64 65 66 67 68 69 70 71 72 73 74 75 76 77 78 79 |
from machine import Pin, I2C, ADC, PWM from time import sleep from i2c_lcd import I2cLcd from lcd_api import LcdApi # I2C Configuration for LCD i2c = I2C(0, scl=Pin(22), sda=Pin(21), freq=400000) LCD_ADDR = 0x27 lcd = I2cLcd(i2c, LCD_ADDR, 2, 16) # 2 rows, 16 columns # Joystick Configuration joystick_x = ADC(Pin(34)) joystick_y = ADC(Pin(35)) joystick_sw = Pin(33, Pin.IN, Pin.PULL_UP) # Buzzer Configuration buzzer = PWM(Pin(23)) # Game Variables pacman_x, pacman_y = 0, 0 score = 0 maze = [ [1,1,1,1,1,1,1,1,1,1,1,1,1,1,1,1], [1,0,0,0,1,0,0,0,1,0,1,0,0,0,0,1], [1,0,1,0,1,0,1,0,1,0,1,0,1,0,1,1], [1,0,0,0,0,0,0,0,0,0,0,0,0,0,0,1], [1,1,1,1,1,1,1,1,1,1,1,1,1,1,1,1] ] # Functions def display_maze(): lcd.clear() for y, row in enumerate(maze): line = "" for x, cell in enumerate(row): if (x, y) == (pacman_x, pacman_y): line += "P" # Pac-Man elif cell == 1: line += "#" # Wall elif cell == 0: line += "." # Pellet lcd.move_to(0, y) lcd.putstr(line) def move_pacman(dx, dy): global pacman_x, pacman_y, score new_x, new_y = pacman_x + dx, pacman_y + dy if maze[new_y][new_x] != 1: # Check for walls pacman_x, pacman_y = new_x, new_y if maze[new_y][new_x] == 0: # Pellet collection maze[new_y][new_x] = -1 # Pellet eaten score += 10 play_sound(1000, 0.1) def play_sound(frequency, duration): buzzer.freq(frequency) buzzer.duty(512) sleep(duration) buzzer.duty(0) def read_joystick(): x_val = joystick_x.read() y_val = joystick_y.read() if x_val < 1000: move_pacman(-1, 0) # Move left elif x_val > 3000: move_pacman(1, 0) # Move right if y_val < 1000: move_pacman(0, -1) # Move up elif y_val > 3000: move_pacman(0, 1) # Move down # Main Game Loop while True: display_maze() read_joystick() lcd.move_to(0, 1) lcd.putstr(f"Score: {score}") sleep(0.2) |
Here’s a detailed explanation of the MicroPython program for the PAC-MAN game :
1. LCD Configuration :
|
1 2 3 |
i2c = I2C(0, scl=Pin(22), sda=Pin(21), freq=400000) LCD_ADDR = 0x27 lcd = I2cLcd(i2c, LCD_ADDR, 2, 16) |
I2C Communication:
SCL (Pin 22) & SDA (Pin 21): Control clock and data lines for the LCD.
Address (0x27): The default I2C address for many LCD modules.
Display Size: 2 rows × 16 columns.
2. Joystick Setup
|
1 2 3 |
joystick_x = ADC(Pin(34)) joystick_y = ADC(Pin(35)) joystick_sw = Pin(33, Pin.IN, Pin.PULL_UP) |
Analog Inputs (Pins 34 & 35): Read X and Y movements.
Switch (Pin 33): Digital input to detect button presses.
PULL_UP: Ensures the button has a default high voltage when not pressed.
3. Buzzer Configuration
|
1 |
buzzer = PWM(Pin(23)) |
PWM (Pin 23): Generates tones with varying frequencies for sound effects.
4. Game Variables
|
1 2 3 4 5 6 7 8 9 |
pacman_x, pacman_y = 0, 0 score = 0 maze = [ [1,1,1,1,1,1,1,1,1,1,1,1,1,1,1,1], [1,0,0,0,1,0,0,0,1,0,1,0,0,0,0,1], [1,0,1,0,1,0,1,0,1,0,1,0,1,0,1,1], [1,0,0,0,0,0,0,0,0,0,0,0,0,0,0,1], [1,1,1,1,1,1,1,1,1,1,1,1,1,1,1,1] ] |
pacman_x, pacman_y: Store Pac-Man's position in the maze.
score: Tracks the player’s points.
maze: A 2D array representing the game grid:
1 = Wall (#)
0 = Pellet (.)
-1 = Eaten pellet (empty space)
4. Displaying the Maze
|
1 2 3 4 5 6 7 8 9 10 11 12 13 |
def display_maze(): lcd.clear() for y, row in enumerate(maze): line = "" for x, cell in enumerate(row): if (x, y) == (pacman_x, pacman_y): line += "P" # Pac-Man elif cell == 1: line += "#" # Wall elif cell == 0: line += "." # Pellet lcd.move_to(0, y) lcd.putstr(line) |
Clears the LCD before each update.
Draws the maze row by row.
Displays Pac-Man (P), walls (#), and pellets (.).
5. Moving Pac-Man
|
1 2 3 4 5 6 7 8 9 |
def move_pacman(dx, dy): global pacman_x, pacman_y, score new_x, new_y = pacman_x + dx, pacman_y + dy if maze[new_y][new_x] != 1: # Avoid walls pacman_x, pacman_y = new_x, new_y if maze[new_y][new_x] == 0: # Pellet collected maze[new_y][new_x] = -1 # Mark as eaten score += 10 play_sound(1000, 0.1) |
Movement Logic: Updates Pac-Man’s position unless there’s a wall (1).
Pellet Collection: Increases the score and plays a sound when Pac-Man eats a pellet.
6. Sound Effects (Buzzer)
|
1 2 3 4 5 |
def play_sound(frequency, duration): buzzer.freq(frequency) buzzer.duty(512) sleep(duration) buzzer.duty(0) |
PWM Frequency: Defines the sound pitch.
Duty Cycle (512): Controls volume (range: 0–1023).
Duration: How long the buzzer plays.
7. Reading Joystick Input
|
1 2 3 4 5 6 7 8 9 10 11 |
def read_joystick(): x_val = joystick_x.read() y_val = joystick_y.read() if x_val < 1000: move_pacman(-1, 0) # Move left elif x_val > 3000: move_pacman(1, 0) # Move right if y_val < 1000: move_pacman(0, -1) # Move up elif y_val > 3000: move_pacman(0, 1) # Move down |
Analog Readings (0–4095): Determine joystick direction.
Thresholds:
< 1000 for left/up
> 3000 for right/down
Calls move_pacman() based on direction.
8. Main Game Loop
|
1 2 3 4 5 6 |
while True: display_maze() read_joystick() lcd.move_to(0, 1) lcd.putstr(f"Score: {score}") sleep(0.2) |
Loop Repeats Continuously:
1- Update Display: Refreshes Pac-Man’s position and maze.
2- Joystick Input: Moves Pac-Man accordingly.
3- Display Score: Shows current points.
4- Delay: Adds a slight pause for smoother gameplay.
0 comment
Leave a comment
Passion for robotics

Recent tutorials


Robotics workshop

Polpular tutorials


Making robots

Most commented tutorials


Robotic arm

Categories
Smart Home