Spaceship game controlled by Micro:bit board
Tutorial plan
1- Presentation of the Spaceship game
2- Objective of the Spaceship project
3- Required Components
4- Component Wiring
5- Programming Makecode with Makecode
Presentation of the Spaceship game
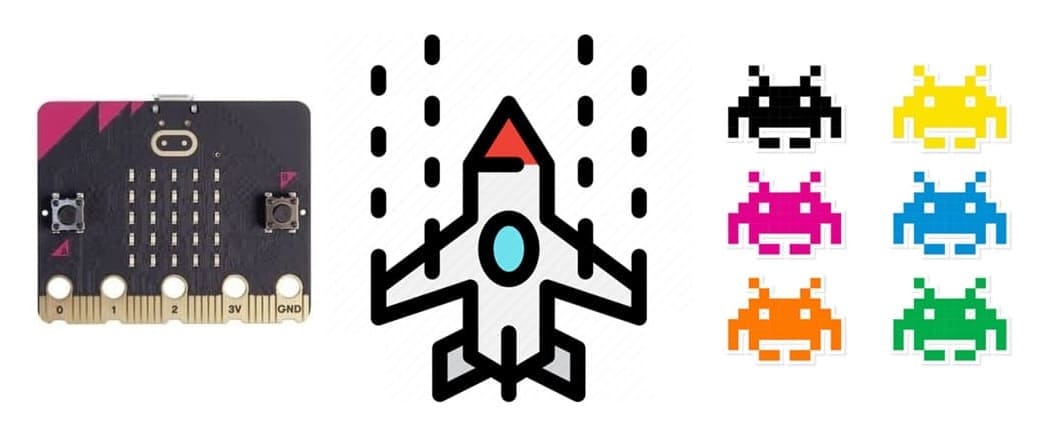
A spaceship video game is a genre of video games where players control a spaceship and navigate through space, battling enemies, avoiding obstacles, or exploring the galaxy. These games often feature fast-paced combat, strategic movement, and immersive sci-fi environments.
Types of Spaceship Games
1. Arcade Space Shooters 🛸🔫
Classic 2D shooters where players shoot enemies and dodge bullets.
Examples: Space Invaders, Galaga, Asteroids.
2. Space Exploration & Simulation 🌌🔭
Players explore the universe, gather resources, and build space colonies.
Examples: Elite Dangerous, No Man’s Sky, Star Citizen.
3. Space Combat Games 🚀⚔️
Engage in dogfights and epic battles against enemy fleets.
Examples: Everspace, Star Wars: Squadrons, Freelancer.
4. Sci-Fi Strategy Games 🧠♟
Command fleets of spaceships, build empires, and manage resources.
Examples: Homeworld, Stellaris, Starcraft.
5. Open-World & RPG Space Games 🌠💫
Players customize ships, complete missions, and explore galaxies.
Examples: Mass Effect, Starfield, X4: Foundations.
Objective of the Spaceship project
The primary objective of the game is to control a spaceship using a joystick and Micro:bit, fight against enemies.
The LCD screen serves as the game display, and the Micro:bit processes joystick inputs to move the spaceship and fire at enemies.
1️⃣ Control the Spaceship
Use the joystick to move left and right on the LCD screen.
2️⃣ Engage in Combat
Use the joystick button to fire lasers/missiles at enemies.
Required Components
Micro:bit V2:
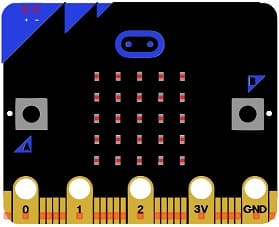
It acts as the game controller and processor.
GPIO Expansion Board
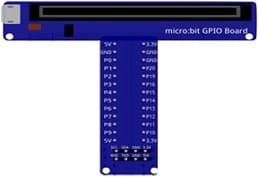
It provides additional GPIO pins for interfacing the joystick and LCD screen with the Micro:bit.
LCD Screen with I2C
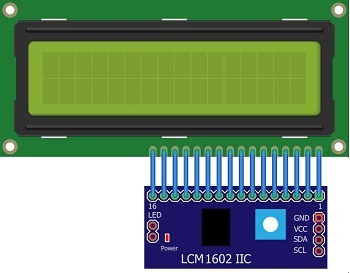
It displays the game graphics.
Joystick Module (XY Axis with Push Button)

It controls spaceship movement.
Jumper Wires

Jumper wires will be used to make connections between the components.
Breadboard:
A breadboard can be used to create a temporary circuit for testing and prototyping.
Component Wiring
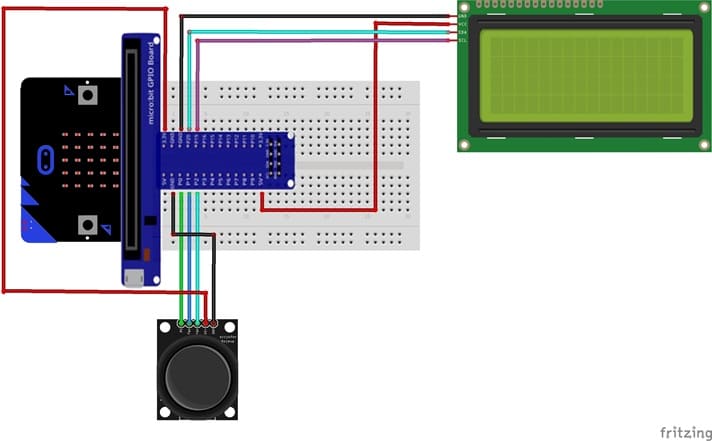
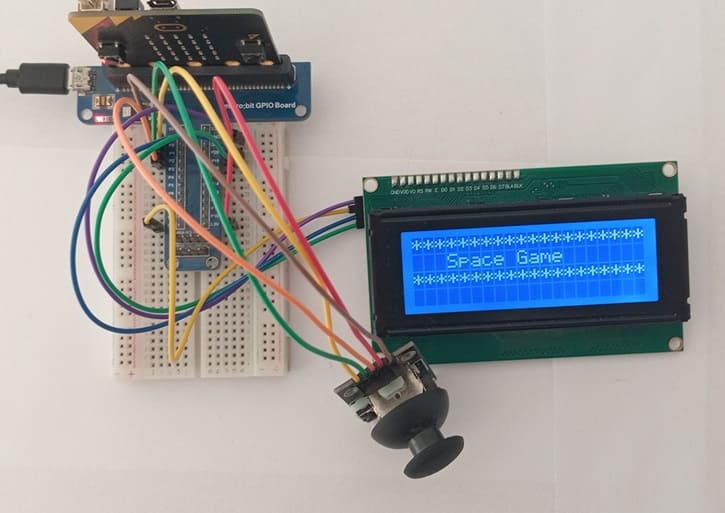
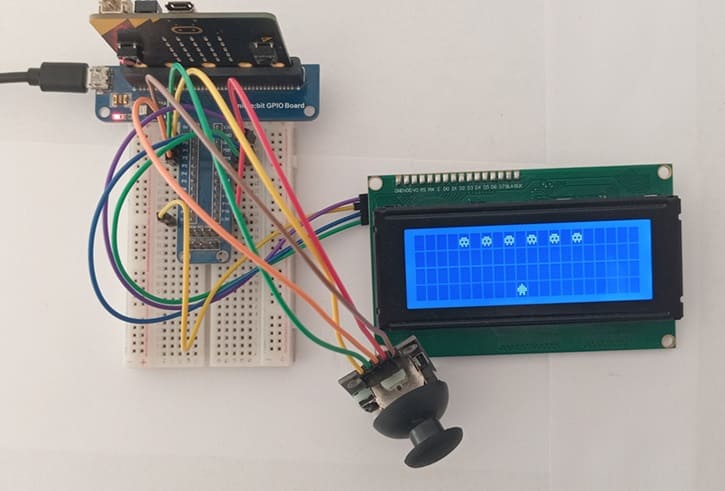
1- Joystick to Micro:bit :
X-axis (VRx pin ) → Analog input pin on GPIO board (e.g., P2).
Y-axis (VRy pin) → Analog input pin on GPIO board (e.g., P1).
Button (SW pin) → Digital pin (e.g., P0).
LCD Screen (I2C-based) to Micro:bit :
SDA → Pin 19 (I2C Data).
SCL → Pin 20 (I2C Clock).
VCC → 3.3V or 5V.
GND → Ground.
Programming Micro:bit Using MakeCode
1- Setup in MakeCode:
Open the MakeCode editor.
Install the required extensions:
a- LCD extension for I2C control.
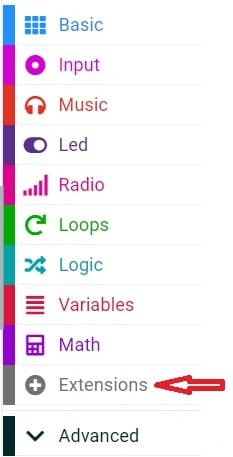
In the MakeCode editor, look for the "Extensions" option and click on it.
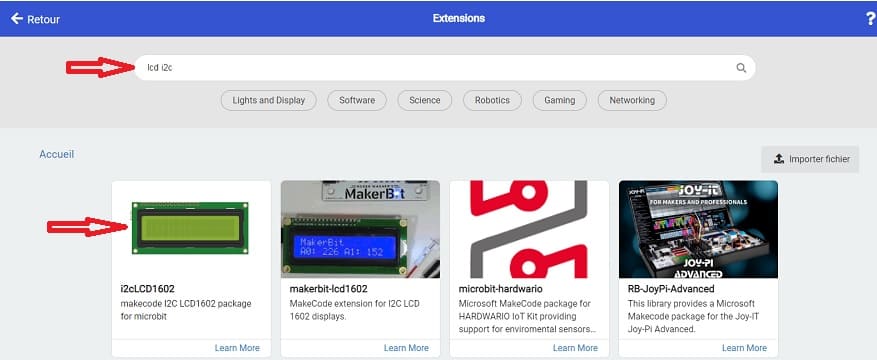
In the search bar, type "I2C LCD," and you should find an extension for the I2C LCD display. Add it to your project.
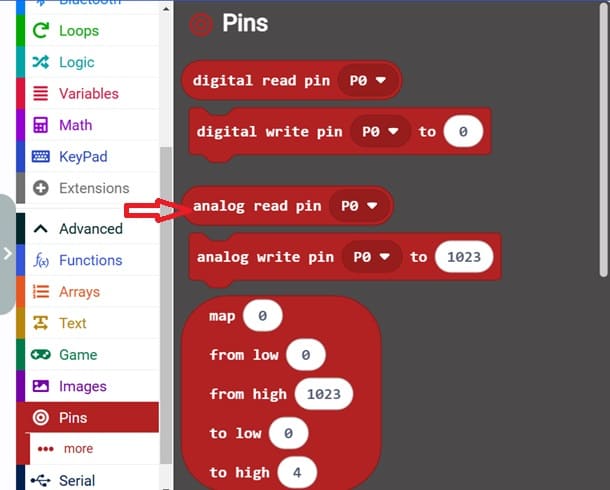
b- Analog Input for joystick readings.
Go to Pins and choose 'analog read pin P0' in order to read the value returned by joystick.
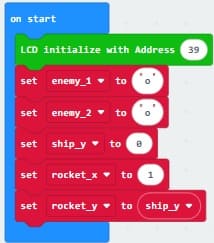
2- Initialization:
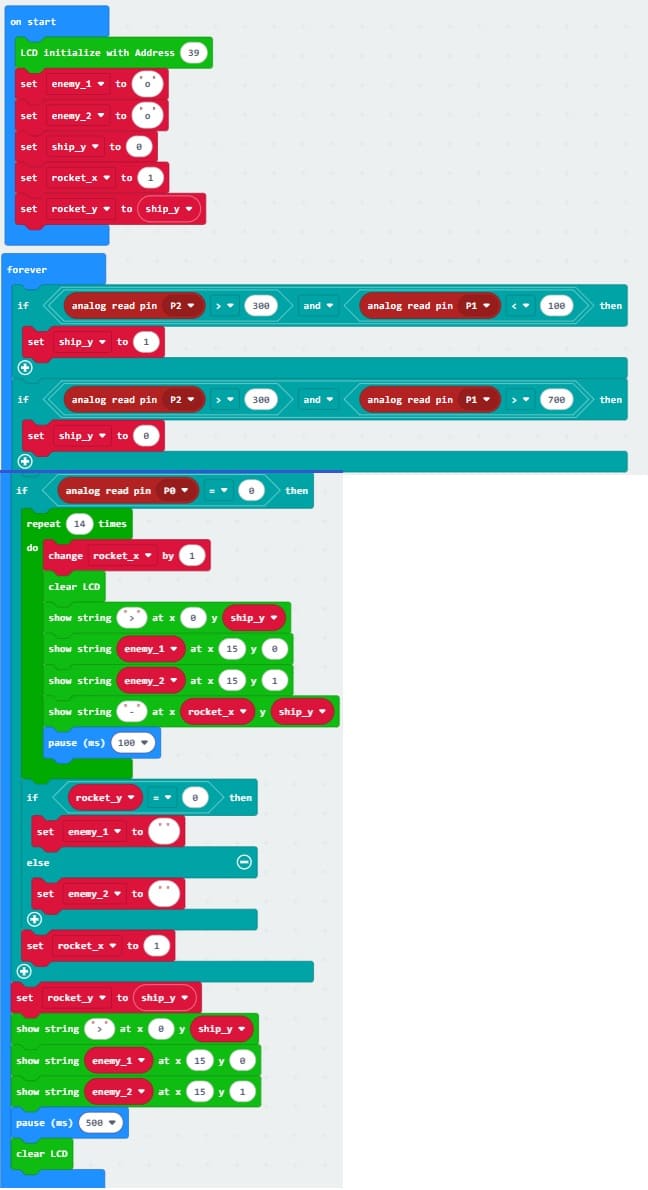
Initialize the LCD screen in the on start block.
Set up variables for the positions of spaceship and enemies.
3- Joystick Input:
a- Read the joystick's analog values for X and Y axes.
b- Map the values to determine movement directions (left, right).
c- Move the snake by updating its head position based on the joystick input.

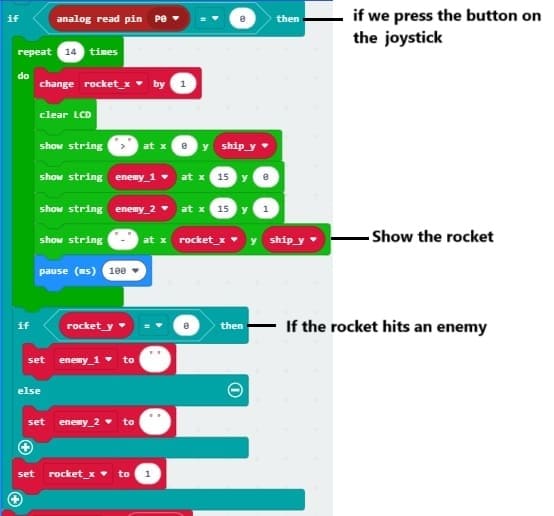
4- Engage in Combat
Use the joystick button to fire lasers/missiles at enemies.
If the rocket hits an enemy, the enemy disappear
5- Display Updates:
Use the LCD to show the positions of spaceship and ennemies
Clear and refresh the LCD at each update.
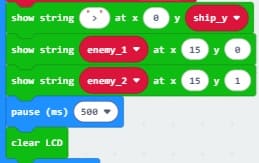
Here is the complete Makecode program :
