Connect ESP32 to IoT and send temperature and humidity to ThingSpeak
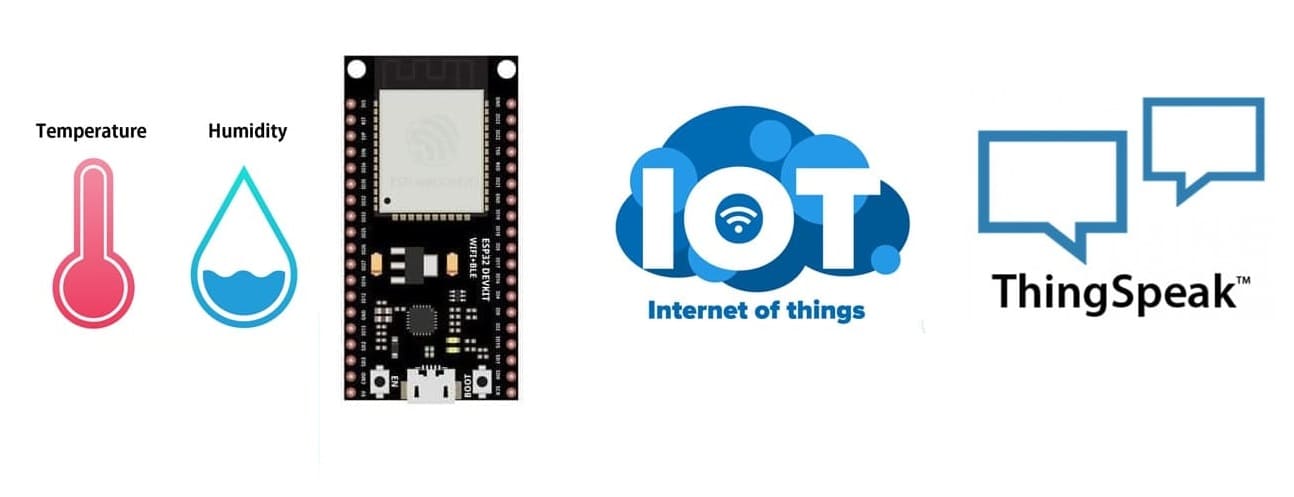
Tutoriel plan
1- Introducing the ThingSpeak Platform
2- Purpose of connecting ESP32 to IoT to send data to ThingSpeak
3- The necessary components
4- System Wiring
5- Micropython programming of the ESP32 card
Introducing the ThingSpeak Platform
ThingSpeak is an open-source Internet of Things (IoT) platform designed to collect, analyze, and visualize data from connected devices or sensors. It provides a simple way for IoT devices to send data over the internet and allows users to monitor, analyze, and act upon the collected data in real-time.
How ThingSpeak Works
1. Create a Channel:
A channel is where data is stored. Each channel can have up to 8 fields to store data (e.g., temperature, humidity).
2. Send Data to the Channel:
IoT devices use the API key associated with a channel to send data via HTTP POST or MQTT publish.
3. Visualize Data:
Use built-in tools to visualize data using graphs, charts, or dashboards.
4. Trigger Actions:
Set conditions to trigger actions like sending notifications or integrating with other IoT platforms.
Applications of ThingSpeak
1. Smart Agriculture:
Monitor soil moisture, temperature, and humidity in real-time.
Automate irrigation systems using data-driven insights.
2. Home Automation:
Collect data from temperature, motion, or light sensors for better home control.
3. Environmental Monitoring:
Track air quality, water levels, or weather conditions in specific locations.
4. Industrial IoT:
Monitor machinery performance and generate alerts for maintenance needs.
5. Energy Management:
Analyze energy consumption and optimize usage patterns.
6. Academic and Research Projects:
Ideal for prototyping IoT solutions and conducting small-scale research.
Purpose of connecting ESP32 to IoT to send data to ThingSpeak
This project demonstrates how to connect an ESP32 microcontroller to the ThingSpeak IoT platform and send real-time temperature and humidity data collected from a DHT11 sensor.
System Workflow
1. DHT11 Sensor:
The sensor measures temperature and humidity.
2. ESP32:
Reads data from the DHT11 sensor.
Connects to Wi-Fi and sends the sensor data to ThingSpeak using HTTP POST requests.
4. ThingSpeak:
Stores the received data in a channel.
Visualizes the data using charts.
The necessary components
ESP32 Development Board:
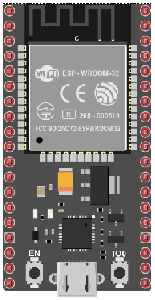
A microcontroller with built-in Wi-Fi capability to connect to ThingSpeak.
DHT11 Sensor:

A basic sensor that measures temperature and humidity.
Jumper Wires:

For connecting the DHT11 sensor to the ESP32.
Breadboard:
For assembling the circuit.
System Wiring
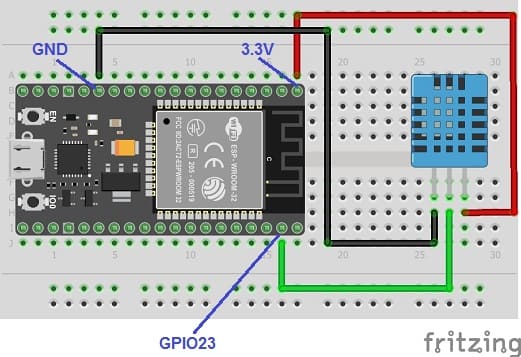
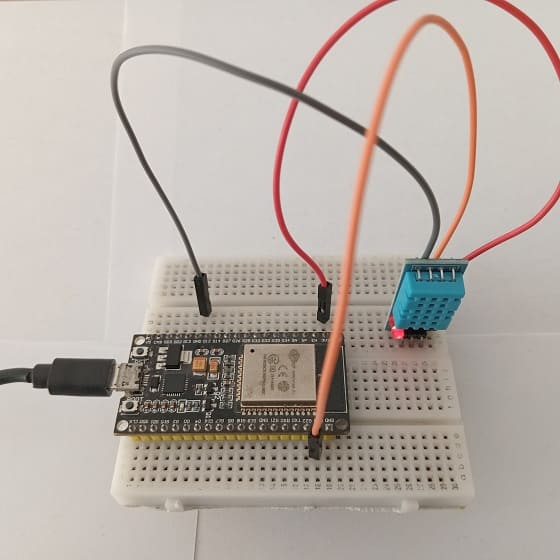
For the DTH11 sensor, we connect:
- DATA pin to pin D23 of the ESP32 board
- VCC pin to the 3.3V pin of the ESP32 board
- GND pin to the GND pin of the ESP32 board
Micropython programming of the ESP32 carde ESP32
1. Setting Up ThingSpeak
1- Sign Up: Create a free account on ThingSpeak.
2- Create a New Channel: Add a new channel with two fields:
Field 1: Temperature
Field 2: Humidity
3- Get the Write API Key: Copy the Write API Key from the channel settings. This key is required to send data to ThingSpeak.
2. Micropyton program
Here is the complete code for reading data from the DHT11 sensor and sending it to ThingSpeak.
|
1 2 3 4 5 6 7 8 9 10 11 12 13 14 15 16 17 18 19 20 21 22 23 24 25 26 27 28 29 30 |
from simple import MQTTClient import network import time from time import sleep from machine import Pin WiFi_SSID = "**********" WiFi_PASS = "*************" SERVER = "mqtt.thingspeak.com" client = MQTTClient("umqtt_client", SERVER) CHANNEL_ID = "********" WRITE_API_KEY = "***************" p23=Pin(23, Pin.IN) d=dht.DHT11(p23) def do_connect(): wlan = network.WLAN(network.STA_IF) wlan.active(True) if not wlan.isconnected(): print('connecting to network...') wlan.connect(WiFi_SSID, WiFi_PASS) while not wlan.isconnected(): pass print('network config:', wlan.ifconfig()) do_connect() topic = "channels/" + CHANNEL_ID + "/publish/" + WRITE_API_KEY while True: d.measure() t=d.temperature() #read temperature h=d.humidity() #lire l'humidite payload = "field1="+str(t)+"&field2="+str(h) client.connect() client.publish(topic, payload) # envoyer les valeurs de la temperature et l'humidite au site thingspeak.com client.disconnect() time.sleep(60) #waiting 1 min |
3. Testing and Output
1. Upload Code: Connect your ESP32 to the computer and upload the code using the Arduino IDE.
2. Monitor Serial Output:
Open the serial monitor to check temperature and humidity readings.
Ensure the Wi-Fi connection is successful and the data is sent to ThingSpeak.
3. View Data on ThingSpeak:
Log in to your ThingSpeak account.
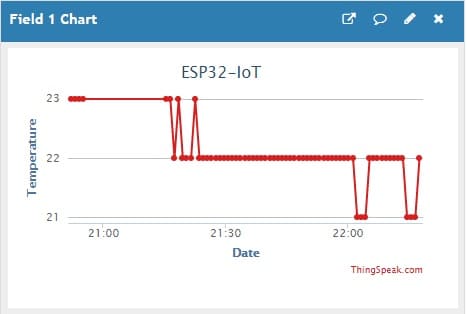
Open your channel to see the real-time graphs of temperature and humidity.
The humidity values sent by the ESP32 card to the thinkspeak.com site
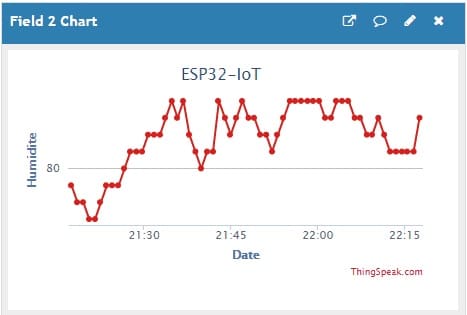
The temperature values sent by the ESP32 card to the thinkspeak.com site
