Control DC 5V Motor by Arduino and SN754410 Motor driver
Tutorial plan
1- SN754410 Motor driver
2- How does Arduino UNO control SN754410 to rotate a motor in both directions ?
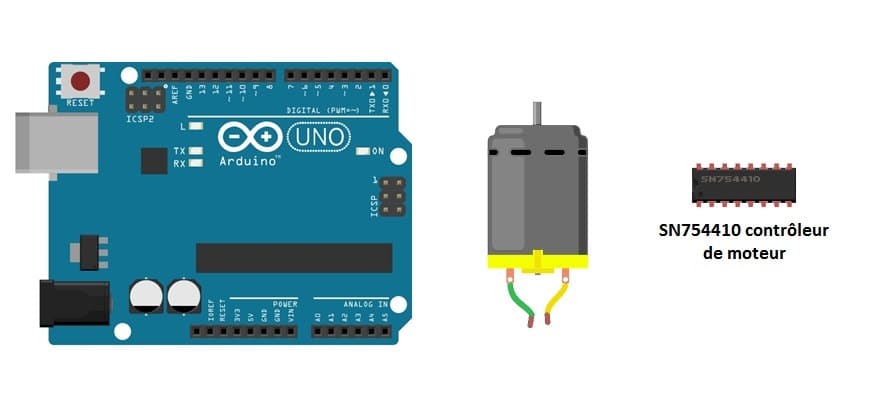
3- Necessary components
4- System connection diagram
5- Programming the Arduino UNO board
SN754410 Motor driver
The SN754410 is a quadruple half-H-bridge motor driver IC designed to control DC motors or stepper motors. It is widely used in robotics and electronics projects to drive motors using low-power signals from microcontrollers like Arduino, Raspberry Pi, or Micro:bit. Its H-bridge configuration allows bidirectional control of motors, making it suitable for applications requiring both forward and reverse movement.
Applications
DC Motor Control:
Control direction and speed of one or two DC motors.
Example: Robots, conveyor belts, and automated systems.
Stepper Motor Control:
Drive a stepper motor by controlling the sequence of its coils.
Example: CNC machines, 3D printers, and camera gimbals.
Relay Control:
Use the H-bridge to toggle relays in high-power applications.
How does Arduino UNO control SN754410 to rotate a motor in both directions ?
To control a motor in both directions using an Arduino UNO and the SN754410 motor driver, the Arduino sends signals to the driver to manipulate the state of the H-bridge circuits inside the SN754410.
The SN754410 uses an H-bridge configuration for motor control. Each H-bridge consists of four switches (transistors) arranged to allow the motor to:
1. Rotate Forward: Current flows in one direction.
2. Rotate Backward: Current flows in the opposite direction.
3. Stop: No current flows through the motor.
4. Brake: Both terminals of the motor are connected to the same voltage, quickly stopping it.
The Arduino UNO controls this behavior by setting the state of two input pins for each motor.
Necessary components
Arduino UNO:

Generates control signals (HIGH or LOW) for the motor driver.
SN754410:

Acts as an interface to drive the motor using the signals from the Arduino.
DC Motor:

The motor to be controlled.
Power Supply:
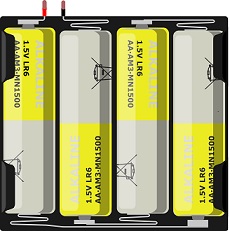
Provides power for the motor (e.g., a 6V piles or adapter).
System connection diagram
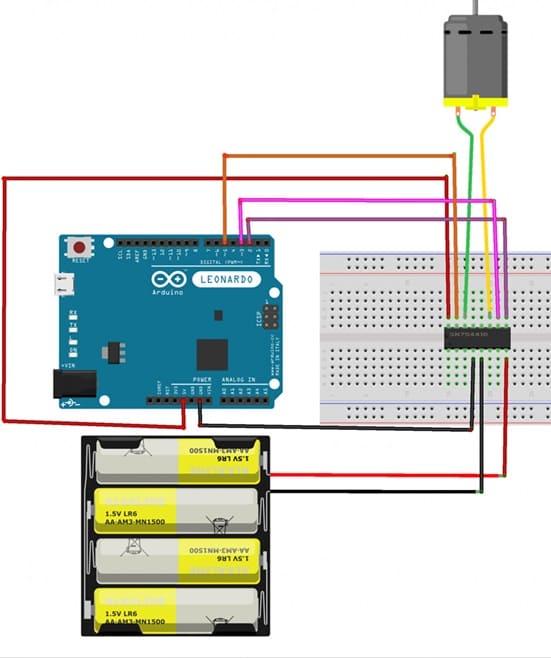
SN754410 Motor Driver:
Motor terminal 1 → 1Y (Pin 2).
Motor terminal 2 → 2Y (Pin 4).
Motor power supply (e.g., 12V) → VCC2 (Pin 8).
Ground → GND (Pins 6, 7, 14, 15).
Logic power supply (5V from Arduino) → VCC1 (Pin 16).
Arduino to SN754410 Motor Driver:
Digital pin 9 → 1A (Pin 1).
Digital pin 10 → 2A (Pin 5).
Digital pin 8 → ENABLE1-2 (Pin 3).
Programming the Arduino UNO board
|
1 2 3 4 5 6 7 8 9 10 11 12 13 14 15 16 17 18 19 20 21 22 23 24 25 26 27 28 |
#define ENABLE 8 #define MOTOR1 9 #define MOTOR2 10 void setup() { pinMode(ENABLE, OUTPUT); pinMode(MOTOR1, OUTPUT); pinMode(MOTOR2, OUTPUT); digitalWrite(ENABLE, HIGH); // Enable motor driver } void loop() { // Rotate motor forward digitalWrite(MOTOR1, HIGH); digitalWrite(MOTOR2, LOW); delay(2000); // Rotate motor backward digitalWrite(MOTOR1, LOW); digitalWrite(MOTOR2, HIGH); delay(2000); // Stop motor digitalWrite(MOTOR1, LOW); digitalWrite(MOTOR2, LOW); delay(2000); } |


