Arduino watering system
Tutoriel plan
1- Introducing the automatic watering system
2- How does Arduino control a watering system ?
3- System Components
4- Irrigation system connection diagram
5- Programming Arduino UNO
Introducing the automatic watering system
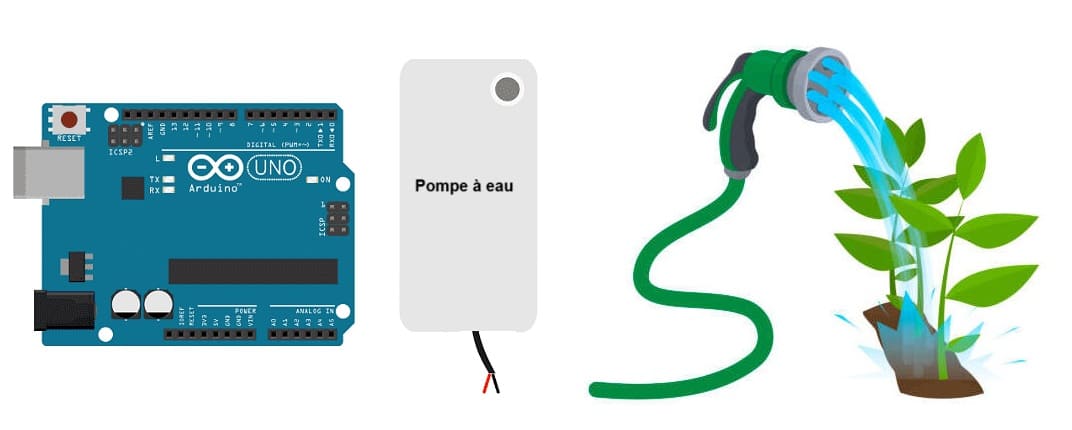
This system automates the irrigation process by using an Arduino UNO as the control unit. It continuously monitors soil moisture levels through a soil moisture sensor and activates a water pump via a relay module to water plants when needed. The system is designed for simplicity, reliability, and resource conservation.
How It Works
1- Soil Monitoring:
The soil moisture sensor measures the water content in the soil.
If the soil is dry, the sensor outputs a signal indicating low moisture levels.
2- Signal Processing:
- The microcontroller reads the sensor output.
- If the moisture is below a set threshold, the system triggers the water pump or valve.
3- Watering:
- The water pump activates and supplies water to the soil.
- Watering continues until the sensor detects sufficient moisture.
4- Automatic Shutoff:
Once the soil moisture level reaches the desired threshold, the pump or valve turns off automatically.
How does Arduino control a watering system ?
An Arduino-based watering system automates plant irrigation by monitoring soil moisture levels and controlling a water pump. The system ensures plants receive adequate water while conserving resources.
Working Principle
1- Soil Moisture Measurement:
The soil moisture sensor is continuously or periodically read by the Arduino. The sensor outputs a voltage (analog) that corresponds to the moisture level of the soil.
A low reading means the soil is dry and requires watering, while a high reading indicates sufficient moisture.
2- Decision-making:
The Arduino program is set up to compare the sensor's reading against a preset threshold. For example, if the soil moisture level is below a certain value, the system will trigger the relay.
3- Activating the Relay:
When the soil is too dry, the Arduino sends a signal to the relay module to close the circuit, allowing current to flow to the water pump.
The relay acts as a switch, allowing the higher voltage required to power the water pump to flow through.
4- Watering the Plants:
Once activated, the water pump turns on and begins to pump water from the reservoir to the plant's soil, typically via tubing. This water irrigates the soil and raises the moisture content.
The Arduino continuously monitors the sensor, and once the soil moisture reaches an acceptable level, it will turn off the relay, cutting power to the pump.
5- Deactivation:
After sufficient water is pumped into the soil, the sensor reading increases. Once the moisture level goes above the threshold, the Arduino deactivates the relay, and the water pump turns off.
System Components
Arduino UNO:

This is the microcontroller that processes the data and controls the system's behavior. The board is programmed to read the soil moisture sensor, and based on the readings, it decides whether to activate the water pump through the relay.
Soil Moisture Sensor:
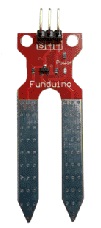
This sensor detects the moisture level of the soil. It typically consists of two probes that, when placed in the soil, measure the electrical resistance between them. The more moisture in the soil, the lower the resistance, and vice versa. The sensor outputs an analog signal that the Arduino reads to determine the soil's moisture content.
Relay Module:
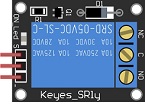
The relay module acts as a switch that controls the water pump. Since the water pump usually operates on a higher voltage (typically 12V or 220V), the relay isolates the Arduino (which operates on 5V) from the high voltage circuit. When the soil moisture level is low (indicating the need for watering), the relay will be activated, allowing current to flow to the pump and turn it on.
Water Pump:
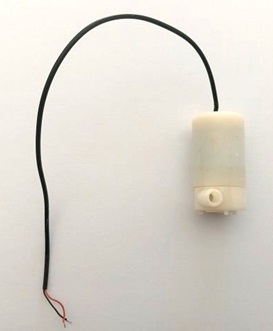
This pump is responsible for transferring water from a water source (like a reservoir or tank) to the plant's soil. It is powered separately (usually with 12V or higher) and is triggered by the relay when activated.
Irrigation system connection diagram
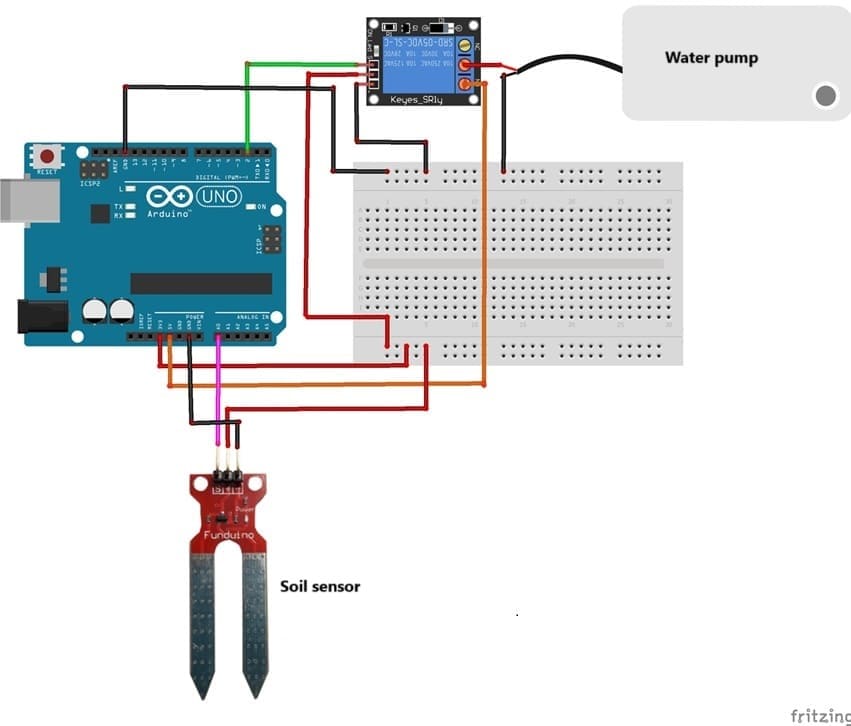
To make the assembly, we can connect :
For the soil moisture sensor:
pin (+) to 3.3V pin of Arduino
pin (-) to GND pin of Arduino
pin (S) to pin A0 of Arduino
For relay module :
pin (+) to 3.3V pin of Arduino
pin (-) to GND pin of Arduino
pin (S) to pin 4 of Arduino
pin (ON) to 5V pin of Arduino
For the water pump:
the first terminal to the COM pin of the relay
the second GND terminal to Arduino GND pin
Programming Arduino UNO
|
1 2 3 4 5 6 7 8 9 10 11 12 13 14 15 16 17 18 19 20 21 22 23 24 25 26 |
// Pin assignments const int soilSensorPin = A0; // Analog pin connected to soil sensor const int relayPin = 4; // Digital pin connected to relay module const int threshold = 600; // Soil moisture threshold (adjust based on sensor readings) void setup() { pinMode(relayPin, OUTPUT); digitalWrite(relayPin, HIGH); // Ensure the pump is off initially Serial.begin(9600); } void loop() { int soilMoistureValue = analogRead(soilSensorPin); Serial.print("Soil Moisture Value: "); Serial.println(soilMoistureValue); if (soilMoistureValue < threshold) { digitalWrite(relayPin, LOW); // Activate the relay, turn on the pump Serial.println("Watering..."); } else { digitalWrite(relayPin, HIGH); // Deactivate the relay, turn off the pump Serial.println("Soil is moist enough."); } delay(1000); // Delay for stability } |
Steps to Build
1- Assemble the Circuit:
Connect the components according to the circuit diagram.
Ensure all connections are secure and the power supply matches the pump's requirements.
2- Upload the Code:
Connect the Arduino to your computer using a USB cable.
Open the Arduino IDE, paste the code, select the correct board and port, and upload.
3- Test the System:
Place the soil sensor in dry soil and observe the relay activating the pump.
Water the soil and ensure the pump stops when the soil moisture exceeds the threshold.
4- Adjust Threshold:
Use the Serial Monitor to view soil moisture readings.
Adjust the threshold value in the code for optimal watering.

