Micro:bit robot boat
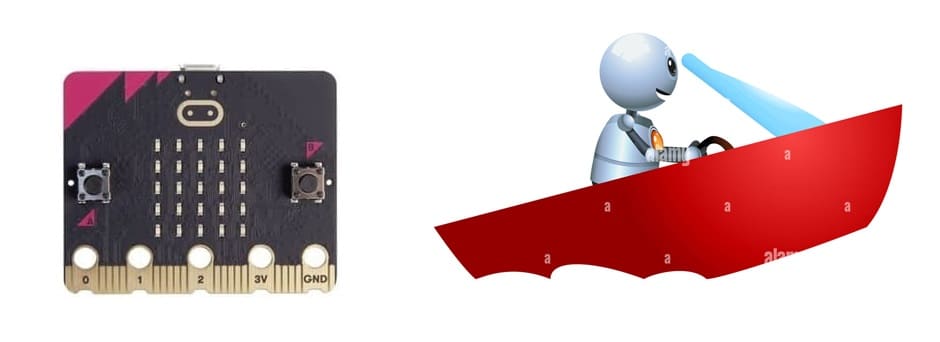
Tutorial plan
1- Objective of building Micro:bit robot boat
2- Required Components
3- Component Wiring
4- Program Micro:bit with Makecode
Objective of building Micro:bit robot boat
The objective of building a Micro:bit robot boat using a Micro:bit driver expansion, water pump, servo motor, and App Inventor for smartphone integration is to create a functional, remote-controlled, and programmable robotic boat.
Educational Objectives:
1- STEM Learning:
Introduce concepts of electronics, mechanics, and programming in a hands-on, engaging way.
Teach students or hobbyists how different components (microcontroller, motors, sensors) work together in a real-world application.
2- Programming Skills:
Develop coding skills through the Micro:bit platform and App Inventor.
Learn about communication protocols like Bluetooth for remote control.
3- Problem-Solving:
Encourage logical thinking by troubleshooting and debugging the boat’s functionality.
Technical Objectives:
1- Integration of Components:
Use the Micro:bit driver expansion to connect and control various hardware components like the water pump (for propulsion) and servo motor (for steering).
Optimize power management for the boat to ensure efficient operation on water.
2- Directional Control:
Implement a servo motor to control the direction of the boat, making it steerable and maneuverable.
3- Water Propulsion System:
Use the water pump to generate thrust for forward and backward movement.
4- Smartphone Control:
Design an intuitive user interface in App Inventor to control the boat via a smartphone app.
Utilize Bluetooth communication to send commands to the Micro:bit robot boat.
Practical Objectives:
1- Build a Functional Prototype:
Create a fully operational robot boat that can navigate a water body.
Ensure that the boat is waterproof and balanced for stability during operation.
2- Remote Operation:
Enable remote control of the boat for navigation and functionality adjustments in real time.
3- Expandability:
Design the system with modularity in mind so that additional features (e.g., sensors for obstacle detection or data logging) can be added later.
System Integration and Working:
1- The Micro:bit processes commands received from the smartphone app via Bluetooth.
2- The driver expansion board interfaces with the water pump and servo motor to control propulsion and direction.
3- The water pump generates thrust for forward/backward motion, while the servo motor steers the boat by changing the angle of the rudder/nozzle.
4- The boat hull ensures stability and houses the components, keeping them dry and secure.
By combining these components, the robot boat achieves functionality, remote control, and modularity for potential future upgrades.
Required Components
Micro:bit
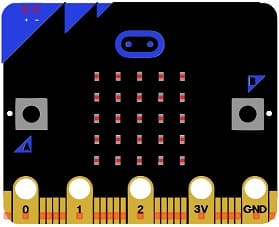
The Micro:bit is a small, programmable microcontroller that serves as the "brain" of the robot boat.
It receive control signals from the smartphone app.
It processe inputs and sends commands to the connected hardware (water pump, servo motor).
Micro:bit Driver Expansion Board
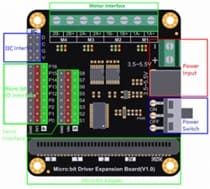
The driver expansion board acts as an interface between the Micro:bit and external components like motors and pumps.
It supplie power and control signals to the water pump and servo motor.
Water Pump
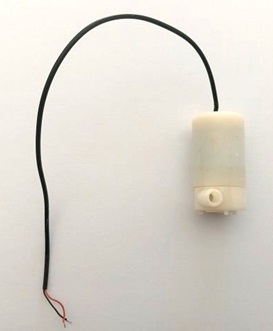
The water pump is responsible for providing propulsion to the robot boat.
It create the forward and backward movement of the boat by pushing water in the opposite direction.
Servo Motor

The servo motor is used to control the direction of the boat by steering.
It Rotate a rudder or directional nozzle attached to the water pump output.
Power Source
The power source supplies energy to the entire system.
It power the Micro:bit, expansion board, water pump, and servo motor.
Boat Hull (Structure)
The hull provide the physical structure and flotation for the robot boat.
Wires:

It Connect components to Micro:bit card.
Component Wiring
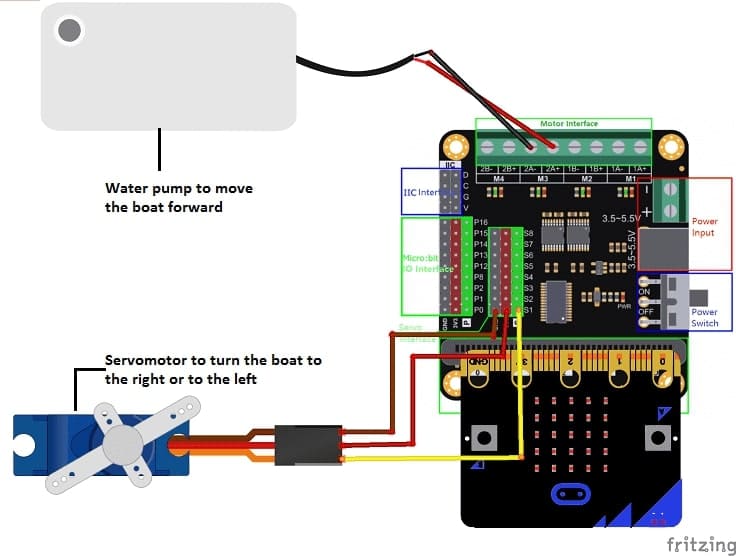
1- Prepare the Boat Hull:
Choose a lightweight, waterproof hull.
Ensure the hull is balanced to keep it stable in the water.
2- Mount the Micro:bit and Expansion Board:
Attach the Micro:bit to the driver expansion board.
Secure the expansion board inside or on top of the boat hull.
3- Install the Water Pump:
Fix the water pump at the back of the hull with its nozzle pointing backward.
Ensure the pump is waterproof and positioned for maximum thrust.
4- Connect the Servo Motor:
Attach the servo motor to the hull, near the pump.
Connect a rudder or nozzle to the servo for steering.
5- Connect the Electronics:
Use connecting wires to link the water pump and servo motor to the expansion board.
Power the expansion board and components using a battery pack.
Program Micro:bit with Makecode
1- Open MakeCode:
Visit Microsoft MakeCode for Micro:bit.
2- Set Up the Program:
Bluetooth Communication:
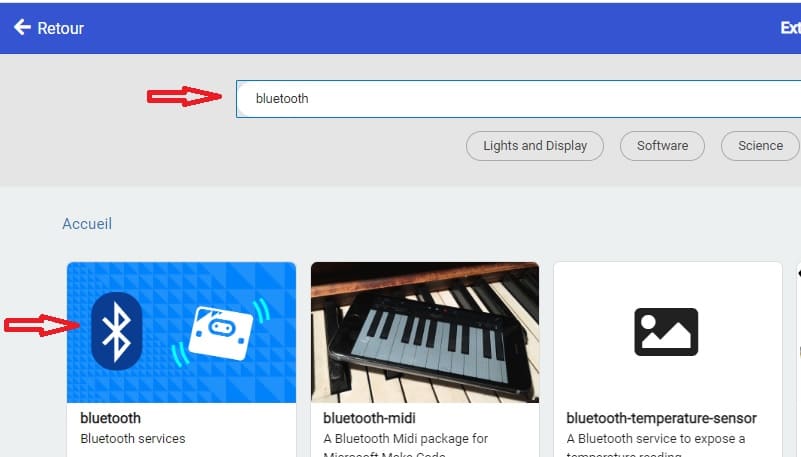
Add the "Bluetooth" extension to receive control signals from the smartphone.
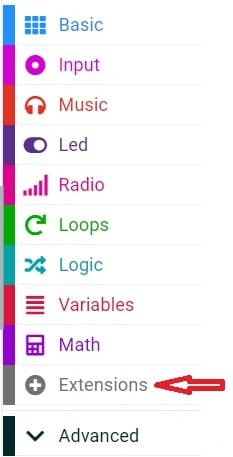
Click on the "Extensions" option in the bottom left corner.
Search and add the "Bluetooth" extension by clicking on it.
Motor Control:
Use GPIO pins to control the water pump's speed and direction.
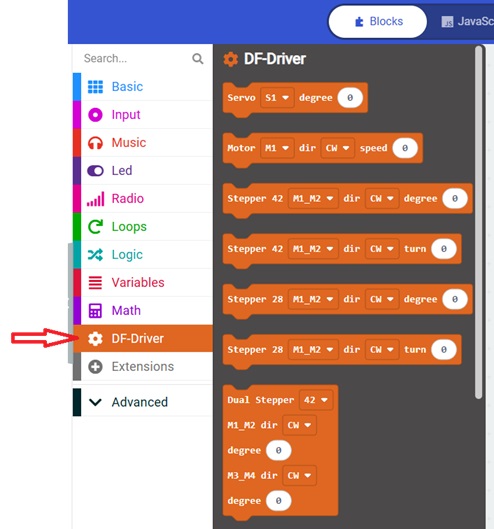
In the search box, insert this link "https://github.com/DFRobot/pxt-motor".
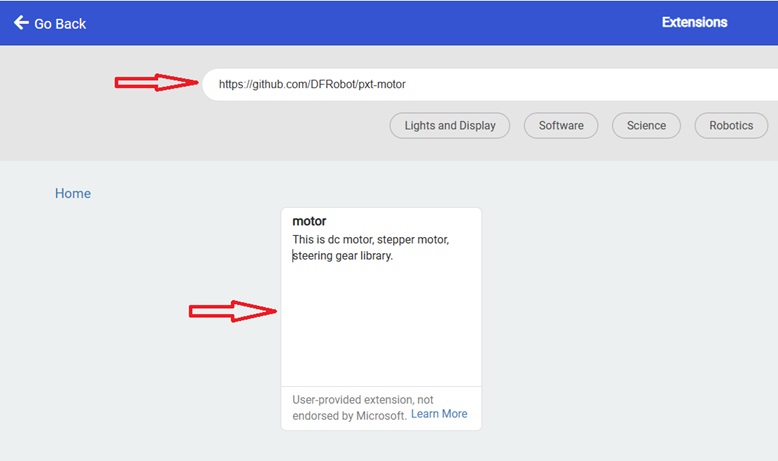
You can now use this blocs to controls the two motors.
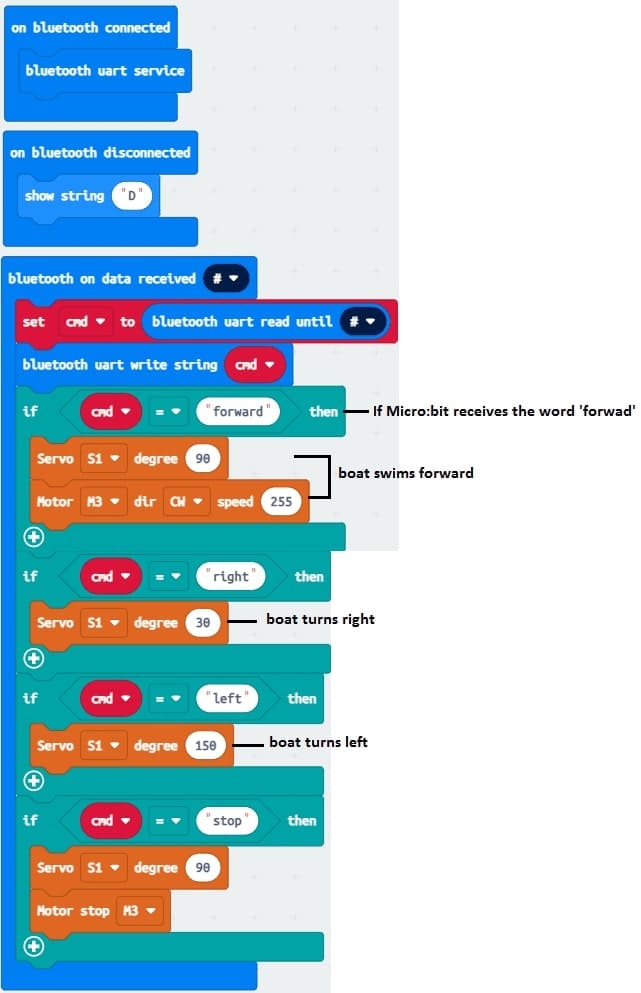
Write the Code:
Program the Micro:bit to:
Interpret commands received via Bluetooth (e.g., forward, backward, left, right).
Control the water pump and servo motor based on these commands.
1- Design the Smartphone App with App Inventor
a) Open MIT App Inventor: Visit MIT App Inventor.
b) Create a New Project: Start a new project and name it (e.g., "Robot Boat Controller").
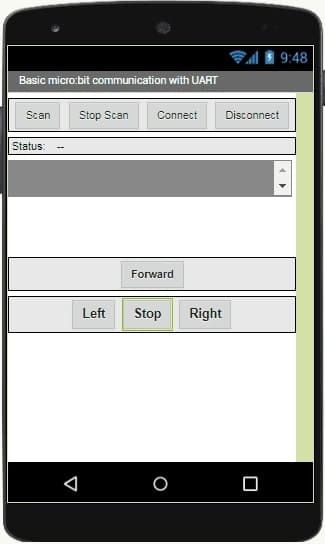
c) Design the App Interface:
Add buttons or a joystick for boat control: Forward, Left and Right.
Include a Bluetooth connection component to pair with the Micro:bit.
2- Program the App :
1- Click on the "Blocks" tab to switch to the Blocks Editor.
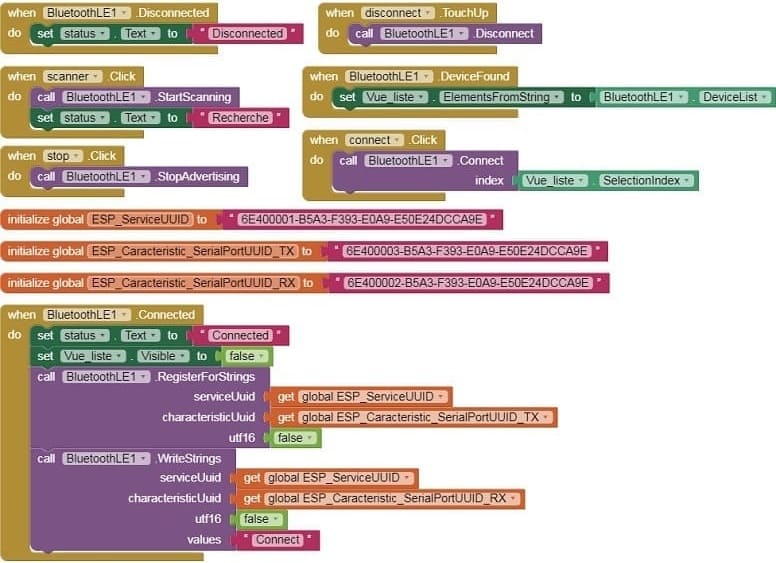
- Starting with Android 12, Bluetooth permissions have been enhanced to improve security and user data protection. This is why we must declare the authorizations that your application needs in the AndroidManifest.xml file. For Bluetooth, you'll need to include ACCESS_FINE_LOCATION, BLUETOOTH_SCAN, and possibly BLUETOOTH_CONNECT permissions, depending on the features you're using.
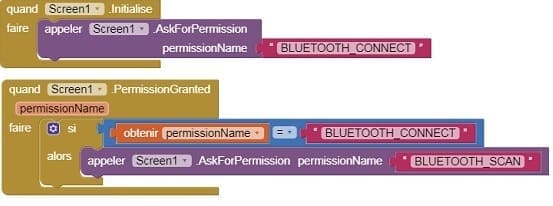
- Use these programming blocks to connect the smartphone to the Micro:bit board via Bluetooth:
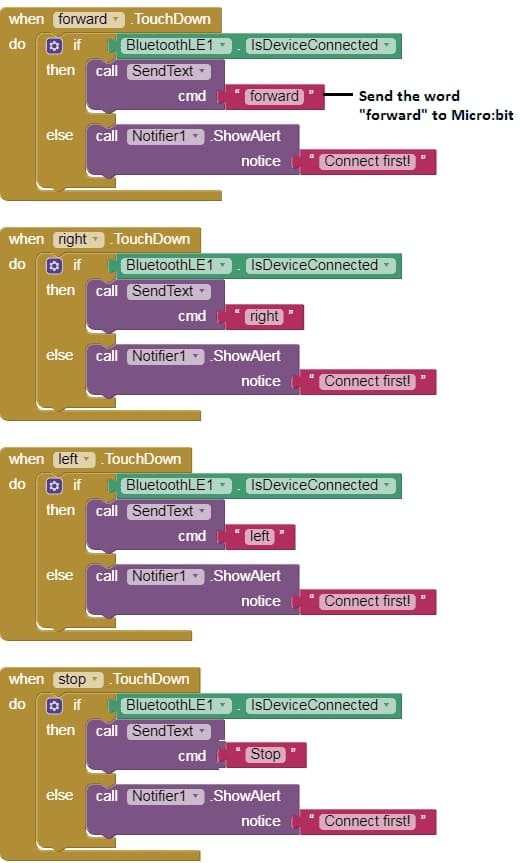
2- Use block-based coding to send specific Bluetooth commands when a button is pressed.
For example:
"forwoard" for forward.
"left" for left turn.
"right" for right turn.
"stop" for stop the boat
Download project Download application
Test the System
1- Connect Bluetooth:
Pair the smartphone app with the Micro:bit.
Ensure the app sends commands to the Micro:bit.
2- Test the Boat:
Place the boat in water and use the app to control it.
Test forward/backward movement by controlling the water pump.
Test steering by adjusting the rudder/nozzle with the servo motor.
3- Debug and Optimize:
Check for any loose connections or unresponsive components.
Adjust the code for better control and response.
