Creation of Snake game using Micro:bit card
Tutorial plan
1- Presentation of the Snake game
2- Objective of the Snake Game Project
3- Required Components
4- Component Wiring
5- Programming Micro:bit Using MakeCode
Presentation of the Snake game
The Snake Game is a classic arcade-style game that challenges players to control a growing snake navigating a grid to collect items (commonly represented as apples or food) while avoiding collisions with obstacles, including its own body. Its simplicity and addictive gameplay have made it one of the most iconic and enduring games.
Objective of the Game
Primary Goal:
Eat as many apples as possible to increase your score.
Challenges:
Avoid colliding with the walls or the snake's own body.
Navigate the snake as it grows longer, which makes the game more challenging.
End Condition:
The game ends when the snake collides with itself or the boundaries of the grid.
Gameplay Mechanics
1- Snake Movement:
The snake moves continuously in one of four directions: up, down, left, or right.
Players control the direction using input devices like arrow keys, a joystick, or buttons.
2- Apple Collection:
Apples appear randomly on the grid.
When the snake eats an apple, its length increases, and the player's score is incremented.
3- Collision Detection:
The game checks if the snake's head:
Hits the boundaries of the grid.
Collides with any part of its own body.
If a collision is detected, the game ends.
4- Scorekeeping:
Players earn points for each apple consumed.
The score is displayed on the screen, and some versions track high scores.
Objective of the Snake Game Project
The primary objective of the Snake game implemented using the Micro:bit, GPIO expansion card, joystick, and LCD screen with MakeCode is to develop a functional and interactive game while enhancing technical and educational skills. This project combines hardware interfacing and programming to achieve the following goals:
1. Educational Objectives:
Microcontroller Programming:
Learn to program the Micro:bit using the MakeCode block editor and JavaScript or Python for advanced users.
Hardware Interfacing:
Understand how to connect and control external peripherals like a joystick and LCD screen via GPIO and I2C communication protocols.
Game Design Principles:
Explore the logic and structure required to design and implement a classic game, including:
Collision detection.
Randomized events (e.g., spawning apples).
Incremental difficulty.
Problem Solving:
Encourage critical thinking and debugging during game implementation.
Technical Objectives:
Control Systems:
Utilize the joystick for user input to control the direction and movement of the snake.
Display Management:
Use the LCD screen to visualize the game grid, the snake's movement, the position of the apple, and the player's score.
Game Logic Implementation:
Implement the core mechanics of the Snake game, such as:
Growing the snake when it eats an apple.
Handling boundaries and self-collision.
Keeping track of and displaying the player's score.
Real-Time Processing:
Demonstrate how a microcontroller handles real-time inputs and updates game logic without delays or interruptions.
This project aims to blend creativity, logic, and technical skills while delivering an engaging experience through the Snake game. Let me know if you’d like a more detailed breakdown of specific objectives or assistance with implementation!
Required Components
Micro:bit board
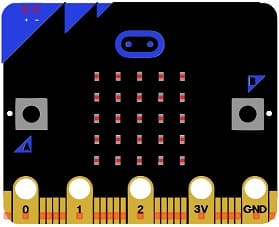
Acts as the main controller for the game.
GPIO Expansion Board
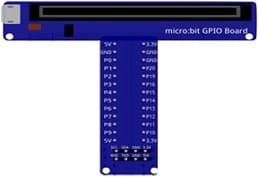
Provides additional GPIO pins for interfacing the joystick and LCD screen with the Micro:bit.
Joystick Module

Used to control the snake's movement (two analog axes and a button).
LCD Screen (16x2 or 20x4)
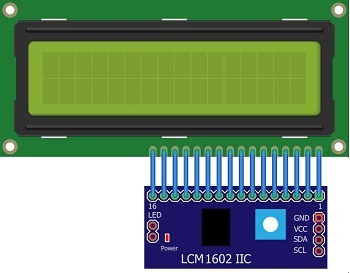
Displays the game grid, score, and messages.
Jumper Wires

Jumper wires will be used to make connections between the components.
Breadboard:
A breadboard can be used to create a temporary circuit for testing and prototyping.
Component Wiring
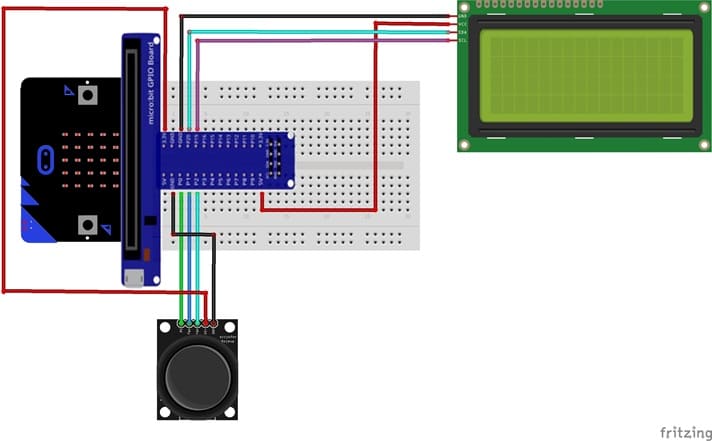
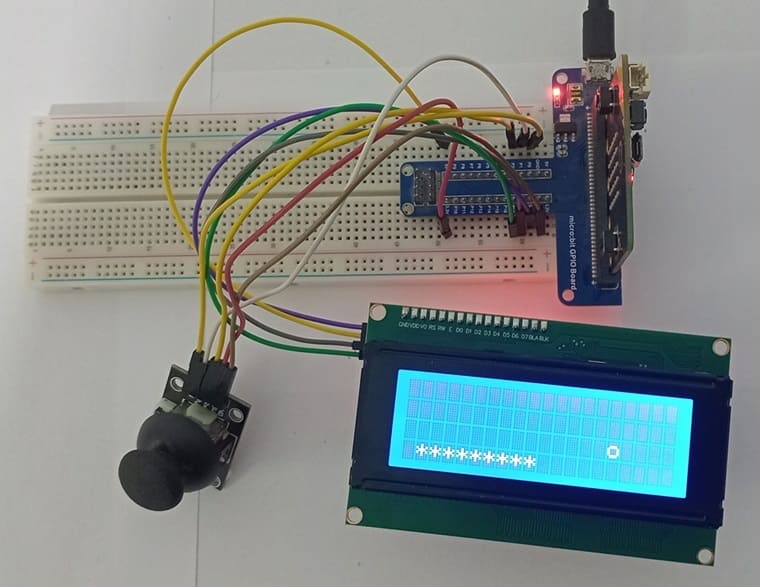
1- Joystick to Micro:bit :
X-axis (VRx pin ) → Analog input pin on GPIO board (e.g., P2).
Y-axis (VRy pin) → Analog input pin on GPIO board (e.g., P1).
Button (SW pin) → Digital pin (e.g., P0).
LCD Screen (I2C-based) to Micro:bit :
SDA → Pin 19 (I2C Data).
SCL → Pin 20 (I2C Clock).
VCC → 3.3V or 5V.
GND → Ground.
Programming Micro:bit Using MakeCode
1- Setup in MakeCode:
Open the MakeCode editor.
Install the required extensions:
a- LCD extension for I2C control.
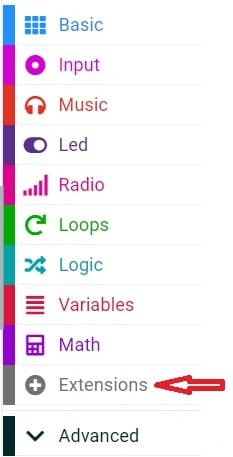
In the MakeCode editor, look for the "Extensions" option and click on it.
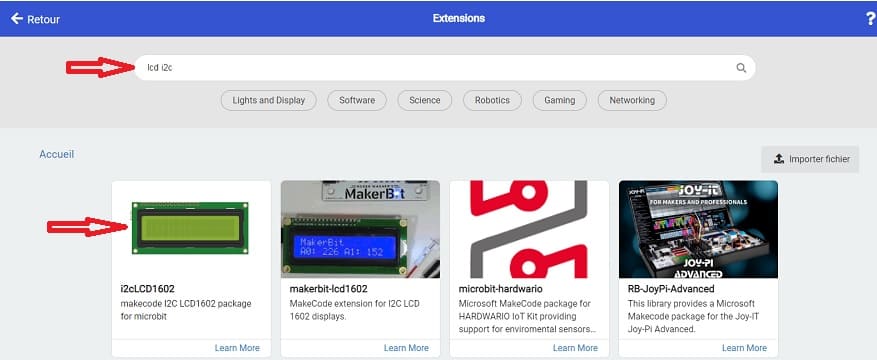
In the search bar, type "I2C LCD," and you should find an extension for the I2C LCD display. Add it to your project.
b- Analog Input for joystick readings.
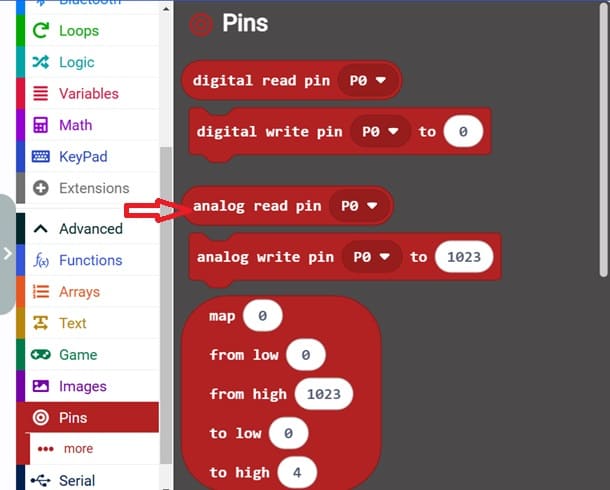
Go to Pins and choose 'analog read pin P0' in order to read the value returned by joystick.
2- Initialization:
Initialize the LCD screen in the on start block.
Set up variables for the snake's position, direction, apple location, and score.
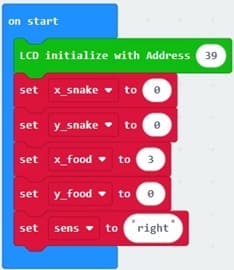
3- Joystick Input:
Read the joystick's analog values for X and Y axes.
Map the values to determine movement directions (up, down, left, right).
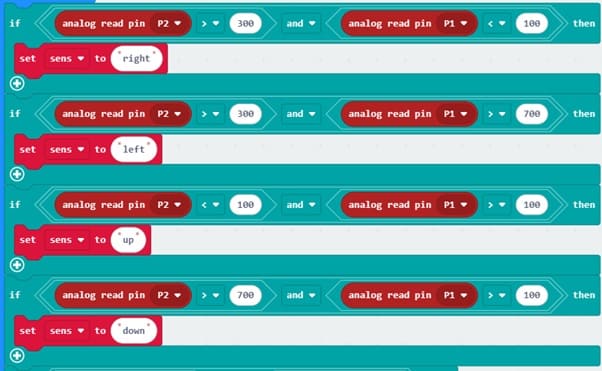
4- Game Logic:
Move the snake by updating its head position based on the joystick input.
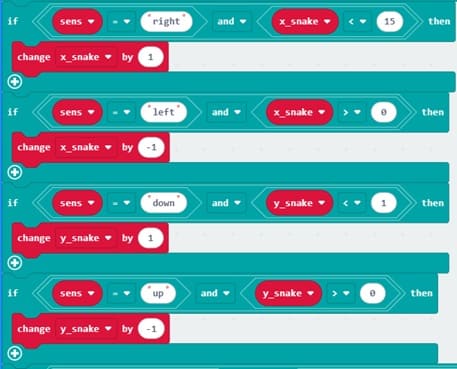
Check for collisions with the food .
Check if the snake's head reaches the food position.

5- Display Updates:
Use the LCD to show:
The snake’s position.
The foods’s position.
Clear and refresh the LCD at each update.
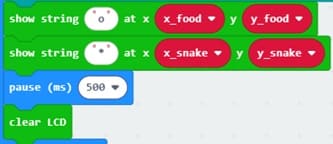
Here is the complete Makecode program :
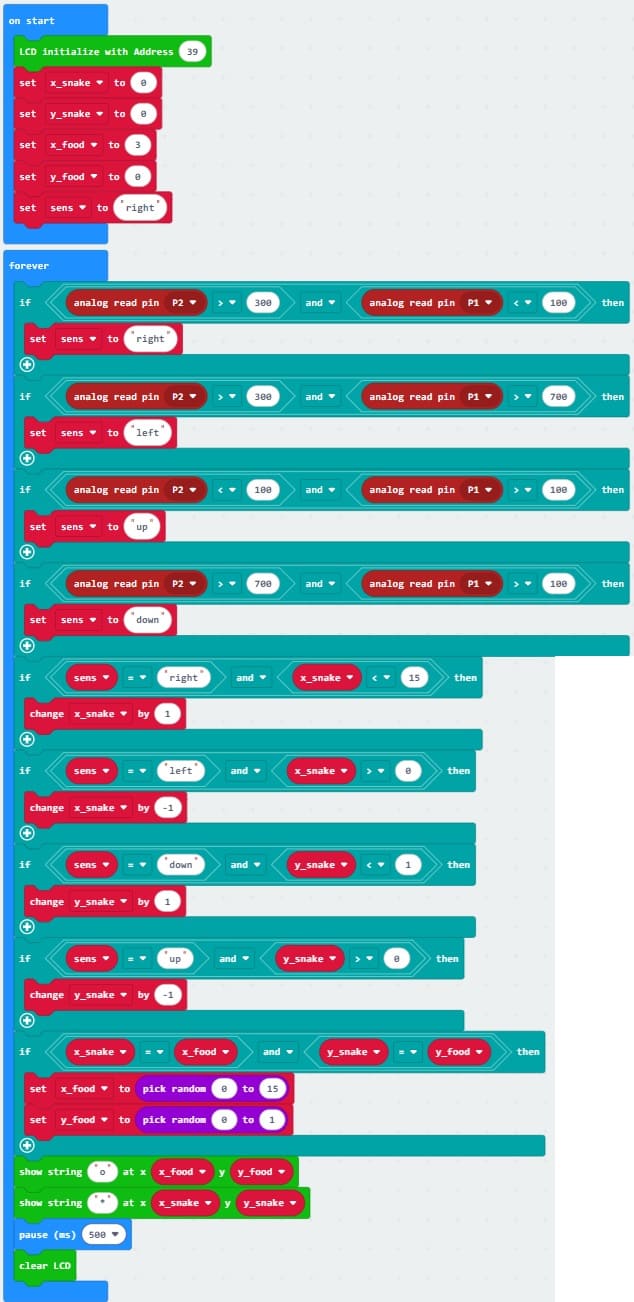
This project introduces key concepts in embedded programming, interfacing sensors, and using Micro:bit in real-world applications.

