Measure weight with Micro:bit card and HX711 sensor
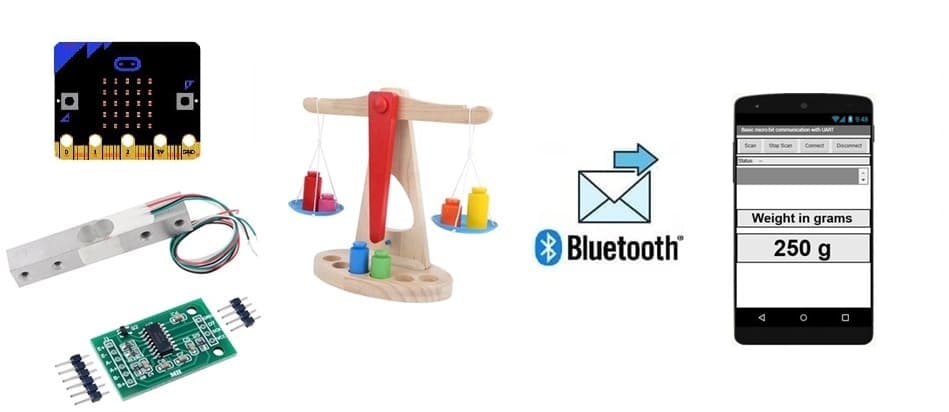
Plan tutorial
1- Presentation of HX711 weight sensor
2- How to send weight measured by HX711 to Samrtphone using Micro:bit board ?
3- Components needed
4- Circuit setup
5- Program Micro:bit card with Makecode to send weight to Smartphone
6- Develop mobile application with App Inventor to receive weight from Micro:bit
Presentation of HX711 weight sensor
The HX711 is a precision 24-bit analog-to-digital converter (ADC) designed for applications requiring accurate weight measurement. It's commonly used with load cells in electronic scales and similar devices.
How It Works
1. Load Cell Connection:
A load cell is a transducer that converts force (weight) into an electrical signal.
The HX711 reads the small voltage changes from the load cell.
2. Signal Amplification:
The module amplifies the low-level signal from the load cell to a readable voltage range.
Channel A has higher precision and is commonly used for weight measurement.
3. Analog-to-Digital Conversion: The amplified signal is converted to a 24-bit digital value for processing.
4. Data Transmission: The HX711 communicates the digital weight data to a microcontroller (e.g., Arduino) via a simple serial protocol.
Applications
Electronic weighing scales.
Force measurement devices.
Industrial automation requiring weight data.
DIY projects like kitchen scales or luggage weighers.
How to send weight measured by HX711 to Samrtphone using Micro:bit board ?
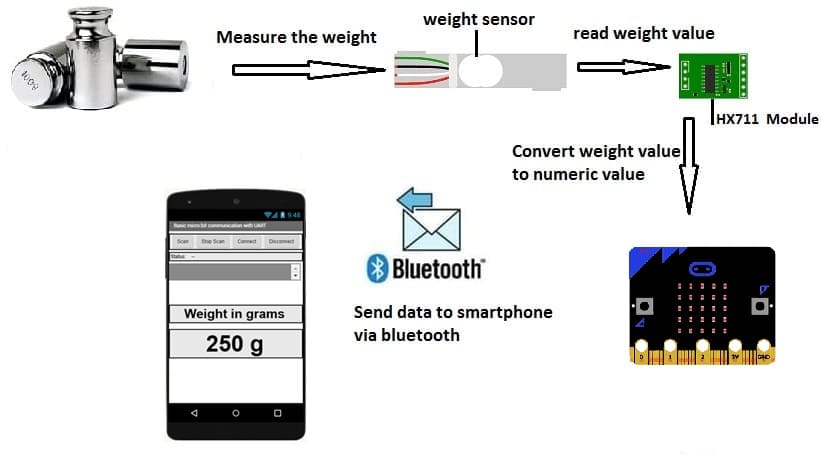
This project involves creating a system to measure weight using the HX711 load cell, transmit the data wirelessly via Bluetooth using an Micro:bit microcontroller running MicroPython, and display the measured weight on a smartphone app built with MIT App Inventor.
Process Overview
1. Measurement:
The HX711 module reads weight data from the load cell, amplifies the signal, and sends it to the Micro:bit via digital pins.
2. Data Processing:
The Micro:bit runs MicroPython, reads the weight data from the HX711, and processes it. The Micro:bit uses Bluetooth to transmit the processed data.
3. Bluetooth Communication:
The Micro:bit acts as a Bluetooth server, advertising its availability and sending weight data to any paired device.
4. Smartphone Application:
A custom app built using MIT App Inventor receives the Bluetooth data and displays it in a user-friendly interface.
Components needed
Micro:bit Board:
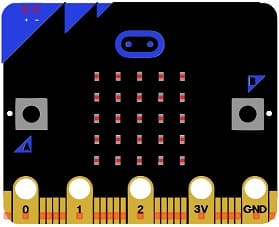
This is the central control unit.
The GPIO expansion card for the Micro:bit card:
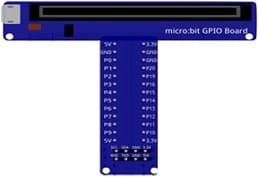
The GPIO expansion board for the Micro:bit board expands the capabilities of the Micro:bit board by adding more input/output (GPIO) pins and additional functionality.
HX711 Module:
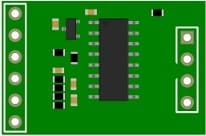
A 24-bit ADC (Analog-to-Digital Converter) designed to read the small electrical signals from a load cell.
Load Cell Sensor:

A transducer that converts force (weight) into an electrical signal.
Smartphone:
The display device to receive and show weight data.
Jumper Wires:

For making temporary connections and wiring between components.
Breadboard:
A breadboard is a useful tool for creating temporary electronic circuits. It allows you to connect components without soldering.
Circuit setup
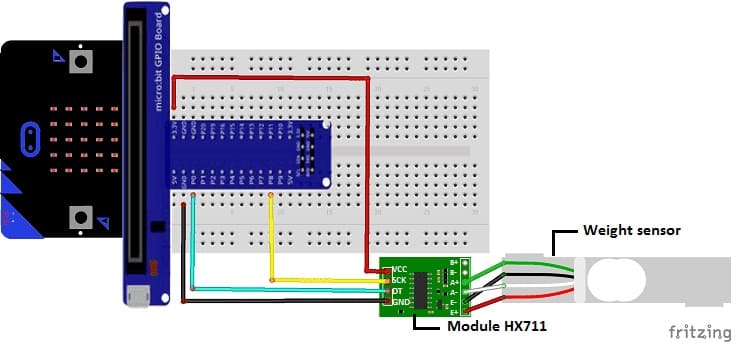
- Connect the VCC pin of the hx711 module to the 3.3V pin of the Micro:bit
- Connect the GND pin of the hx711 module to the GND pin of the Micro:bit
- Connect the DT pin of the hx711 module to the P0 pin of the Micro:bit
- Connect the SCK pin of the hx711 module to the P8 pin of the Micro:bit
- Connect the E+ pin of the hx711 module to the red wire of the weight sensor
- Connect the E- pin of the hx711 module to the black wire of the weight sensor
- Connect pin A- of the hx711 module to the white wire of the weight sensor
- Connect the A+ pin of the hx711 module to the green wire of the weight sensor
Program Micro:bit card with Makecode to send weight to Smartphone
To program the Micro:bit to send a message to Smartphone via Bluetooth using MakeCode, follow these steps:
1-Go to the MakeCode website (makecode.microbit.org).
2- Click on "New Project" to start.
3- Add Bluetooth Extension:
Click on the "Extensions" option in the bottom left corner.
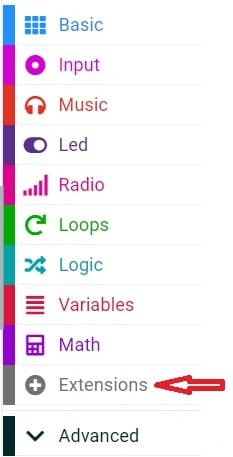
Search and add the "Bluetooth" extension by clicking on it.
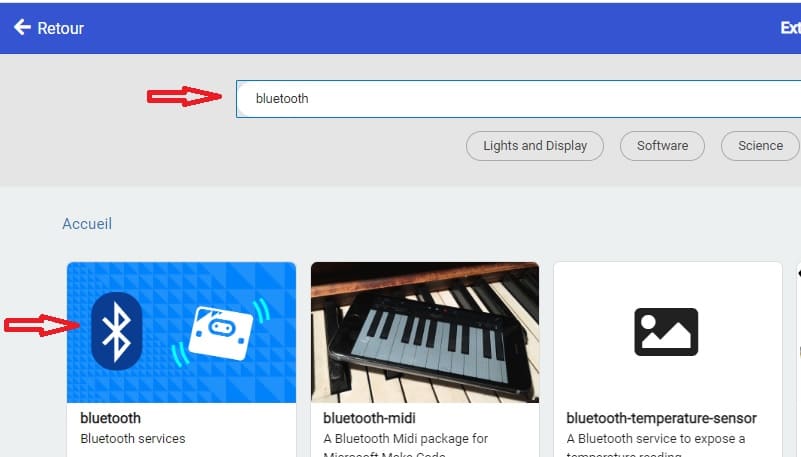
4- Add code to send a message:
- Use the bluetooth.uartWriteString() block under Bluetooth to send a string message via Bluetooth.
5- Add HX711 Extension:
Click on the "Extensions" option in the bottom left corner.

Search and add the "HX711" extension by clicking on it.
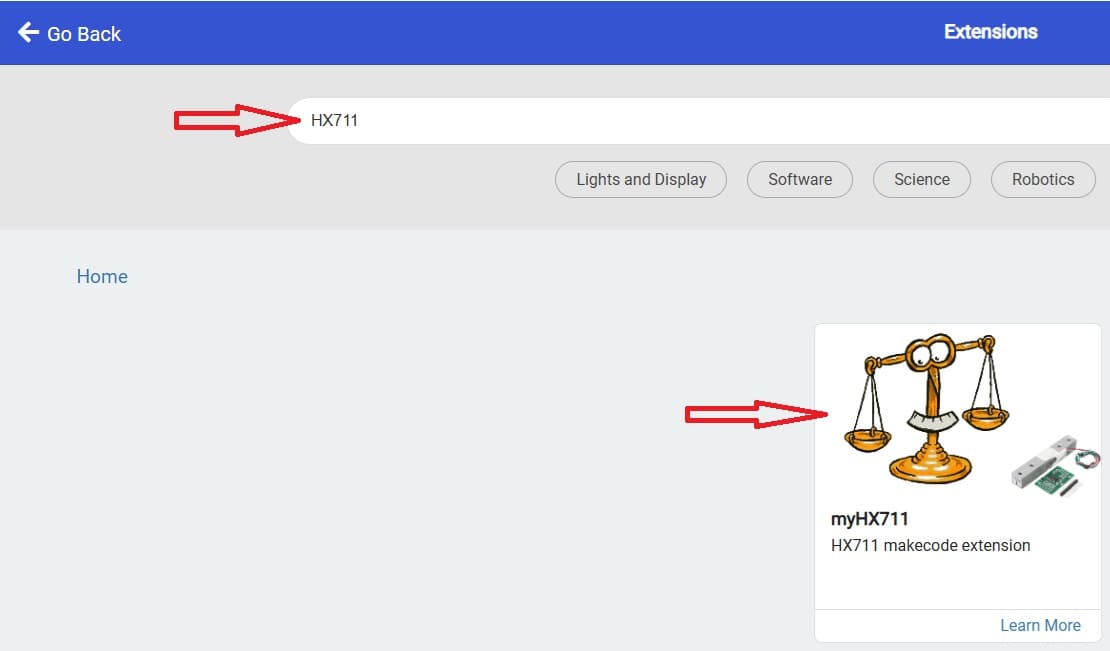
Here is the Makecode program that :
1- reads data from the HX711
2- converts it into weight values
3- sends the weight via Bluetooth to Smartphone
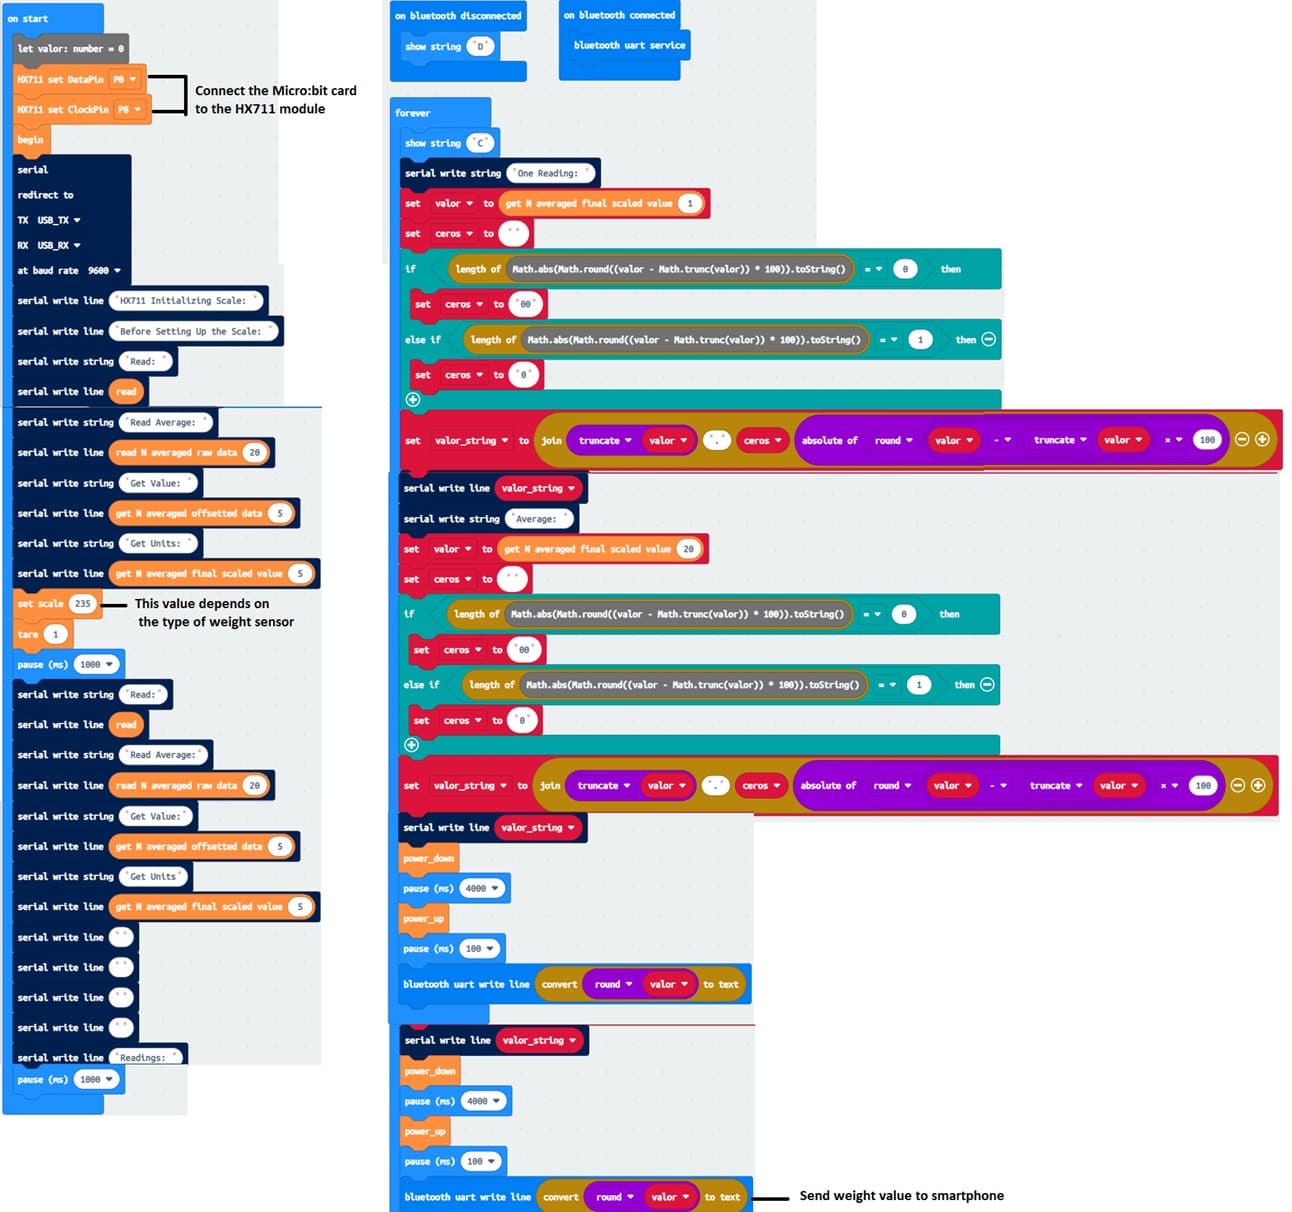
Develop mobile application with App Inventor to receive weight from Micro:bit
1- Go to MIT App Inventor and create a new project.
2- Design the User Interface
- Drag and drop components to create the following UI:
- the available Bluetooth components to establish a connection with the Micro:bit.
- Label: To display the weight.
Here is the Designer part of the application with App Inventor :
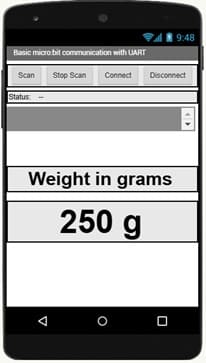
3- Programming the application with App Inventor:
- Starting with Android 12, Bluetooth permissions have been enhanced to improve security and user data protection. This is why we must declare the authorizations that your application needs in the AndroidManifest.xml file. For Bluetooth, you'll need to include ACCESS_FINE_LOCATION, BLUETOOTH_SCAN, and possibly BLUETOOTH_CONNECT permissions, depending on the features you're using.
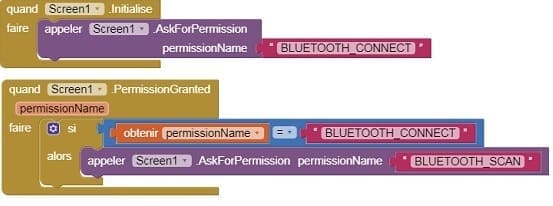
2- Use these programming blocks to connect the smartphone to the Micro:bit board via Bluetooth:
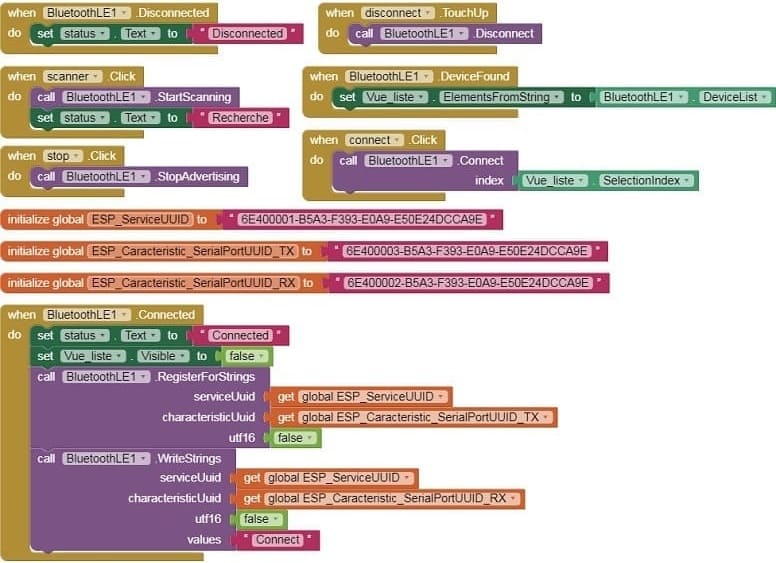
b- Use these programming blocks Receive the weight sent by the Micro:bit via Bluetooth and display it in your app.

Pairing with a Smartphone
1- Pairing: Pair the Micro:bit with your phone via Bluetooth (check the pairing code displayed on the Micro:bit).
2- Receiving Data: Use the App Inventor app to connect to the Micro:bit and view the transmitted weight in real time.
