Using Arduino UNO and Sensor Shield V5.0 to control servomotors
Tutorial plan
1- Presentation of Sensor Shield V5.0
2- Necessary components to control four servomotors
3- Wiring Setup
4- Programming Arduino
Presentation of Sensor Shield V5.0
The Sensor Shield V5.0 is an Arduino-compatible expansion board designed to simplify the connection of sensors, servos, and other devices to an Arduino board. It breaks out various pins of the Arduino board into standard 3-pin connectors, making it easier to connect and use components without soldering or complex wiring. Here’s a rundown of the features and pin layout:
Key Features:
Compatibility: Works with Arduino UNO, MEGA, and other standard Arduino boards.
Multiple Pins for Sensors and Actuators:
Provides Digital I/O pins (D0 to D13).
Analog input pins (A0 to A5).
Servo Connections: Has dedicated 3-pin headers (signal, power, ground) for directly connecting multiple servos.
I2C and UART Connections: Allows easy connection of I2C and UART communication modules like OLED displays and serial sensors.
External Power Support: Includes power headers to connect external power sources for devices that require more power than the Arduino can supply.
Additional Module Headers: The board has a variety of connectors for modules like Bluetooth, XBee, APC220, and other compatible devices.
Pin Layout:
Digital Pins (D0–D13): Each pin has a standard 3-pin header (signal, VCC, and GND).
Analog Pins (A0–A5): Each analog pin also has a 3-pin header (signal, VCC, GND).
I2C: Includes an I2C interface pin header for easy connection of I2C modules.
Serial Communication: Has TX and RX pins for serial communication with other devices like GPS or serial sensors.
Benefits:
Simplifies Connections: Reduces the need for breadboards and jumper wires.
Quick Prototyping: Ideal for projects that involve multiple sensors and servos.
Clean Layout: Keeps wiring organized and secure, reducing the chances of loose connections.
This shield is popular in robotics, IoT projects, and prototyping applications where multiple sensors and modules are needed.
Necessary components to control four servomotors
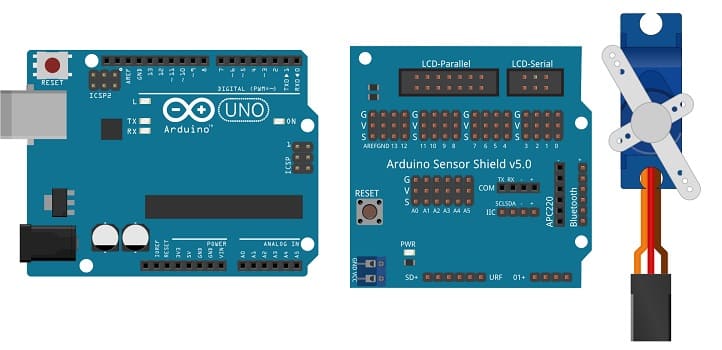
To control four servomotors with an Arduino UNO and Sensor Shield V5.0, you'll need the following components:
Arduino UNO:

The main microcontroller board to control the servos.
Sensor Shield V5.0:
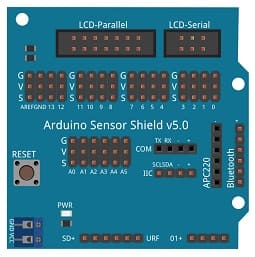
This shield will simplify the connections between the Arduino and the servomotors by providing standard 3-pin headers.
Four Servomotors:

Choose servos based on your project’s requirements (e.g., SG90 or MG996R servos).
Each servo will connect to a digital pin on the Sensor Shield V5.0.
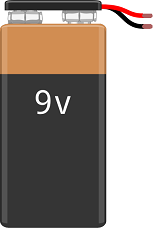
External Power Supply (9V battery):
Servos can draw significant current, which may exceed the Arduino’s power limits.
Use an external 5V power source with enough current capacity for all servos (typically 1A per servo).
Connect the external power supply’s ground (GND) to the Arduino’s ground for a common reference.
Jumper Wires :

Jumper wires will be used to make connections between the components.
Wiring Setup
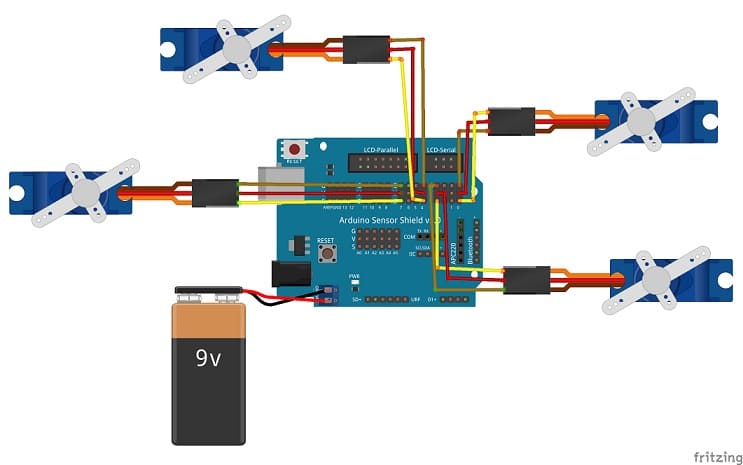
1- Connect the Shield Sensor V5.0 to the Arduino UNO board
2- Connect the first servomotor to port N°0 of the Shield Sensor V5.0
3- Connect the second servomotor to port N°3 of the Shield Sensor V5.0
4- Connect the third servomotor to port N°4 of the Shield Sensor V5.0
5- Connect the fourth servomotor to port N°7 of the Shield Sensor V5.0
Programming Arduino
Here is the Arduino program which allows four servo motors to be controlled by the Arduino and the Shield Sensor V5.0.
|
1 2 3 4 5 6 7 8 9 10 11 12 13 14 15 16 17 18 19 20 21 22 23 24 25 26 27 28 29 30 31 32 33 34 35 36 37 38 39 40 41 42 43 44 45 46 47 48 49 50 51 52 53 54 55 56 57 58 59 60 61 62 63 |
#include <Servo.h> Servo servo1; // create servo object to control a servo Servo servo2; // create servo object to control a servo Servo servo3; // create servo object to control a servo Servo servo4; // create servo object to control a servo int pos = 0; // variable to store the servo position void setup() { servo1.attach(0); // attaches the servo on pin 0 servo2.attach(3); // attaches the servo on pin 3 servo3.attach(4); // attaches the servo on pin 4 servo4.attach(7); // attaches the servo on pin 7 servo1.write(0); servo2.write(0); servo3.write(0); servo4.write(0); } void loop() { for (pos = 0; pos <= 180; pos += 1) { // goes from 0 degrees to 180 degrees // in steps of 1 degree servo1.write(pos); // tell servo1 to go to position in variable 'pos' delay(15); // waits 15ms for the servo to reach the position } for (pos = 0; pos <= 180; pos += 1) { // goes from 0 degrees to 180 degrees // in steps of 1 degree servo2.write(pos); // tell servo2 to go to position in variable 'pos' delay(15); // waits 15ms for the servo to reach the position } for (pos = 0; pos <= 180; pos += 1) { // goes from 0 degrees to 180 degrees // in steps of 1 degree servo3.write(pos); // tell servo3 to go to position in variable 'pos' delay(15); // waits 15ms for the servo to reach the position } for (pos = 0; pos <= 180; pos += 1) { // goes from 0 degrees to 180 degrees // in steps of 1 degree servo4.write(pos); // tell servo4 to go to position in variable 'pos' delay(15); // waits 15ms for the servo to reach the position } for (pos = 180; pos >= 0; pos -= 1) { // goes from 180 degrees to 0 degrees servo1.write(pos); // tell servo1 to go to position in variable 'pos' delay(15); // waits 15ms for the servo to reach the position } for (pos = 180; pos >= 0; pos -= 1) { // goes from 180 degrees to 0 degrees servo2.write(pos); // tell servo2 to go to position in variable 'pos' delay(15); // waits 15ms for the servo to reach the position } for (pos = 180; pos >= 0; pos -= 1) { // goes from 180 degrees to 0 degrees servo3.write(pos); // tell servo3 to go to position in variable 'pos' delay(15); // waits 15ms for the servo to reach the position } for (pos = 180; pos >= 0; pos -= 1) { // goes from 180 degrees to 0 degrees servo4.write(pos); // tell servo4 to go to position in variable 'pos' delay(15); // waits 15ms for the servo to reach the position } } |
