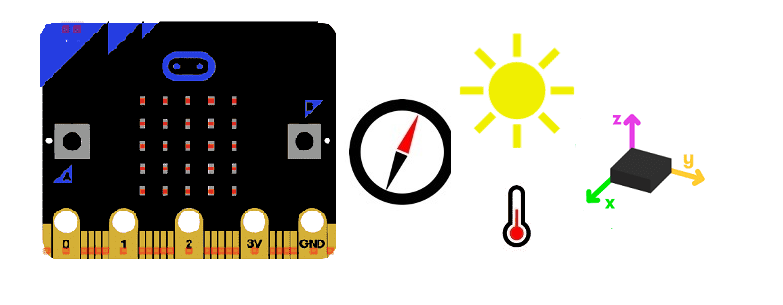
Overview of Micro:bit sensors
The Micro:bit is a small, programmable computer that can be used to teach coding and electronics to students of all ages. It has a range of built-in sensors that can be used to gather data and create interactive projects. Here are some of the sensors included in the Micro:bit:
- Accelerometer: This sensor measures the acceleration of the Micro:bit and can detect movement and changes in orientation.
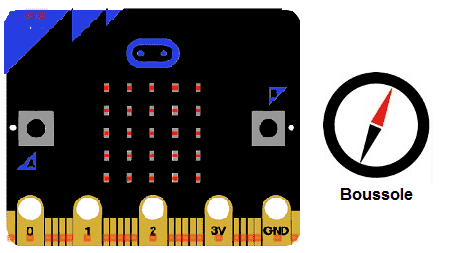
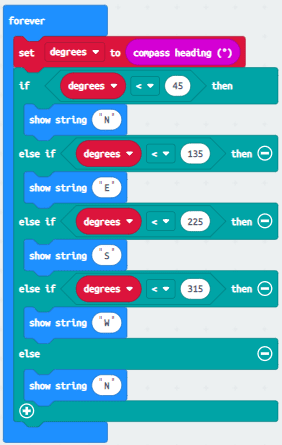
- Magnetometer: The magnetometer detects magnetic fields and can be used to create compasses or detect the presence of magnets.
- Temperature sensor: The Micro:bit has a temperature sensor that can be used to measure the temperature of the environment.
- Light sensor: The Micro:bit's light sensor can be used to detect changes in light levels and can be used to create projects that respond to changes in light.
These sensors can be used in a variety of projects, from simple games to complex data logging and analysis applications.
The Micro:bit temperature sensor
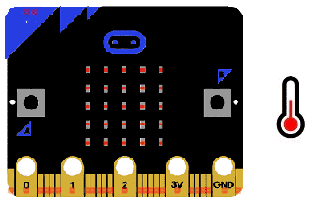
The Micro:bit temperature sensor is a built-in sensor that can be used to measure the temperature of the environment. The sensor is a thermistor, which means that it measures changes in resistance as the temperature changes. The Micro:bit uses an analog-to-digital converter (ADC) to convert the resistance value to a temperature value in degrees Celsius.
To use the temperature sensor in a Micro:bit project, you can write code using a programming language like JavaScript or Python. Here's an example MakeCode code that reads the temperature sensor value and displays it on the Micro:bit's LED display:
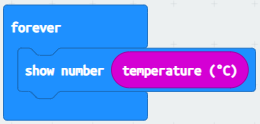
This code creates a loop that reads the temperature sensor value, displays it on the LED display, and pauses for one second before repeating. The temperature (°C) function returns the temperature in degrees Celsius, which is stored in the temp variable. The show number() function displays the temperature value on the LED display.
The Micro:bit light sensor
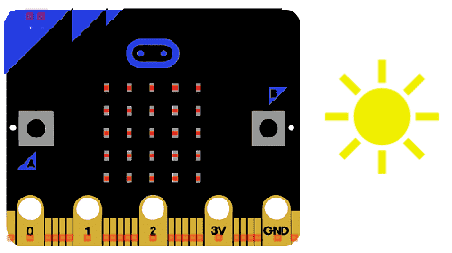
The Micro:bit light sensor is a built-in sensor that can be used to measure the ambient light level in the environment. The sensor is a photodiode that detects changes in the amount of light that falls on it. The Micro:bit uses an analog-to-digital converter (ADC) to convert the voltage value from the light sensor to a digital value that can be read by the microcontroller.
To use the light sensor in a Micro:bit project, you can write code using a programming language like JavaScript or Python. Here's an example MakeCode code that reads the light sensor value and displays it on the Micro:bit's LED display:
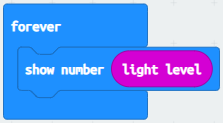
This code creates a loop that reads the light sensor value, displays it on the LED display, and pauses for one second before repeating. The light level() function returns the light level as a value between 0 and 255, which is stored in the light variable. The show number() function displays the light level on the LED display.
I am text block. Click edit button to change this text. Lorem ipsum dolor sit amet, consectetur adipiscing elit. Ut elit tellus, luctus nec ullamcorper mattis, pulvinar dapibus leo.
The Micro:bit accelerometer
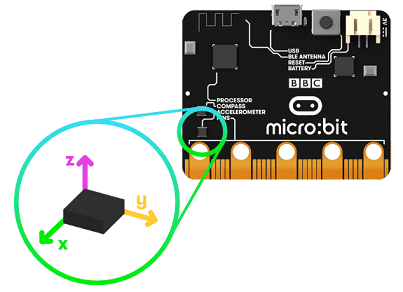
The Micro:bit is a small, programmable device that can be used to teach coding and electronics to students. It has a built-in accelerometer that can detect changes in motion and orientation. The accelerometer on the Micro:bit is a three-axis accelerometer, which means that it can detect motion in three dimensions: X, Y, and Z.
The accelerometer measures acceleration in each of these directions, and can be used to detect movement, changes in orientation, and even the speed of the Micro:bit's movement. By programming the Micro:bit to respond to these changes in acceleration, you can create a wide range of projects, from games that respond to movement, to devices that can detect when they've been dropped.
To use the accelerometer on the Micro:bit, you'll need to use a programming language that supports the device, such as MicroPython or Microsoft MakeCode. These languages provide libraries and functions that make it easy to read the accelerometer data and use it to control your project. For example, you can use the accelerometer to detect when the Micro:bit has been tilted, and then use this information to move a sprite on the device's LED matrix.
To use the Micro:bit accelerometer with MakeCode, you can follow these steps:
- Open the MakeCode editor in your web browser.
- Create a new project, and select the "Input" category from the toolbar on the left side of the screen.
- Insert this MakeCode program that uses the accelerometer